|
|
|
|
|
|
|
|
|
|
|
|
 |
 |
|
*We are happy to share our
experiences and tips, but please
respect our copyright of all photos
and text. |
|
|
 |
|
|
|
|
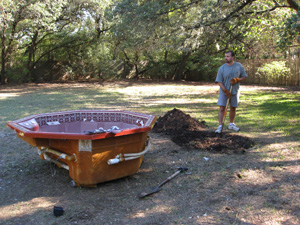
| After wanting a pond for many years, we finally decided to build one in 2008 (finished it in 2009). It helped that we found someone who wanted to give away all his landscaping rocks for free, and those rocks inspired us to build a raised pond, which would hopefully help keep the dogs out of the fishes' water. We found another person giving away an old hot tub shell, and that became the rigid liner for the raised pond. The bonus is that we also saved that hot tub shell from going to the landfill. The steps of the hot tub would provide shelves for plants, and the depth of the hot tub would make for happy fish. |
|
| This project was not an overnight job. In fact, it took us months to finish. It's hard to do anything involving digging into our rock- and clay-heavy soil that sits on a shallow bedrock. The limestone boulders were extremely heavy to move. And rains came. And a very destructive hailstorm (ok the list goes on). And because we also didn't want to screw anything up on our first water project, we took it slow and did a lot of research. |
|
| Our rocks ranged from small to boulder-sized. They are limestone, and everything we read said that you shouldn't use limestone rocks to make ponds. However, we live in the Austin area, and our water already has a higher pH because of limestone, so our fish would just have to adjust. Our local pond experts did not expect it to be a problem, and we didn't exactly have any other options, so limestone rocks it would be. They do fit with the natural landscape, so even though the pond is somewhat raised, the rocks aren't entirely out of place. We just had to make sure it didn't look like a volcano sticking up out of the ground. |
|
|
 |
|
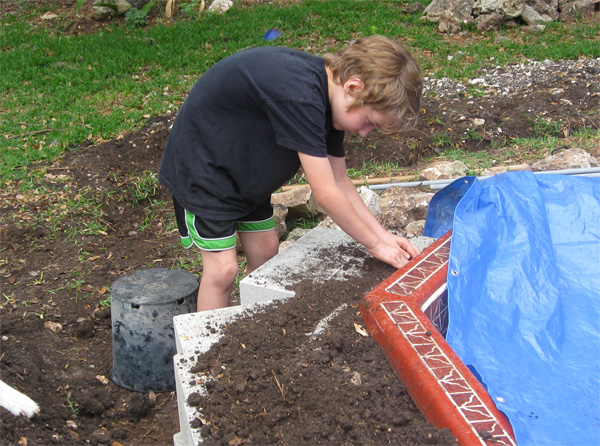
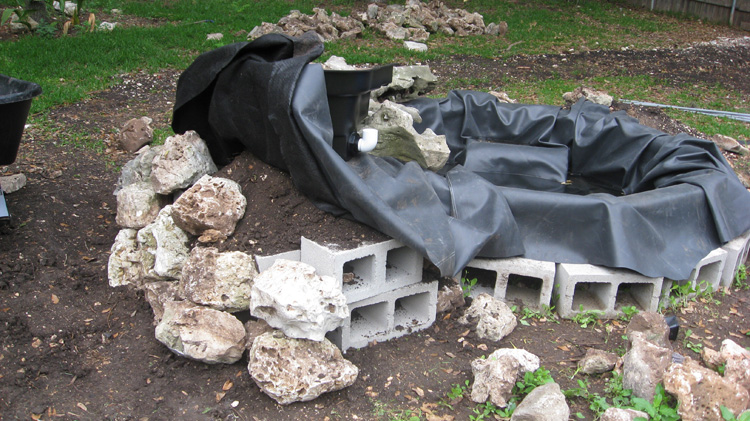
| The first thing we did was dig a big hole to put the hot tub about 18 inches into the ground. This served two purposes. Lowering the hot tub would help us avoid having the raised pond be ridiculously tall. It would also let the fish have a nice cool, deep area to hide from predators in the summer, and a nice warm area to swim in when the air might reach freezing temperatures in the winter. You can see here that we also got some cement blocks to use as a base for the rocks around the pond. |
|
|
TIP: Craigslist can be a great source for free or inexpensive rocks or pond supplies and plants. |
|
|
|
 |
|
|
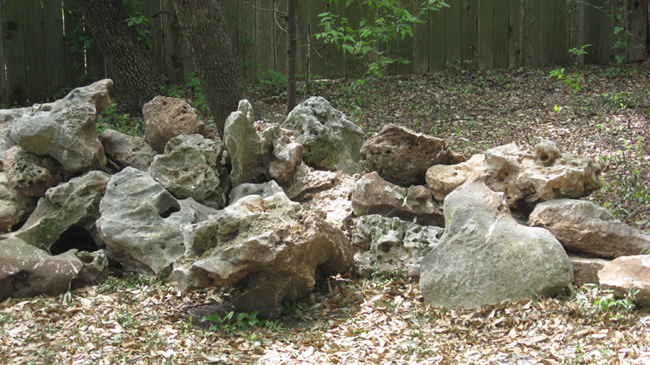
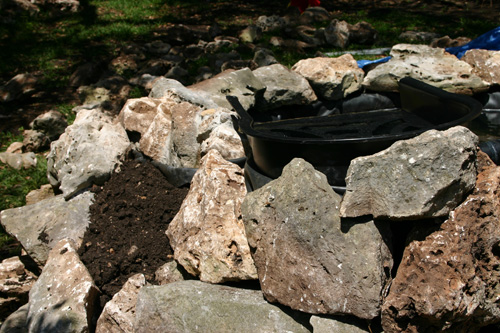
| Some of the many limestone boulders we had to work with... |
|
|
|
 |
|
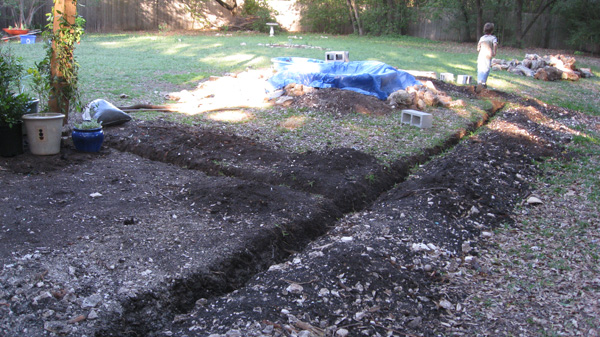
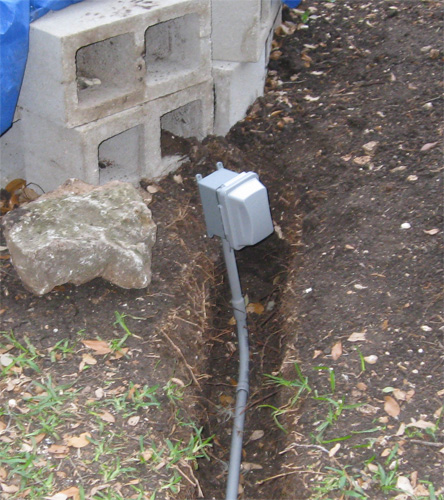
| Before we could really get underway on the pond itself, we had to get the electrical system done. We decided to place the GFCI outlet at the back of the pond, and we placed an extra outlet by the shade sail posts while we were at it. |
|
|
 |
|
|
 |
|
|
|
 |
|
|
|
|
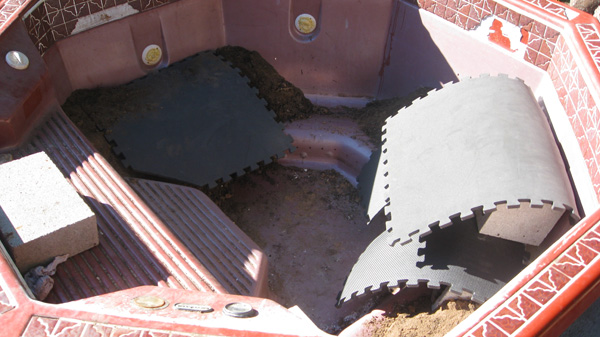
| The hot tub shell only had two steps that could serve as shelves, so we built in a few extras while we could, using cement blocks, dirt, and some foam squares we no longer used. We also drilled some holes in the bottom of the tub for drainage below the liner, and just in case, also filled in any side holes with foamy stuff. |
|
|
 |
|
|
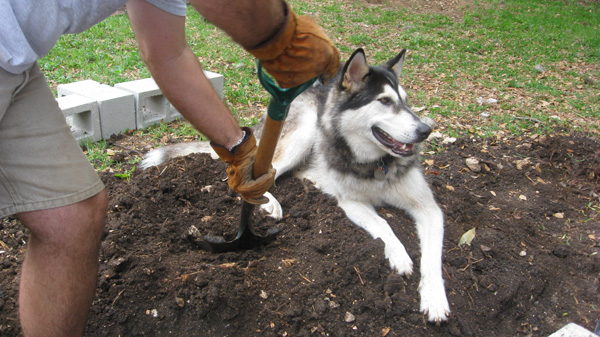
| Then we began building the base for the waterfall area, using cement blocks as a level support, with dirt and rocks as filler where necessary. The husky wasn't much help. |
|
|
|
 |
|
 |
|
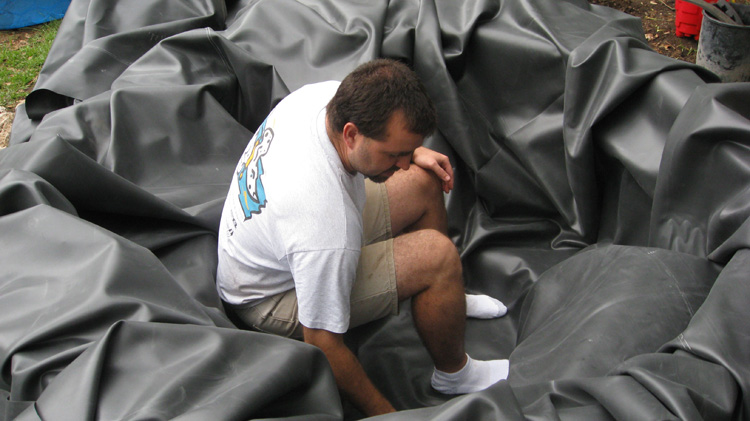
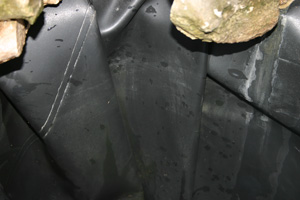
| Next we placed the liner in the tub, a pond-quality rubber liner some 15x20 feet in measurement. We planned on this liner staying intact, in a single sheet that would go under and up behind the filter falls and stream. Because of the shape of the hot tub being relatively round, we had to spend some time getting the folds placed neatly, as best we could. |
|
 |
|
|
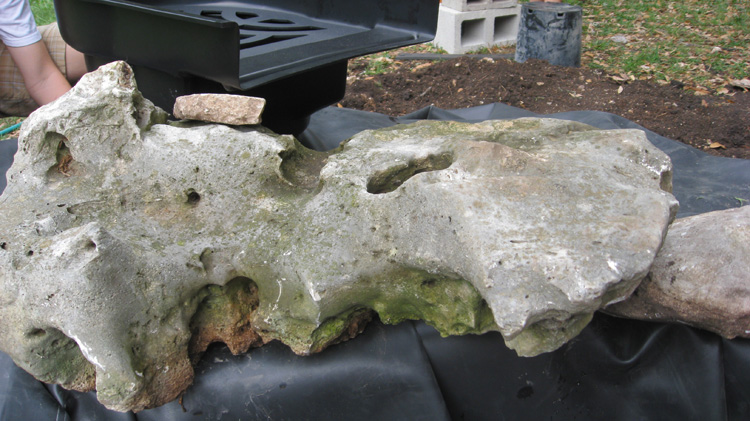
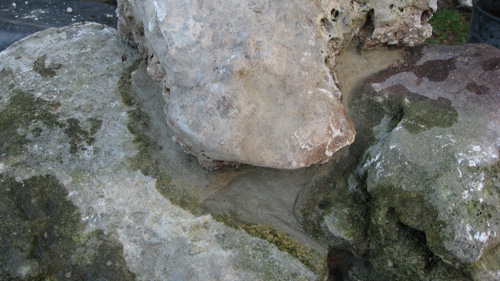
At last we were ready to begin placing rocks for the waterfall/stream area. This was a slow, time-consuming process, because we wanted the stream to look great and natural, and we wanted the water to flow exactly where we intended it. We chose as the first "water rock" this beautiful limestone rock with a built-in channel for water and a large hole that would let water drip through to the pool below. We wanted about 1/3 of the water from the falls to hit this rock. |
|
|
 |
|
|
|
|
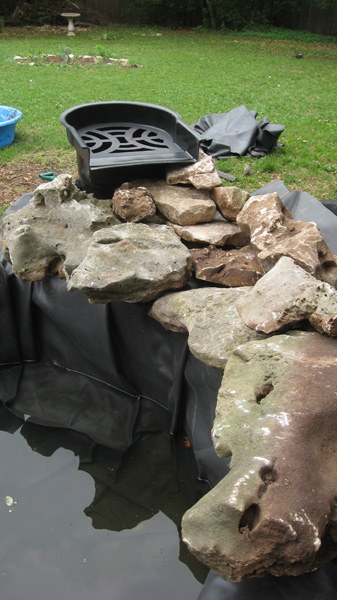
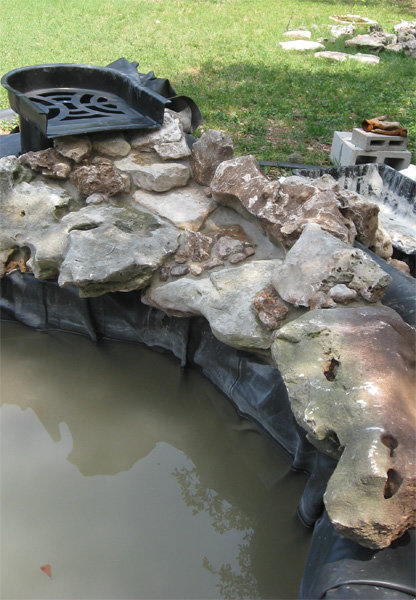
After careful work, replacing several rocks along the way, we ended up with this basic stream set-up. Some water would flow across the big rock with the channel and hole, and the rest would flow along the sloping stream bed, pouring off the final rock. The dam walls, as we called them, would direct the water along the stream. |
|
|
 |
|
|
|
|
TIP: Don't force yourself to just stick with your first arrangement if it just isn't working for you. Take the time to switch out rocks even if they are heavy. You'll be much happier with the results, and you can't fix it easily once you mortar. |
|
|
|
 |
|
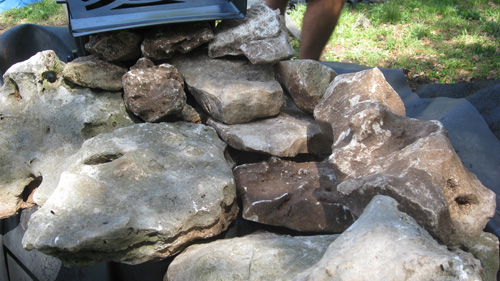
| A close-up of the tiered rocks forming the stream bed. (note, we added more smaller rocks as needed later to better guide the flow -- see below) |
|
| The height of the filter falls mattered -- too high would look odd, and too low just wouldn't work. We had to rebuild the height of the base below, at least a couple of times. You can see we used underlayment under the filter falls area. We didn't need it in the tub, as the shell was rigid and self-protecting. |
|
 |
|
|
Mortaring the rocks in place was critical in order to get the water to flow across the rocks and not just down through them. We also needed to direct all the water forward and not behind the dam. Having never mortared anything before, we were a bit nervous, but as it turns out, mortaring was a lot of fun. In order to keep the falls looking natural, this was a very careful process -- trying to not overuse the morter while making sure that there was enough to secure the rocks and fill holes. Tools used (aside from the mixing tub and trowel) were vinyl gloves, wet cloths for wiping (have near at all times), Q-tips for delicate cleaning, paper towels for water absorption and mortar clean-up, little twigs for pushing mortar into holes, and some extra little rocks to hide the larger areas of mortar and make subtle flow changes. That's pretty much it! |
|
|
|
 |
|
|
| In the area behind the rock "walls," we added a lot of mortar to really secure those rocks and prevent water from flowing through. This mortar would be covered up with the rubber liner and then more rocks or the filter falls themselves, so it didn't really matter how it looked. |
|
 |
|
|
|
|
But it did matter how the waterfalls and stream looked. This was Meredith's area of expertise -- being a perfectionist. The mortar couldn't start out too wet or it wouldn't stick in place. Extra mortar bits had to be cleaned up right away, mortar had to be smooth along the rocks, and excess mortar had to be scooped back out if necessary. It was important to leave as much rock exposed as possible, and additional rocks needed to add to the natural look had to be placed "just right." Gently pouring a little water onto the mortar periodically helped with the process, both in cleaning and smoothing. Q-tips, paper towels, wet cloths, and twigs -- critical during the process. |
|
|
|
Here is an area where Meredith added more rocks to help guide the water farther along the stream bed.
|
|
 |
|
|
|
The (mostly) final mortared look of the waterfall and stream bed area. |
|
 |
|
|
|
|
|
TIP: While mortaring, wear vinyl or rubber gloves. They allow you to work finely with your hands, while protecting your skin from the irritating mortar. |
|
|
| During this whole process, we periodically worked on measuring, cutting, and sealing together with 90-degree joints the flexible hose for the pump-to-falls flow. You want to create joints at every necessary bend. We attempted to spray paint the hose black at first (some pond builders apparently do this), but that was a fiasco (if you attempt it, don't use the spray paint used for plastics -- it reacts with the hose material). So we got replacement hose and decided to leave it white and let algae and plants cover it. The black-painted joints were fine, so we used those along with the remaining white ones. |
|
| Sealing the joints with regular PVC adhesive (non-toxic once dry) was a multi-step process. Too much torque at any point, and the seal would break. So several times the joints had to be repaired until they were at last (we hope) well secured. |
|
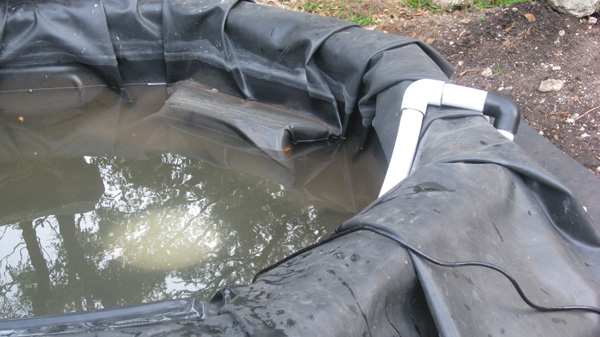
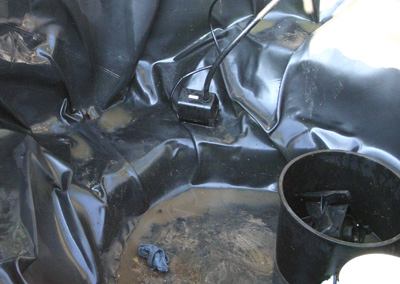
| Because of the hot tub liner, we couldn't use a pond skimmer (sigh), so we have the pump housed in a filter pot in the deepest area of the tub. You can see it below in the murky water. Ideally it would be fully opposite the falls, too, but the hot tub shape prevented it, so it's a bit more in the center than ideal. |
|
|
 |
|
|
|
|
|
|
 |
|
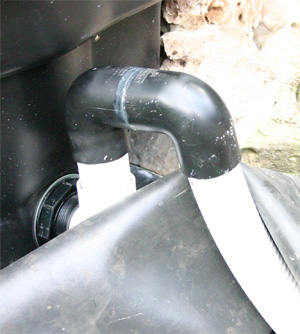
| A close-up of the pipe coming from the filter falls. Directing the pipe this way allowed us to keep the liner up, plus deal with the rocks around the falls. The rest of the flexible pipe is tucked under the lip of the hot tub and hidden by rocks. |
|
| TIP: Secure the joint seams well with adhesive the first time. They can easily separate with too much torque. We had to redo a couple of joints a few times. |
|
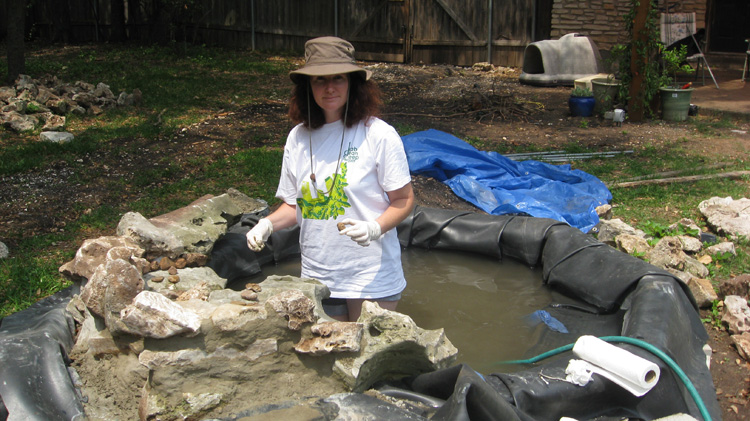
| We let the mortar set for a couple of days, periodically wetting it, and then drained the pond, much to the mosquito larvae's horror. They were becoming rather, err, happy and active in the still water. |
|
|
 |
|
|
| Note: we soon purchased an extra pump for draining purposes -- the filter fall set-up is now permanently in position. |
|
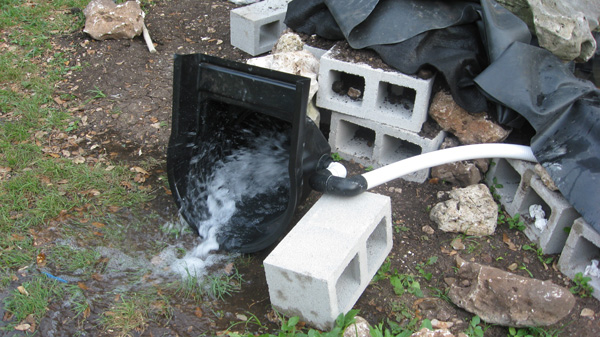
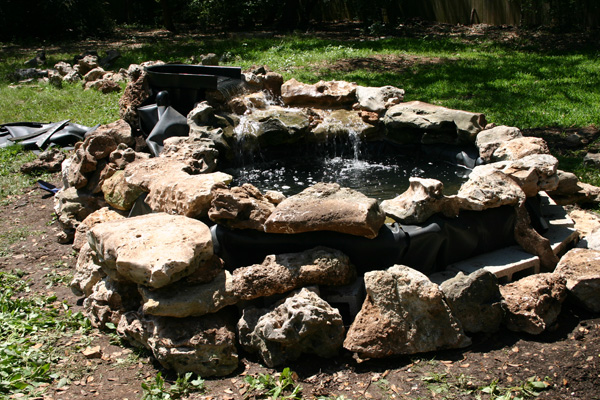
| Testing the water flow was exciting -- we even had friends over for dinner when it happened, so it was quite the event. This is how it turned out! |
|
 |
|
|
We let it run for several days while we assessed any areas that might be leaking or needed touch up. Wouldn't you know it, we noticed that the water level lowered faster than it should. Upon investigation, there was an area of splash near the filter falls that needed a rock to block it, and there were a couple of very small holes that were letting water through to the back. So we patched up those areas and the next day ran the water again. Water level has been great ever since! |
|
|
| It was time to build up the outside of the pond -- hiding the liner and filter falls along the way. Where water was an issue, we raised up and folded over the edge of the liner, then tucked it behind rocks or dirt. Along the rest of the hot tub, we just let the liner drape over the edge and hid it under rocks.
We also built in this little planter near the filter falls for some future pretty, little happy plant.
|
|
 |
|
|
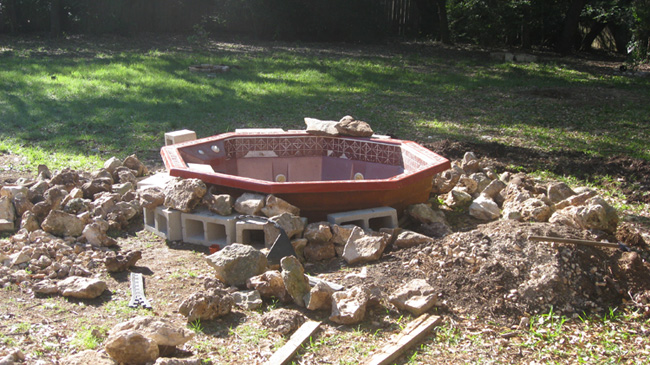
| The next step was to find nicely-shaped rocks to go around the hot tub edge. This took a few attempts until the rocks felt pretty stable. We knew that dogs and kids could too easily bump them, and if they were loose, they'd be a hazard to animal and human alike. We were prepared to mortar them if necessary, but Michael managed to arrange them very well to where we didn't need to. We also built in a little bench on the left side -- it faces toward the butterfly garden. |
|
|
 |
|
|
|
| Once we knew we were completely done with mortar, it was time to do another drain and clean of the pond. We used a second small pump for easy draining. Small cups and buckets were useful for getting the lower areas of water out, then cloths and paper towels to deal with the sludge. We did our best to use the pond water to water some of our plants around the yard. |
|
 |
|
|
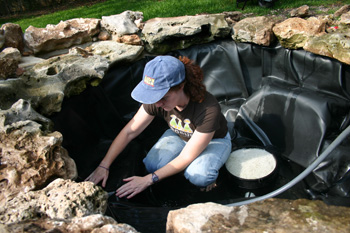
| Once the pond was clean, it was important to fix the folds to get them to lay as flat and neatly as possible before the water went in. |
|
|
 |
|
 |
|
|
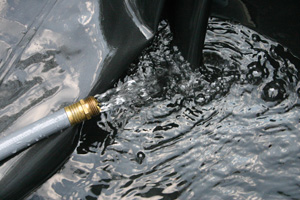
And then a refill of the water! |
|
|
 |
|
|
| TIP: Once you have fish and plants in the pond, use a small sprinkler to gently and slowly spray water into the pond. This will help the chlorine dissipate sooner. Be sure not to splash your lily leaves! And never add more than 10 percent without dechlorinating the water first, or you might kill your fish! |
|
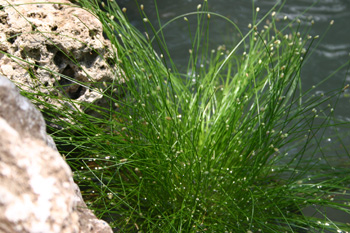
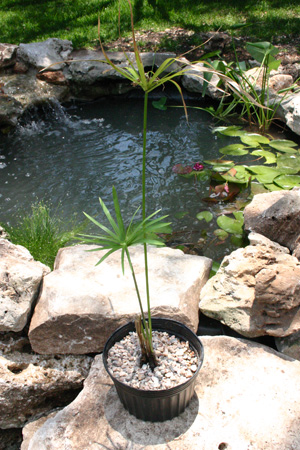
| And finally, after months of construction, it was time to get some plants for the pond! A friend gave us a baby lily, a Pickerel Weed, an Umbrella plant, and some Taro (which we'll make sure never escapes to the wild). In addition, I selected a Perry's Baby Red lily, a Pink Sparkle lily, and a Fiber Optic plant. The lilies we placed about 18 inches down (opposite the water fall to be on the "calm" side), and the others were placed on shallow shelves. For the filter falls, we chose a combination of lemon bacopa and Ruby Red Runner. We also planned to place some submerged grasses and a couple of other plants to help with surface shade. |
|
|
 |
|
|
|
|
 |
|
|
|
The bog plants, like the umbrella plant at right, were placed in no-hole plastic pots with heavy soil from our yard, and then covered with pea gravel. They were placed on a pond shelf with about 2 inches of water above them. |
|
 |
|
|
|
TIP: In the filter falls, under the plants, is a bag of pea gravel, which is used as a place for a healthy bacteria colony. BEFORE putting this pea gravel in the pond water, rinse the dirt and dust off of it ELSEWHERE. What these lovely pictures do not show you is how we had to redrain and clean the pond one more time to get the murky water and gunk from the pond, all caused from the pea gravel dust. Of course, we already had all our other plants in the water, so we had to be very careful.
|
|
| TIP: Some plants purchased from nurseries might come with their own string algae or duckweed or something else you don't want in there. Take the time to remove as much as you can before adding the plants to your pond. Any excess duckweed, hopefully the goldfish will eat. |
|
|
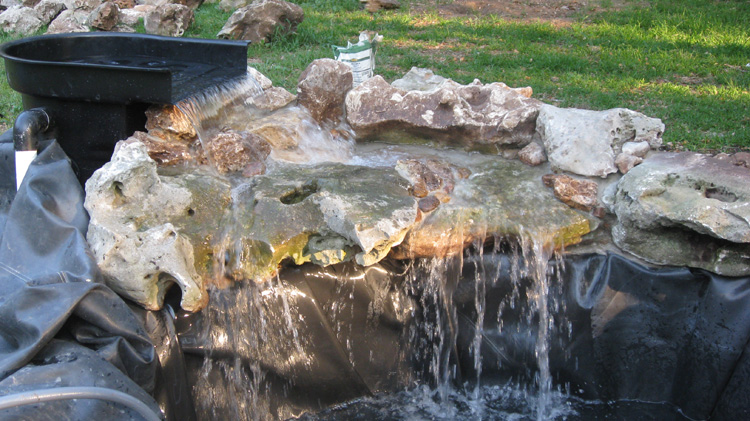
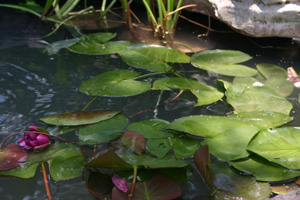
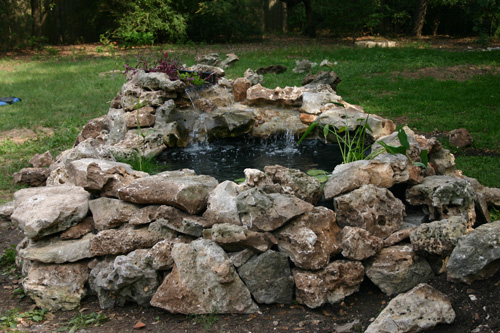
| Here's an overall view of the young pond with its new plants on 5/31/09 -- we still had to place a few rocks and add more plants (and fish, of course!). |
|
|
 |
|
|
|
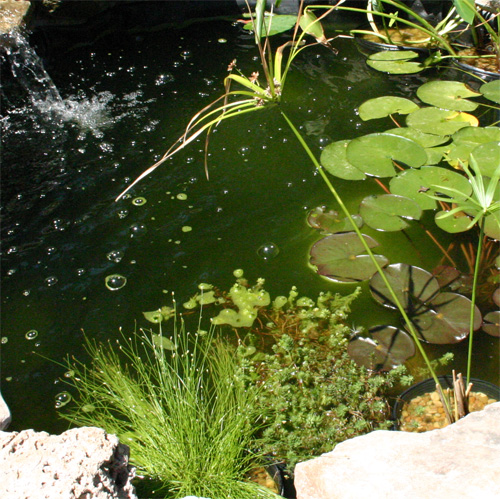
| And here's a close-up. |
|
|
|
 |
|
|
|
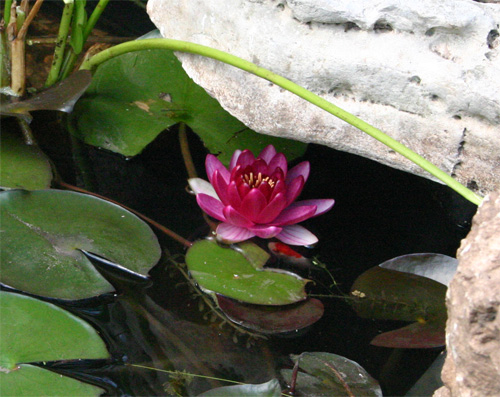
| After a few days of letting the plants do their thing in the water and checking chlorine levels (I eventually added a little dechlorinator to make sure the water was safe), we added four little goldfish to the water. We chose to use feeder goldfish for many reasons -- they were cheap, they're pretty, and they'd grow. It turns out the pond water was just fine, and they are happy little fish. I don't feed them. They have plenty to eat in the pond. Here's one by a lily bloom. |
|
 |
|
|
| TIP: Before you think "koi" -- consider the awesome goldfish. It looks like koi and is much less expensive. You don't have to feed it, and you can have it in a smaller pond. Depending on the species it can grow between 6 and 12 inches. Koi are often targeted by heron and other predators -- goldfish can hide better and are less expensive to replace. |
|
|
TIP: You don't need to buy mosquito fish if you have goldfish or other fish -- they will all eat mosquito larvae. But in a pond with a waterfall, you are unlikely to have mosquitoes lay their eggs there at all. Guppies will reproduce like mad, so they aren't necessarily a good choice, either! |
|
|
|
|
 |
|
| Within a few days we had our first algae bloom, as expected in a new pond. Still, even though it was perfectly normal, it was a shock to have to look at, and I hurried to get more plants in the water to help counter-act the algae. I added a dwarf papyrus, a TX Star Hibiscus, a Mediterranean parrotfeather, and some submerged grasses, and the water had more clarity within a couple of days. |
|
| TIP: Don't panic when you see the green water! Just check to make sure you have plenty of plants and at least 60-70% of the surface area shaded. Then be patient. If in doubt, add more plants, especially submerged grasses. You do want some algae, like the soft algae that grows on the liner and rocks. |
|
|
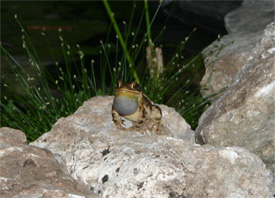
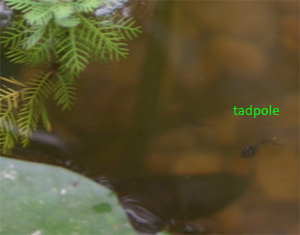
And about three nights after finishing up our pond, we already had toads at the water's edge, and shortly thereafter a gazilliion tadpoles. We have lots of visiting dragonflies, as well. "If you build it, they will come" is so true, so true. |
|
|
|
|
 |
|
|
 |
|
|
| TIP: No need to buy tadpoles. Frogs and toads will find your pond naturally, and then you'll be worried you have too many! |
|
|
|
 |
|
| TIP: For a balanced ecosystem, you want to have a variety of deep water and bog plants, as well as submerged grasses to help oxygenate and filter the water, keeping bad algae at bay. But remember, the soft green algae is the good algae! Fish are an important part of a balanced, but don't have too many or overfeed them, or you'll be feeding the bad algae. |
|
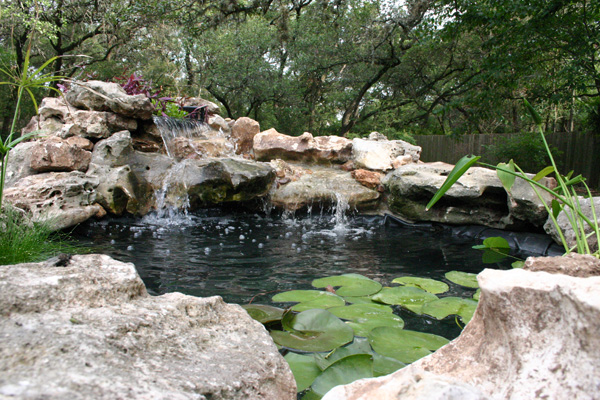
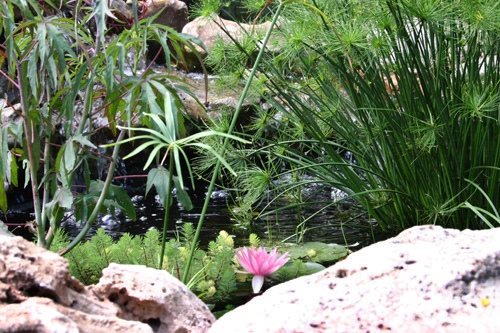
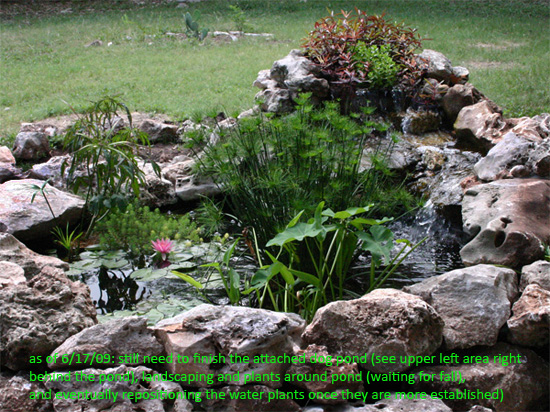
| Here's the pond on 6/17/09. The dwarf papyrus was getting huge already, and by fall it became a giant dome. While it was excellent for filtering the water and for keeping the waterfall droplets off the lily pads, it eventually overwhelmed the pond in terms of aesthetics. We pulled it out later, as you can see in a picture below. |
|
|
|
 |
|
|
|
| In 2010, the pond had survived its first winter, and in April we did a full cleaning, pumping out the water into the dog pool and into multiple buckets to allow easier removal of winter sludge buildup and excess leaves. Six of the original 9 fish made it through the winter, as well (and the pond cleaning). The addition of more native plants makes it look much more natural. |
|
|
|
|
|
|
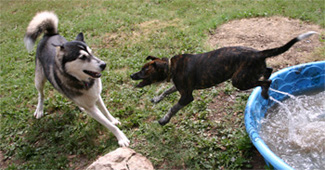
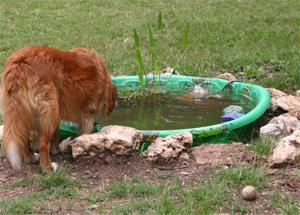
| Near our pond, we added a wading pool for our dogs. At first it was just the blue one you see below. But now we have a green pool complete with a few plants and a fountain, just to keep it prettier and mosquito-free (thanks to the circulating water). |
|
|
|
|
TIP: Having a raised pond can help keep the dogs out, but it's not a guarantee. They will need supervision and gentle training until they know the rules. Giving them their own wading pool or lower-level pond will help them be happy and stay out of your "real" pond. |
|
|
|
 |
|
 |
|
|
| Bit by bit, we're adding landscaping around the pond, but the plants are still fairly small. The list so far is included in the specifics below. |
|
|
|
|
THE SPECIFICS |
|
|
|
| POND EQUIPMENT:
Atlantic BF 1250 filter falls
Atlantic Tidal Wave 2400 pump
Filter pot, made from a 5-gal pot
Extra 500 gph pump for easy drainage
Quality pond rubber liner (measure carefully, based on interior area of pond as well as waterfall and filter fall areas, adding a little extra)
Underlayment for the areas needing protection
Mortar -- Type "S"
Flexible PVC hose
PVC joints, mostly 90-degree
PVC joint adhesive
Pea gravel (rinse first!)
Cement blocks
Rocks for exterior and waterall
Miscellaneous: vinyl gloves, cloths, paper towels, Q-tips, etc.
|
|
POND PLANTS:
Submerged grasses:
Anacharis
Hornwort
Deep (about 18 inches down):
Water lily: White Water Lily (native)
Water lily: Yellow Water Lily
Water lily: Perry's Baby Red
Water lily: Pink Sparkle
Bog plants (about 1-2 inches below the surface)
Horsetail (native)
Cardinal Flower (native)
Common Rush (native)
Lizard's Tail (native)
Pickerel Weed (native)
Texas Star Hibiscus
Some sort of Taro
Fiber optic plant (struggled, does better outside pond)
Dwarf papyrus (got too large, aesthetically)
Mediterranean parrotfeather (supposedly less aggressive than regular parrotfeather; however it's recovering from getting knocked into deeper part of pond -- it's in the dog pond for now)
Dwarf Umbrella Plant (recovering in dog pond)
In the falls:
Lemon Bacopa
Ruby Red Runner
|
|
|
|
FISH:
4 comet goldfish (feeder fish, spent only 82 cents!)
A couple of fantail goldfish from a friend
Splurged in May 2010 and bought four Shubunkin goldfish at $2 each for color variation in the pond
|
|
| PLANTS AROUND THE OUTSIDE:
Rock Rose/Pavonia
Pineapple Sage
Yellow Bells: Sangria
Dwarf Bottle Brush
Snapdragon Vine
Common Tree Senna
Texas Lantana
Almond Verbena
|
|
|
|
|
|
|
|
| If you are thinking about building a pond, we can tell you that we love ours. The sounds of the waterfall are so pleasant, and the wildlife rewards are great. Don't be fooled, though -- it's a lot of work at first, especially to lug those rocks around. But maintenance isn't so bad, and I love having so many dragonflies around -- our mosquito population is so much lower WITH the pond than it ever was without. |
|
|
|
|
|
|
|
|
|
|
|
|
|
|
|
|
|
|
|
|
|
|
|
|
|
|
|
|
|
|
|
|
|
|
|
|
|
|
|
|
|
|
|
|
|
|
|
|
|
|
|
|
|
|
|
|
|
|
|
|
|
|
|
|
|
|
|
|
|
|