
 One might think that August in Texas is not the best month to create a large garden path in the full sun, and that person would be right. But there are some plus sides to creating a new path in August, even in the 100+ weather. One, hiring for some of the work we couldn’t do meant helping out other families in need of some income during what is a slow month for many workers. Two, landscape supply companies were very open in terms of delivery availability and quite eager for business. Three, the heat certainly wasn’t slowing down the growth of Bermuda grass and Nut Sedge, so why let the weeds continue their world takeover by waiting until autumn to work on the path? And four, if we went ahead and tackled the path in August, then come fall we could actually focus on enjoying the garden, instead of crying about the weeds and miserably wishing we had a real garden path.
As lovely as a flagstone path would have been, we couldn’t afford all the necessary stone for our large garden, so we opted instead for a decomposed granite path. The advantages were many — we could always add stone later if we chose, and because no cement of any kind was involved, it would be easy to make changes to the shape whenever we wanted. I knew that I wanted to add an artistic flair to the path later, at the very least, and going ahead with the granite would give me time to figure out what I wanted to do. And the difference in cost was tremendous.
I spent a lot of time doing research on how to create a weed-free, chemical free garden path. According to sources online, the key to keeping a path as weed free as possible is to dig out all the grass and soil about 6 inches deep, then adding in 3-4 inches of compacted road base, followed by a good 2-inches of compacted decomposed granite. The compaction is necessary to keep weeds from growing, but it still allows plenty of drainage after a rain. Note that there is no need for any sort of weed barrier, which is good because weed barrier is notoriously ineffective.
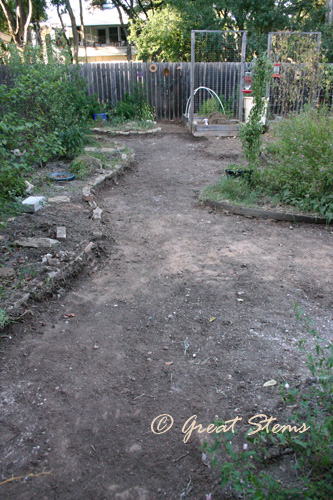
I couldn’t bear to take many pictures of the Before Path. It was so overgrown and too ugly to share, so here’s all you’re getting. Yeah, not pretty, and really embarrassing.
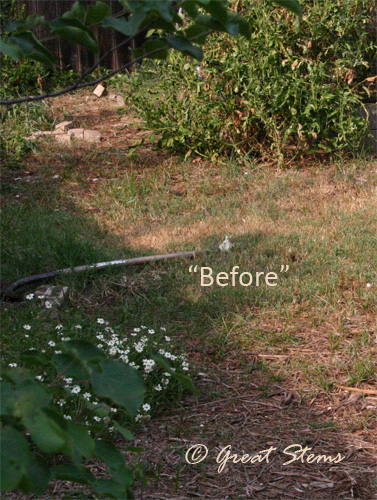 Mowing had become a joke, and the fact that mowing was even required made me all the more annoyed. You can see why we needed to do something drastic.
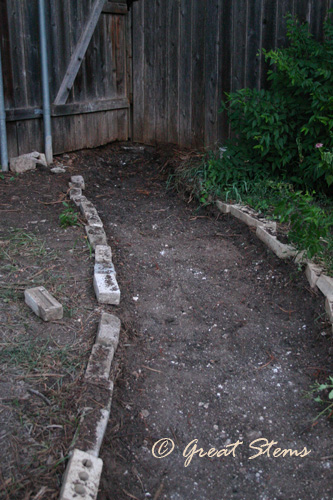
The first step was to scrape out all the weeds. Hey, look — something like a path was under all that grass!
 And then the real digging began (this part we had to hire out). I am not even going to pretend that this was easy. Six inches of compacted clay- and rock-filled soil, thick with Bermuda and other roots, does not come out willingly. All that topsoil is now a big hill in the back of our yard, ready for a nice groundcover or vine to take it over — or perhaps we will find another use for it later. Right now it serves as a visual barrier to our wildlife-friendly brush pile.
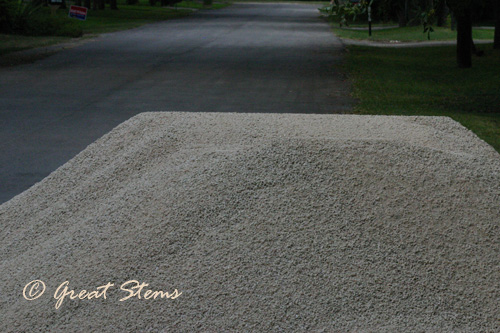
 During all of this work, the first round of material arrived. We ordered 3/8″ limestone dust, a fine aggregate base. The scary part was whether we’d accurately calculated the number of yards we needed. Fortunately, we were well on target.

 The first layer of aggregate base further helped us to visualize the path to come.
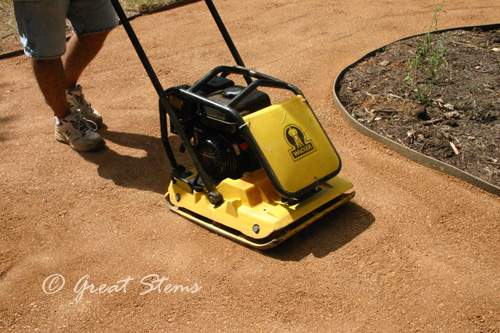
 We compacted the dust in thin layers as we went along, until we had about 4 inches of good base. There are different ways one can go about compaction — a tamper or a water-filled roller is an inexpensive option. However, we decided after much discussion that we would go ahead and rent a vibrating plate compactor to help us with our large garden path. It was unfortunately gas-powered, but it gave such amazing results that I don’t regret it. We did use a tamper from time to time as well.
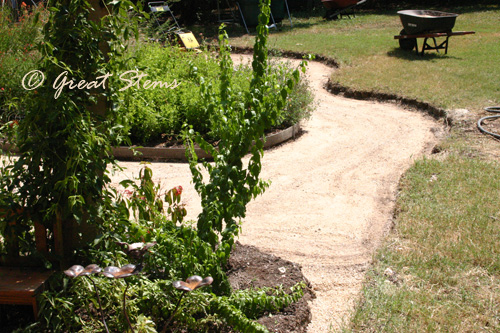
Along the lawn side, we decided that we’d feel better about having some low edging in place. I purchased from Amazon some Master Mark brown composite edging — made of nearly 100% recycled materials. Not only was it SO much cheaper than edging found at the box stores, it is available in 5-inch by 40 feet lengths, and very easy to use. I did, however, get brown metal stakes from a box store, on recommendation from a reviewer. Good call. We’re very pleased. You can see it on the final shots.
If one plans on laying down flagstone, the next step would be to put in 1-2 inches of sand. We had decided against the stone, so we went straight to decomposed granite, aiming for about 2 inches of compacted material. Again, we compacted the layers in 1/2-inch increments, creating a very solid base.
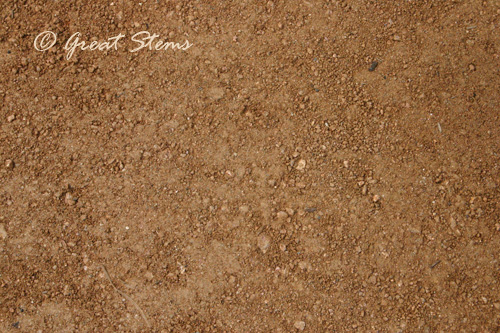 Compacting in small increments is so very necessary. The reason is three-fold — it keeps the weeds out, it keeps the decomposed granite tight and in place, and it minimizes potential mushiness after a rain.
 And finally, we lined the beds with limestone, most salvaged from our own yard.
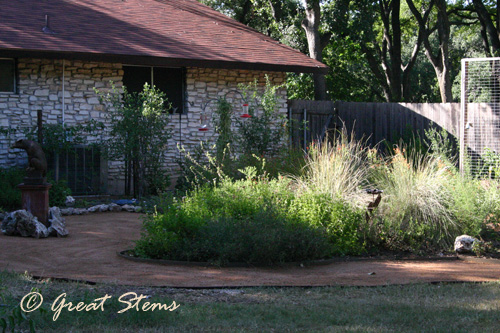
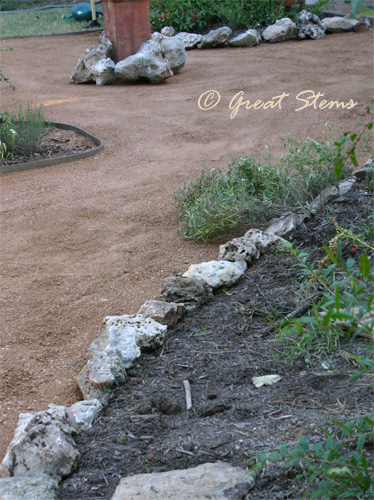 We LOVE the results.
What a breeze it will be to take care of the garden compared to how it used to be. And we have had a major reduction in the size of the lawn, so less mowing.
 The veggie garden will be a much more pleasant place to work this fall. Excuse the lack of green activity while we wait for cooler temperatures.
 And there you have it. Would I recommend this pathway technique? Yes and no. If you are determined to stay weed free and don’t mind the work and extra materials, then absolutely, this is the way to go. But many kinds of casual pathways don’t need this kind of detail, especially if the area isn’t heavily prone to invasive plants. We, on the other hand, were in a war against major weeds in our full-sun garden, and we wanted to WIN.
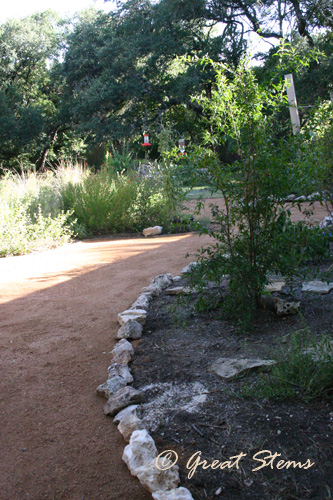
Do I wish the pathway was fully flagstone or another kind of stone? Sure, a little bit, but there is a casualness to our limestone ranch house that doesn’t warrant so much “luxury,” though we do use a little flagstone in various locations. The way we went about creating the path adds to its pseudo element of formality. It is clean and defined, and mess has been minimized.
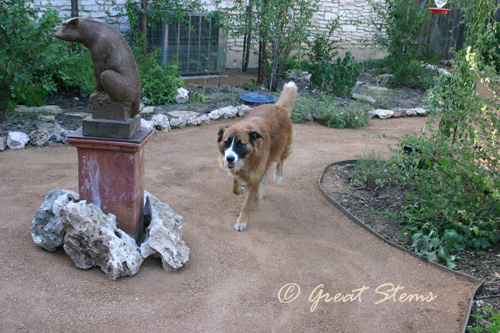
One very nice thing about our large pathways is getting to walk side-by-side with my hubby through our garden (and the dogs not tripping us as they run by).
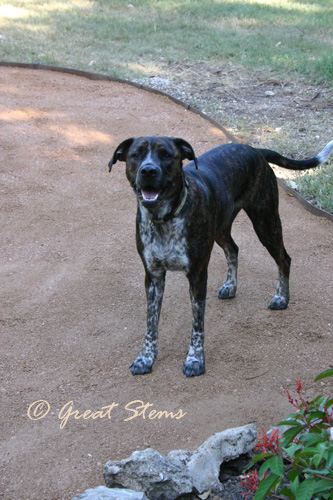
And Grimm is happy, too — our garden guardian, seen here in his new pathway spot.

Meridith,
Looks great and I’m sure it’ll be long lasting! I’ve been working outside in the 100 degree heat, very tough. We build a deck and several days in the hot sun we just gave up before 3pm.
Honestly, Randy, I’m not sure how I survived to the end. Usually I melt in the heat really quickly. I think I was afraid that if I didn’t move through the process with focus and determination, we’d have yet another unfinished project to deal with. Good luck with your deck — that’s tough work in the heat, too!
Thanks for sharing. I like paths like this, especially when they are combined with a bit a flagstone.
Looks wonderful, Meredith! It looks so inviting and interesting. One day, I hope to get rid of more of our lawn. I bet you love walking in your garden! Great job 🙂
Liz, thanks — our original plan was to have a scattering of flagstone “artistically placed,” with a couple of designed spots, but it was too much decision making in a short amount of time. I decided it could all be added later when I could take my time and know what I wanted.
Amy, yes we feel very much at home, so to speak, walking along the pathway. I do still have a lot of lawn to deal with (and get rid of) on this 1/2-acre lot, but we finally are beginning to feel like we’re making progress.
Who wouldn’t love this new path? It’s great, Meredith! You deserve a medal! Looks professional to me.
Tatyana, thank you. We were wondering whether it would have turned out the way we envisioned if we’d hired a contractor to do it. We just have the feeling we might not have been as satisfied with the results if time and heart hadn’t been put into it.
I’m in the process of “starting” this same project. Just waiting for the heat to break. Thanks for sharing the “experience” I have to look forward to. Great results on your area. Kaarentubinger
Kaaren, best of luck on your garden path. Having survived the process, I know you will, too. Please let me know how it turns out!
I’m surprised how much I like that look. It’s not an insult, more like maybe I should try this some day. Nice! Bravo! Et cetera et cetera (I start teachign again tomorrow and am whacky-stressed today).
I was attracted to your post, because I just posted on my own, very different sort of path. I think yours is fantastic! I would love to do the parking court behind our house this way. You gave excellent advice and instructions, and I think your choice of materials is perfect for your limestone house. I am truly happy to have discovered your blog and look forward to your future posts.
Benjamin, it’s back-to-school for us here, too. I understand what you are going through!
Deb, I’m glad we found each other’s blog. I love your wooded path — we are slowly working on one of our own elsewhere in our yard (we have “wild areas” on the outskirts and far backyard), though on a much smaller scale. It will be a much more simple trail than was our DG path in the full sun area, in that we will likely just use leaf mulch along the path.
Not only does the path look awesome, really wonderful, but I’m pleasantly surprised there is a doable way to keep it weed free and organic that does not cost an arm and a leg. Usually it’s one or the other in my experience… Also, great post writing – as soon as I had a question as I read, it was answered in the next paragraph. Neat-o.
I love this! What great how-to info. And it is beautiful. Lots of work in this heat, but it is worth it.
Your new pathways look fantastic, Meredith! I love that you made them broad and gently curvy—nice lines. And you certainly took the time to build them properly. I’m curious about the limestone dust base you used. Is it a lot cheaper than the decomposed granite itself?
Tatiana, I won’t say it was cheap — it did require quite a few yards of material, but then again, our path was huge. I’m glad you liked the how- to — I really like to share how I did things when I actually think I did something right!
Linda, we think it was worth doing it, even if it meant dealing with the crazy heat. Lots of water and gatorade were provided, and we stuck to the cooler morning hours as best we could.
Pam, the limestone dust was indeed much cheaper than the DG. We purchased it from Austin Landscape Supplies in Georgetown. Not only were their prices reasonable, their delivery was substantially lower than their competitors. Plus, they were very, very nice — good customer service is always prized. And I’m glad you like the path!
You think your paths looked bad before you started, you should see mine right now. I was so proud of my raised bed garden this past spring. I had put down a good quality weed barrier and several inches of mulch. it looked great. then we had a very hot summer and i was very busy at work… the weeds took over! When i had to mow the paths between the beds i got so angry and discouraged i have seriously been thinking of closing shop on being a gardener. thank you so much for posting this. i might give this and gardening one more try.
I hear you, Marla — paths make all the difference. I knew that weed barrier has a history of letting weeds in, so I skipped trying it. But mulch and cardboard didn’t keep out the nutsedge and bermuda, either — that’s why I went to more extreme measures. We’ve had the decomposed granite paths for a year now, and they still look as good as the first day we finished them — no weeds! Today’s post (8/30/11) is about a new path we created for our shaded area — I hope you’ll check it out!
Thanks for posting this! Ive been so hesitant to use the weed barrier and have been looking for alternatives since we are prone to heavy weeds. We will go with a layer of newspaper before putting down baserock. It looks great! I wonder if there are current images somewhere as it seems installation was a couple of years ago…
I don’t have an updated post specifically on the paths but it’s visible on assorted pictures since that time. We still love the path. The top surface has been loosened just a little by our dogs and by the occasional rainstorm, but it is still a fully-functional path. Occasional seeds will try to germinate now but I just yank them or rake them slightly to pull them out by the roots, and that’s that.
I was wondering how the paths have held up after five years. Is weed control becoming an issue? How is maintenance? We live in very different parts of the country (eastern Washington state), but I think this is the way I want to go for my garden paths, to cut down on water usage and most definitely for weed control!
Chris, the paths are holding up fine after all these years. The dogs churn a little of the top surface of the decomposed granite, making it easier for weeds to grab hold, but they are few and very easy to deal with. The dogs have finally learned to stick to the pathway far more than diving into my garden, so that’s a bonus!