
One of the projects we’ve been working on at home and with kids at school is making plantable ornaments or cards from recycled paper. Here’s a quick and easy way to do this at home. This is a very fun project for both kids and grown-ups!
 Materials needed:
- recycled paper in a variety of colors
- water
- blender
- native wildflower or perennial seeds (because we missed the fall planting season for Texas wildflower seeds, we used perennial seeds that could be planted in spring — whatever you use, don’t pick something that will germinate the moment it touches water!)
- cookie rack or sturdy grid that will allow water to drain through
- basin in which the cookie rack fits
- paper-sized piece of window screen
- cookie cutters
- piece of damp felt larger than your largest cookie cutter
- sponge
Tear the paper into bits, separated by color. Add a cup or so of paper bits into the blender and cover with water. Soak for a little bit, then blend. Add more water or paper as appropriate until you have the amount of pulp you want and the pulp is fairly free of chunks. I found it helpful to add a little white paper in with the colors to extend the available colors — we had far more white available than color; plus, the bits of white give a neat effect to the colors when they are visible.
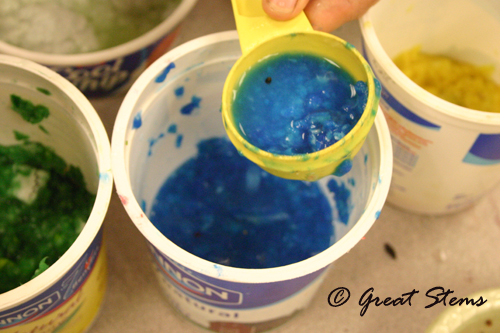 Our ornaments needed about 1/4 cup pulp, so we scooped the color we wanted and then added 1/4 to 1/3 teaspoon seeds.
We placed the screen onto the cookie rack and set the rack in the basin. Next we spread the pulp/seed mixture into a cookie cutter, making sure that pulp filled all the corners and edges. The goal here is to use just enough pulp to make a thin ornament — the thicker it is, the longer it takes to dry (and then you might sprout flowers seedlings!).
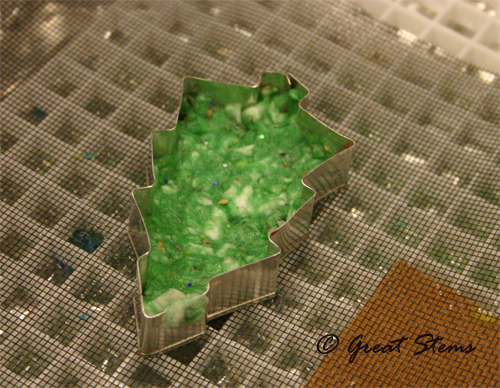
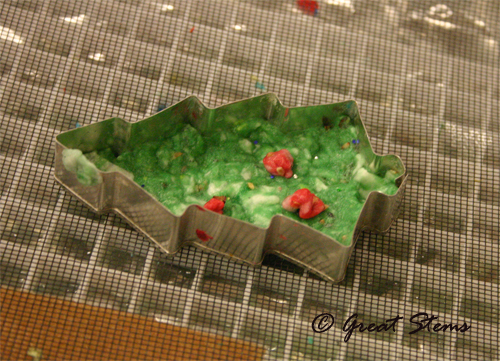
If you like, add other colors to embellish the ornament.
 Once you’ve filled the cookie cutter, gently lift the cookie cutter, pressing the pulp down simultaneously to encourage it to remain on the screen.
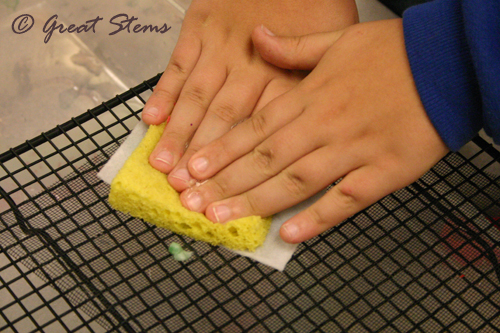
Next, take a damp piece of felt and lay it over the ornament. Press down on the felt with the sponge to push out the water from the ornament. Periodically squeeze the sponge off to the side to remove excess water.
 Remove the sponge and felt — the ornament will be easy to transfer to another rack or screen for drying. Voila!
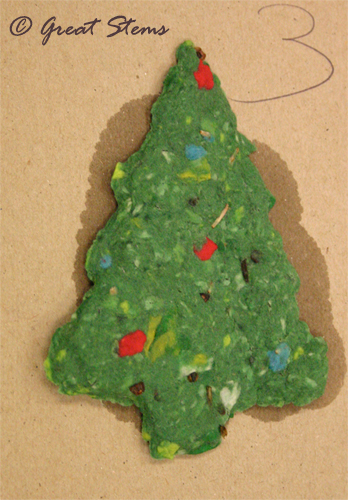 You can use the same process to make a card, with the “ornament” attached to a background piece of paper.
Hi Meredith, great idea!
I’m always looking for ways to get kids involved in gardening and this looks like a good one. Hope you don’t mind if I use it.
Rees
Please do — that’s why I posted it. It’s a great project for kids — have fun with yours!
These look beautiful, Meredith! How’s the germination rate?
The ornaments didn’t sprout while drying, if that’s what you mean, Kelly — I certainly didn’t want to have to rush out and plant them all instead of giving them out to family and friends. As for the longterm germination rate, we’ll just have to see what happens in the spring!
It’s the latter I wondered about–thought maybe you’d made these before (they really are fun!). I shall circle back with you in the springtime–or make a few with my kids and do some discovering of our own. :0) Happy day, Meredith!