It’s been a busy couple of weeks for me. This week alone, I’ve been teaching about the wonders of snakes to kids at a summer camp (with friend and fellow master naturalist Sue), talking about backyard bird identification to a local gardening group, and then leading walks about Texas plant adaptations at the Wildflower Center’s first Nature Night of the year. Next week is more snake talk, and then Amphibians! The other exciting news is that this week on Central Texas Gardener, you can see me visiting with Tom Spencer about kid-friendly, nature-approved wildlife projects. If you have a chance, check it out!
One of my very favorite projects is seed paper, an easy way for kids of all ages to give the gift of nature to others. It also teaches kids about recycling, taking used paper and turning it into something else, such as birthday cards or holiday gifts — even ornaments. As the native seeds start to grow, then the gift extends to pollinators, birds, and other wildlife, and it spreads beauty, too!
What you need:
- Used or scrap paper of assorted colors (don’t use glossy paper)
- Water
- Blender
- Native seeds, such as wildflowers or perennials (think about what would naturally germinate in the upcoming growing season)
- Cookie cooling rack or a sturdy grid
- Window screen or other flat mesh, cut to about the size of a sheet of paper
- Baking pan or basin to catch the water
- Cookie cutters of assorted shapes
- Light-colored felt pieces, cut larger than the largest cookie cutter
- Absorbent sponge
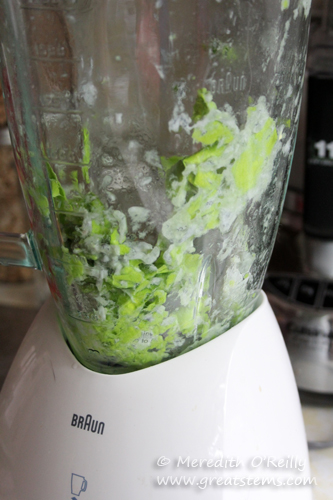
1. Start by tearing the paper into small bits, keeping each color separate. If you don’t have a lot of a particular color, you can add a few white scraps, but don’t go overboard with the white, as the resulting colors will, of course, be paler or even gray. For each color, add the paper bits to a blender and add a small amount of water. This amount will vary, but add just enough to moisten the mixture for blending without turning it to soup. Blend to a pulp.
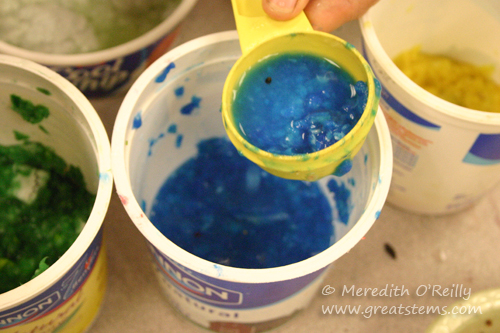
Yogurt cups or small bowls are great for keeping the pulp colors separate. Don’t add the seeds yet, however — we’ll add those as we make individual shapes.
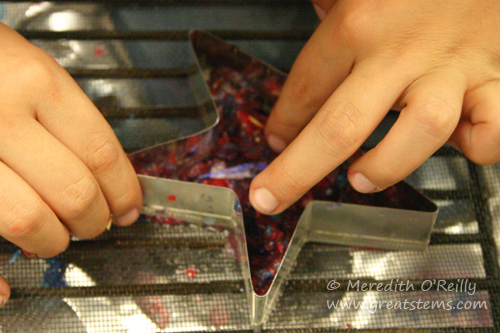
2. Set up the window screen pieces on top of the cookie cooling rack, and place the baking pan underneath (this will allow you to squeeze out excess water from your seed paper). After choosing your cookie cutter, take a small amount of paper pulp and sprinkle in some seeds, then mix it together briefly with your hands (sprinkling seeds on later is less effective — you need some paper fibers to surround the seeds and hold them in the paper). Press the moist pulp-seed mixture into the chosen cookie cutter, about 1/4″ thick.
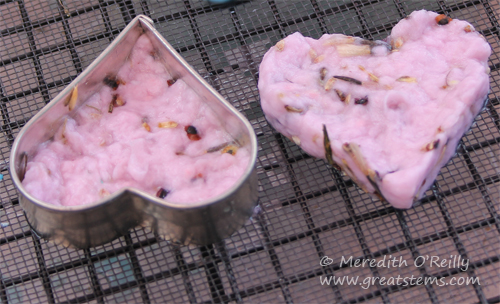
Then gently press your fingers along the paper pulp edges as you remove the cookie cutter so that the pulp mixture doesn’t lift away from the screen or pull away with the cookie cutter.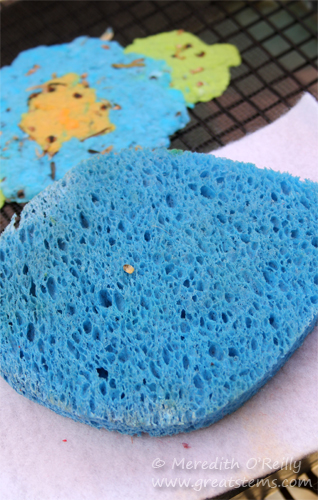
3. Lay a piece of felt on top of the pulp. On top of that place a sponge.
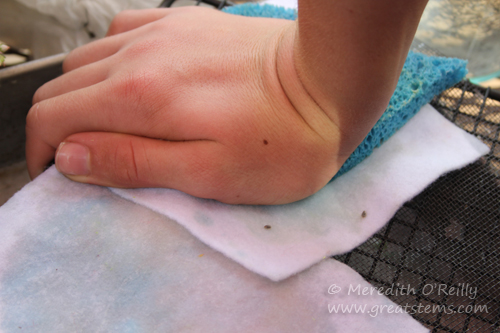
4. Next, carefully press your hand onto the sponge to squeeze out excess water. Re-position the sponge as necessary.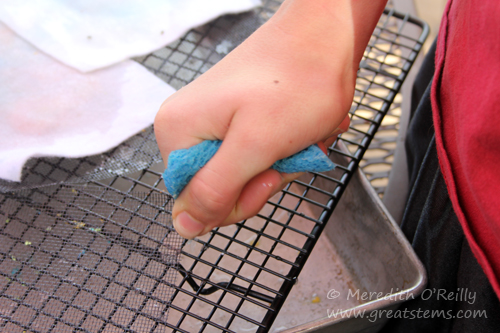
You might need to periodically squeeze out water from the sponge itself as it absorbs some of the water.
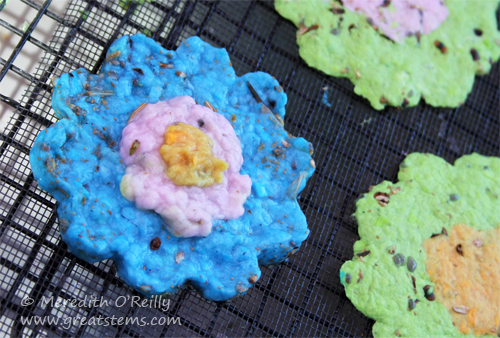
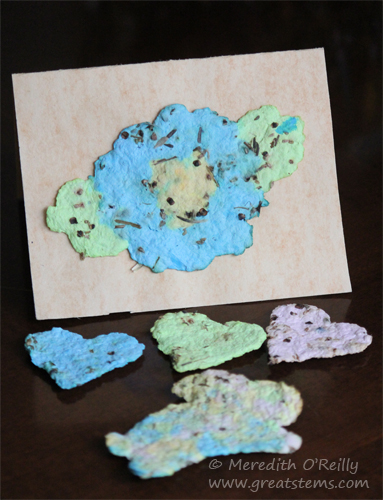
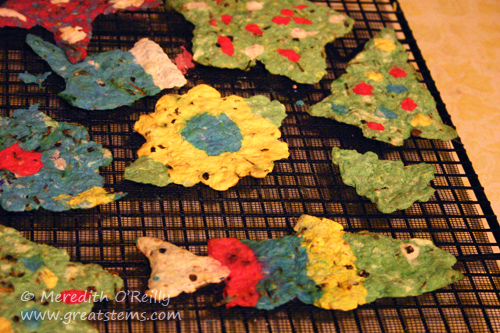
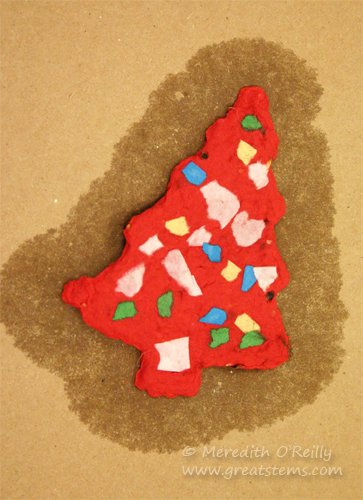
Be creative and combine colors however you like. Here you can see some flowers, one just before pressing out the water. You can even add bits of “intact” paper for decoration — scroll down to see the tree ornament for an example.
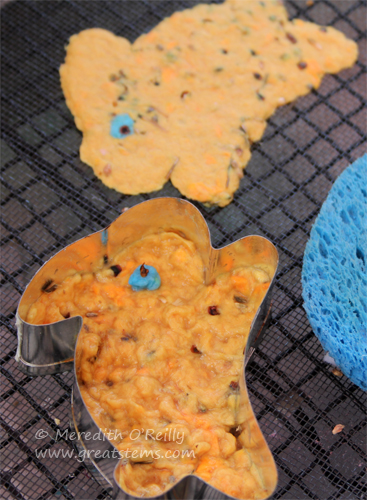
 We’ve made bunnies, stars, airplanes, holiday shapes, and even a rainbow trout for a fisherman. Technically, you don’t even need the cookie cutter — if you want to make a lizard or a dragon or a bumblebee but don’t have a cutter for it, just create one by hand!
5. Be sure to let your creations dry well indoors– set out on paper plates or cardboard or on the window screen pieces and let them air dry for 2 or 3 days. Don’t dry them in the sun — this might encourage early germination of the seeds. Occasionally check for curling as the seed paper dries — if there is any curling, just flip the seed paper over while it is still slightly damp and gently press it down flat again. I like to flip the seed paper while it dries, anyway, whether it is curling or not.
6. To create seed cards, simply use a dot or two of white school glue to attach the fully-dried seed paper to the card of your choosing (perhaps use construction paper or card stock). To create ornaments, use a hole punch or the tip of scissors to carefully puncture a hole in the seed paper for an ornament hanger.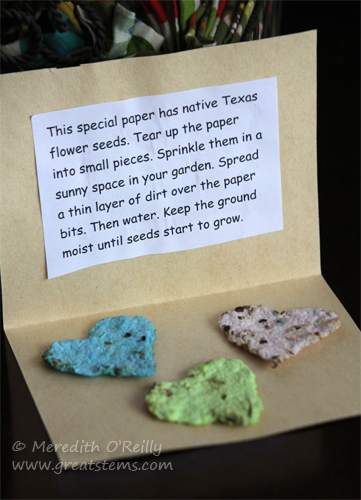
7. Finally, include planting instructions with your seed gift. Of course, you will want to adapt your note to match the type of seeds you used with your seed paper. Don’t forget to mention the type of seeds in the paper if you can, as well as the recommended season for planting!
By the way, this project is easy to do with small or large groups of kids. It’s fun for an outdoor event, too. Enjoy!
To learn more about other wildlife/nature projects for kids, as well as ways to connect kids with nature, just click here!
I would love to include this Summer time craft in a compilation E-book. Please contact for more details.
How long will these stay good for? I would like to make them as Christmas gifts, but they can’t be planted for a few months after Christmas (live in IL). Thanks!
They should be fine for months, Tina, provided the seed paper dries quickly enough. It might also depend on the seeds you use, whether they have a long dormancy or germinate the moment they touch water. Good luck, and have fun!