How to Engineer a Bird’s Nest

makingbirdsnestg01-03-2016

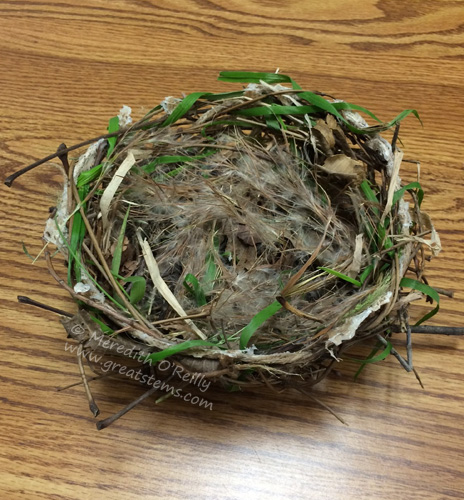
One of the perks of my job is that I get to have fun creating new science-based, nature-related activities for kids. This winter break I wanted to create an engineering-based activity for creating a realistic-looking bird’s nest using natural and/or biodegradable materials. It sounds easier than it actually is — even birds who do it by instinct spend many hours or even days collecting materials and creating their nest, and what seems to come naturally to them can be quite the engineering challenge for humans. It certainly isn’t a new idea for a kids’ activity, either, but it’s one that often leads to less than satisfying results. I also knew that I didn’t want this to be just an arts-and-crafts activity with chenille stems and other wasteful materials, and I wanted youth to be able to present their own ideas and find solutions. At the same time, I needed the core activity to be sound enough for success.

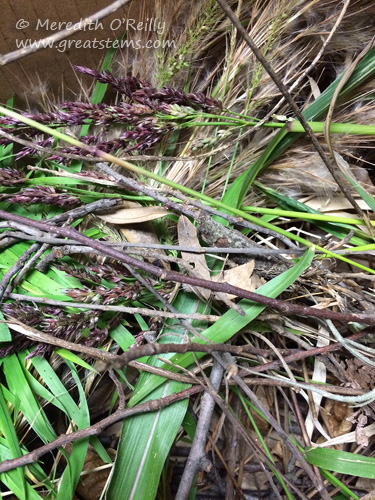
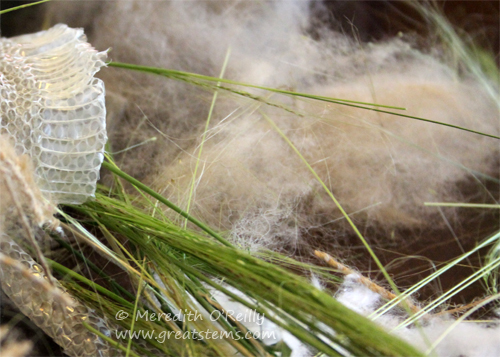
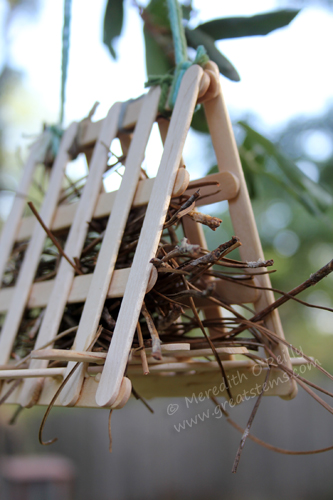
Different bird species use different techniques and materials to build their nests. Birds that create a “traditional” nest will typically select a sound structure that will support and even provide a little basic framework for their nest, then they gather twigs and other materials for a little trial-and-error placement to get the nest going. They then keep building it up, weaving materials and using mud and saliva and other means to prevent the nest from falling apart. Other birds mix mud and saliva as a cement for shaping an earthen nest, some do complicated weaving patterns with grasses, some incorporate spider webs and even snake skins, and some bypass the issue entirely by simply cushioning an available cavity in a tree or man-made structure. Birds are amazing engineers! For this particular task, I wanted to focus on the classic nest look with twigs and grasses.

makingbirdsneste01-03-2016How do you turn this activity in a youth-driven engineering challenge? One option is to have them gather (or you provide) a bunch of natural materials and challenge them to create a basic nest that will hold a set number of like objects, such as 3-4 marbles. They can do so individually or as partners, and it’s a lot of fun. It can also be done in a single lesson or in about a 1-hour time frame.

But to fully create a realistic-looking nest, start by helping kids identify the tasks in front of them. Show pictures and videos of birds building nests and lead a discussion about some of the challenges birds have to deal with to make a sound nest. You might even let the kids work with the materials for a while to consider some of the difficulties of the task ahead. Guide them to think about such questions as the following:

  • Will the nest structure require framework?
  • How do you keep the nest from falling apart? How would birds do it? (mud and saliva, spider webs, weaving grasses, etc.) For our nests, what could we use instead of mud?
  • What kinds of materials would work best for the main nest? For example, what length and thickness of twigs and/or grasses might be best? Should items be flexible or sturdy?
  • How do you keep the inner shape of the nest relatively round?
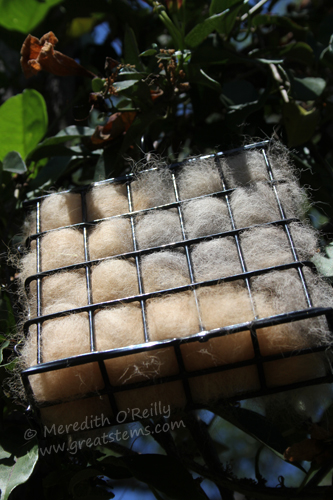
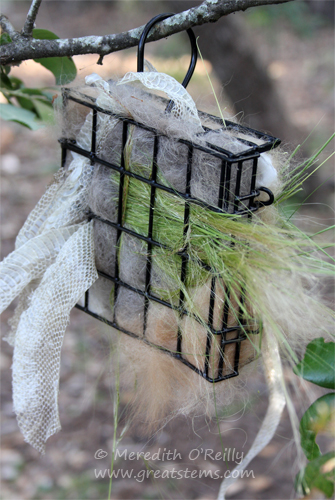
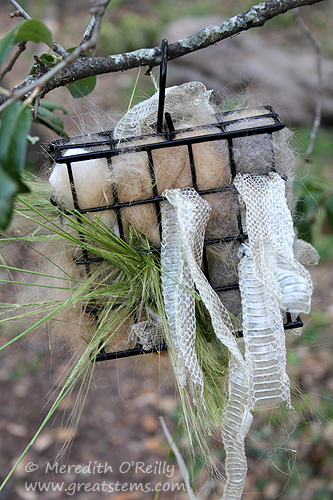
  • Should you add a lining for the eggs and baby birds? What might birds use? (soft plant fibers, dog fur, downy feathers, leaves, etc.)
  • Is there anything unique about the nest that you’d like to build? Would you add a roof of sorts or create more of a cavity style?

Once kids have identified questions and pondered the answers, help them figure out their basic plan. If they have a good idea they want to try, let them go for it. You can also show them a sample of dried twine pieces glued together and see whether they think it might be a technique they’d like to use. Let them be a part of figuring this out as much as possible. You might also wish to explain that twine is made from natural plant materials and is biodegradable, and that white school glue is non-toxic.

makingbirdsnesta01-03-2016
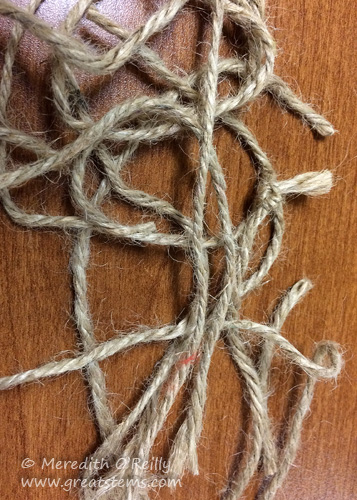
The following shows how to shape the activity using the glue and twine technique. Modify it according to kids’ ideas. Have kids make suggestions for what objects could be used to create a mold for the nest (such as a bowl). Have them also consider how to protect the bowl or other object from the glue (perhaps plastic wrap). Guide kids to see why shorter pieces of twine are potentially safer than really long ones, if the final nest might get placed permanently outside (shorter pieces are safer for wildlife to keep them from getting long twine wrapped around a foot or limb). Have the kids cut the twine into pieces 5-6 inches long.

makingbirdsnestb01-03-2016

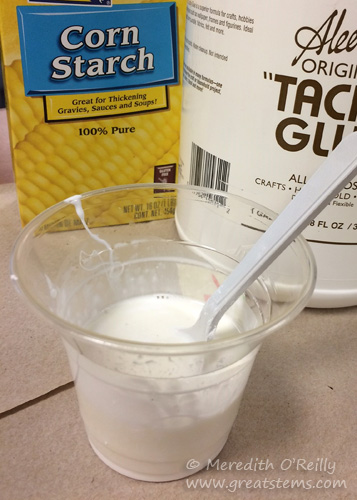
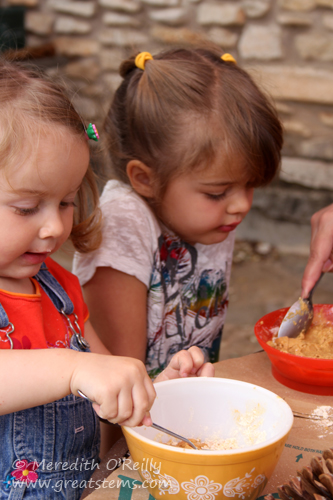
Let kids measure and mix the glue, water, and corn starch to make a sticky paste. For a single nest, I used approximately 1/4 cup water, 1/2 cup corn starch, and about 1/2 cup white school glue or tacky glue (non-toxic). The mixture is fairly thick but fluid enough to allow easy coating of the twine pieces.

makingbirdsnestc01-03-2016

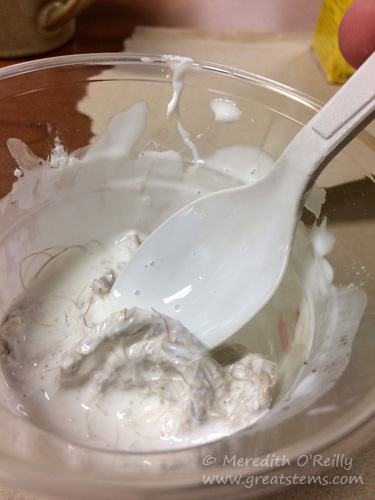
Working with a few pieces at time, use a spoon or fork to help coat the twine.

makingbirdsnestd01-03-2016

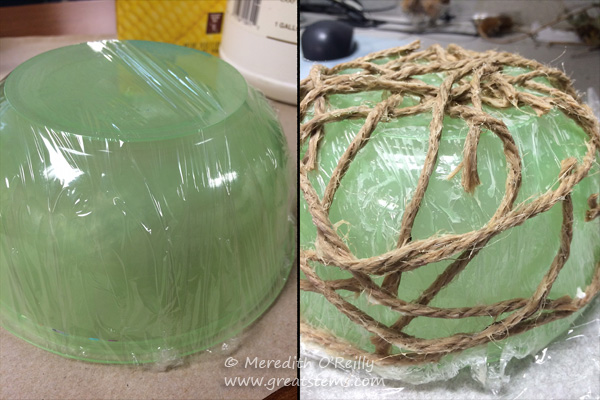
If you haven’t already, be sure to protect your bowl by covering the outside in plastic wrap, taping in place as needed (this will also allow for easy removal of the final structure). Have kids take a piece of coated twine, squeezing off the excess glue mixture. Then let them figure out the way they want to place the sticky twine on the bowl, keeping in mind their engineering requirements as they add more pieces. But you might suggest that they imagine what might happen to the nest if the twine were to get wet in the rain. How easily might it fall apart if the glue softens? Should they overlap and weave together the twine pieces (I did). Do they want to make knots? Open spaces are fine at this point.

I’ll admit that this part is messy, so hopefully you’ve put down some newspaper or cardboard or some other material to protect your table. Encourage kids to not smear glue on their clothes or on furniture during the activity, and be ready to get them to sink the moment they are done.

Let the nest frame dry for a couple of days. This is a fine time to let kids collect twigs, leaves, grasses, and other natural materials for their nest. When ready to work with the dried twine frame, help kids carefully remove their structure from the bowl and plastic wrap.

makingbirdsnestf01-03-2016

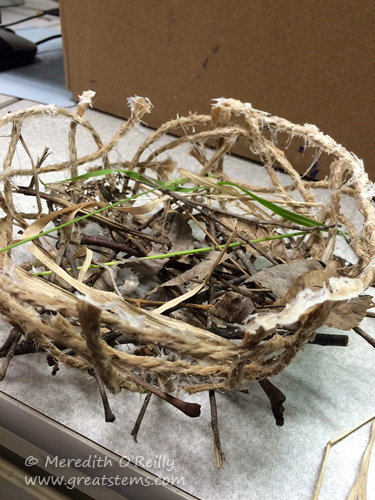
Then the fun begins — time to weave the natural materials through the nest frame! What size twigs seem to best, or can they vary? What materials are flexible enough to help weave through back and forth to “lock” other materials in place? At what point should you switch to softer lining materials? How can you keep the open bowl shape for the nest? Let kids do this with tweezers or forceps if they want to imagine they are birds at work!

makingbirdsnesti01-03-2016
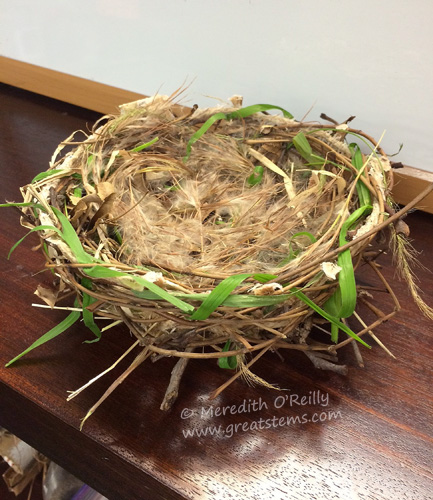
Have kids keep adding material until holes and gaps are filled and nothing slips out as they move the nest around. Encourage them to rotate the nest often and triple-check for gaps. To add to the challenge, you could have kids test the strength and stability of the nest by temporarily adding rocks, marbles, or other weighted items, by using a fan to blow on the nest, by giving a gentle shake to the nest, etc. Let kids make adjustments to their nest accordingly. At the end, discuss again how birds in nature make nests and why it’s important for the nest to be sound in structure. Why might different species have different nest-building methods?makingbirdsnesth01-03-2016

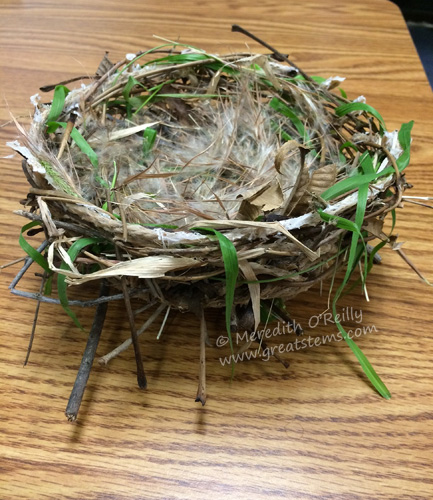
I used both dried and fresh grasses to help secure many of thin twigs and flexible stems I gathered. Within a couple of days, the greenery was already turning brown, though I didn’t take any new pictures.

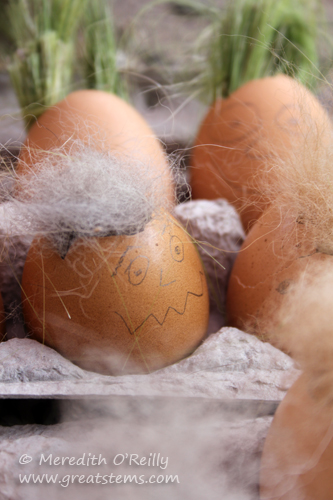
Could you or should you put your nest outside? I think if you feel it’s fairly solidly built, then it’s fine, as long as you also put it in a place where it won’t fall to the ground in wind. I would expect that any bird parents actually interested in using the nest would add their own material to enhance the nest and check it for stability. But if it’s fairly loose and has some gaps, then just use it as decoration for home. If doing so, how might you create some eggs or a small bird to add to the nest?

This activity can be adapted for kids of any age, but I think that kids 3rd grade and up will be able to most of the work on their own. Grown-ups can have fun making a nest, too — you just have to be a kid at heart!

Our Spidey Senses Are Tingling

In a moment of pure golden brilliance, I came up with the idea of using eye stickers to turn kids into 8-eyed spiders when I’m teaching about our arachnid friends. Stickers in hand, I asked my teenage son if he’d be willing to be my guinea pig and then (I was holding my breath when I asked this) let me post his picture on my blog. He said sure.

8eyes10-1-13

This, my friends, is one of the many reasons why I love my son so, for not every teen would be so willing to do this. Our very own Spiderman, he is. And don’t you dare do a glasses crack and point out that some would say he looks more like a 10-eyed spider. What he is representing is a nearsighted 8-eyed spider. Gosh.

spiderweb10-1-13

We looked up during our photo op and saw a huge and very well-placed orbweaver web hanging from the eaves way above us. It’s a sign, I tell you. The spiders approve.

Wildlife Project: Bee Boxes

Many of our flowering plants and crops depend on pollinators, especially native bees, in order to produce fruit and seed. An excellent project for helping native bees is to create places for them to nest. In the case of solitary mason bees, this might be a bee box made of wood, cardboard tubes, or even bamboo. For digging bees, a patch of open dirt is all it takes. As is often the case, these projects can be done with simple methods, but if you have access to power tools, you can take them to another level.beeboxe2013

One idea is to place either cardboard nesting tubes (available for purchase online) or bamboo tubes inside a can. beeboxa2013

I recommend that you use cans with BPA-free lining if possible (Eden Organic, for example).

beeboxb2013

If you like, decorate the outside of the can. Spanish moss is one possibility. Be sure to use outdoor-appropriate non-toxic glue.

beeboxc2013

If using bamboo, cut it to lengths of about 6 inches. If possible, select tube portions that are approximately 5/16″ in diameter, or a little larger if you’d like to add a paper liner. This is mainly to provide tubes that are an ideal size for mason bees. A paper liner (see first picture above) can be made with parchment paper cut to about 3″ x 6″ and rolled tightly with a pencil — insert into the tube and draw the pencil carefully back out to let the liner expand to fit the tube.

In order to keep the tubes snugly together, I wrapped around them with masking tape. You can drizzle a little non-toxic glue between them if you like. I also used tape to create a sticky base inside the can. This keeps the tubes in place while letting them be easily removed and replaced as needed later.

beeboxd2013

If you’d like to hang up your bee can, tie twine or rope around it. Or simply place it in a sunny spot in your garden where it won’t roll or be disturbed by pets or other animals.

beeboxf2013

Another popular bee box project is to use a power drill to create holes in natural wood. Ideally, these holes would be about 6″ deep, but aim for at least 4″ if possible. The diameter should be 5/16″ — or use 3/8″ with paper liners as described above. The paper liners keep the wood from absorbing too much moisture, and because they are replaceable, they also help keep the holes clean long-term.

beeboxg2013

When you’ve drilled all the necessary holes, place the bee box in a warm, sunny spot. I’ve also found that particularly here in Texas some partial shade is helpful to keep the Death Star from baking the bees.

MEOinsecthotel06-04-13withtextOf course, to really go all out, your bee boxes can become part of an entire insect hotel!

miningbee6-11
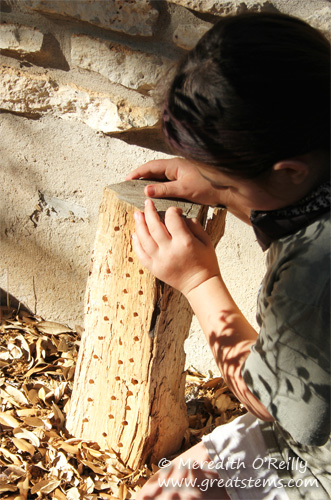
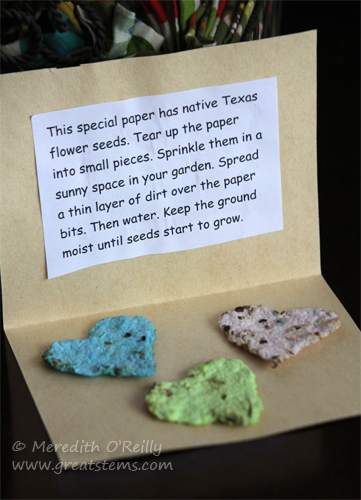
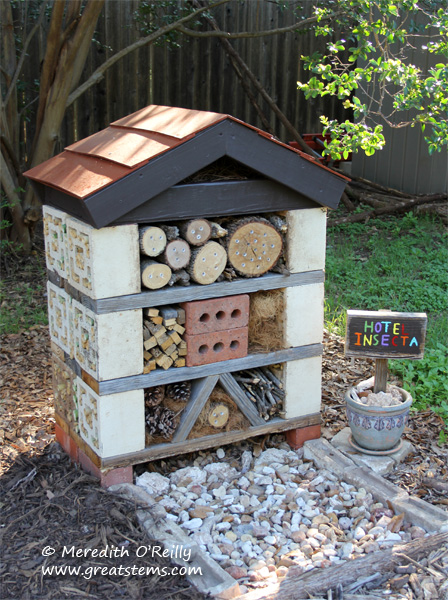
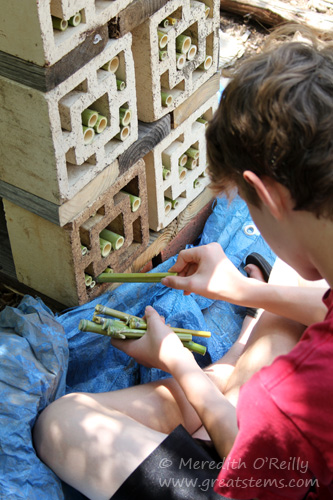
Be sure to include patches of open dirt elsewhere in your garden to let mining bees, or digger bees, lay their nests, too! Perhaps create a sign for your special “Bee Patch.”

Of course, it’s also important to provide in your garden native plants and shallow water sources for your bees and other pollinators. Keep your garden and yard pesticide-free, and encourage your neighbors to garden organically as well. Thanks for helping our hardworking pollinators!

To see other nature/wildlife projects for kids, click here.


Wildlife Projects for Kids: Seed Paper

It’s been a busy couple of weeks for me. This week alone, I’ve been teaching about the wonders of snakes to kids at a summer camp (with friend and fellow master naturalist Sue), talking about backyard bird identification to a local gardening group, and then leading walks about Texas plant adaptations at the Wildflower Center’s first Nature Night of the year. Next week is more snake talk, and then Amphibians! The other exciting news is that this week on Central Texas Gardener, you can see me visiting with Tom Spencer about kid-friendly, nature-approved wildlife projects. If you have a chance, check it out!

seedpaperstepsL05-12-13

One of my very favorite projects is seed paper, an easy way for kids of all ages to give the gift of nature to others. It also teaches kids about recycling, taking used paper and turning it into something else, such as birthday cards or holiday gifts — even ornaments. As the native seeds start to grow, then the gift extends to pollinators, birds, and other wildlife, and it spreads beauty, too!

What you need:

  • Used or scrap paper of assorted colors (don’t use glossy paper)
  • Water
  • Blender
  • Native seeds, such as wildflowers or perennials (think about what would naturally germinate in the upcoming growing season)
  • Cookie cooling rack or a sturdy grid
  • Window screen or other flat mesh, cut to about the size of a sheet of paper
  • Baking pan or basin to catch the water
  • Cookie cutters of assorted shapes
  • Light-colored felt pieces, cut larger than the largest cookie cutter
  • Absorbent sponge

seedpaperstepsA05-12-13

1. Start by tearing the paper into small bits, keeping each color separate. If you don’t have a lot of a particular color, you can add a few white scraps, but don’t go overboard with the white, as the resulting colors will, of course, be paler or even gray. For each color, add the paper bits to a blender and add a small amount of water. This amount will vary, but add just enough to moisten the mixture for blending without turning it to soup. Blend to a pulp.

seedpaperstepsG12-10-10

Yogurt cups or small bowls are great for keeping the pulp colors separate. Don’t add the seeds yet, however — we’ll add those as we make individual shapes.

seedpaperstepsK12-10-10

2. Set up the window screen pieces on top of the cookie cooling rack, and place the baking pan underneath (this will allow you to squeeze out excess water from your seed paper). After choosing your cookie cutter, take a small amount of paper pulp and sprinkle in some seeds, then mix it together briefly with your hands (sprinkling seeds on later is less effective — you need some paper fibers to surround the seeds and hold them in the paper). Press the moist pulp-seed mixture into the chosen cookie cutter, about 1/4″ thick.

seedpaperstepsBB05-12-13

Then gently press your fingers along the paper pulp edges as you remove the cookie cutter so that the pulp mixture doesn’t lift away from the screen or pull away with the cookie cutter.seedpaperstepsC05-12-13

3. Lay a piece of felt on top of the pulp. On top of that place a sponge.

seedpaperstepsD05-12-13

4. Next, carefully press your hand onto the sponge to squeeze out excess water. Re-position the sponge as necessary.seedpaperstepsE05-12-13

You might need to periodically squeeze out water from the sponge itself as it absorbs some of the water.

seedpaperstepsI05-12-13

Be creative and combine colors however you like. Here you can see some flowers, one just before pressing out the water. You can even add bits of “intact” paper for decoration — scroll down to see the tree ornament for an example.

seedpaperstepsH05-12-13

seedpaperstepsF12-10-10
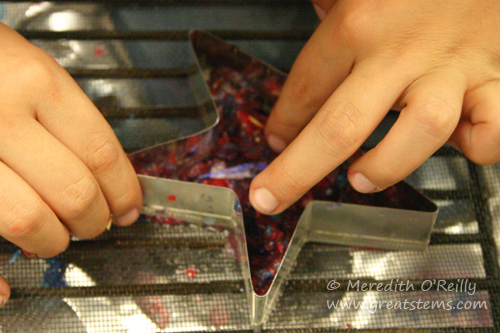
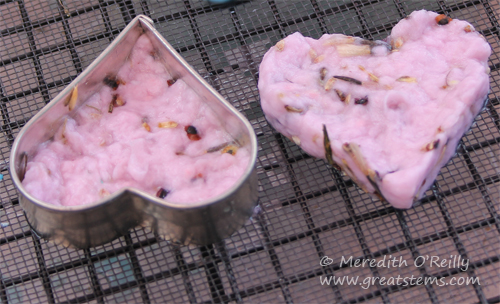
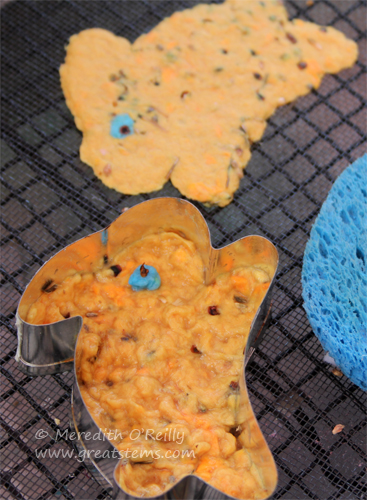
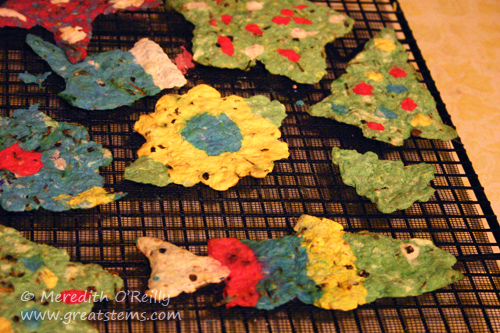
We’ve made bunnies, stars, airplanes, holiday shapes, and even a rainbow trout for a fisherman. Technically, you don’t even need the cookie cutter — if you want to make a lizard or a dragon or a bumblebee but don’t have a cutter for it, just create one by hand!

seedpaperstepsJ12-10-10

5. Be sure to let your creations dry well indoors– set out on paper plates or cardboard or on the window screen pieces and let them air dry for 2 or 3 days. Don’t dry them in the sun — this might encourage early germination of the seeds. Occasionally check for curling as the seed paper dries — if there is any curling, just flip the seed paper over while it is still slightly damp and gently press it down flat again. I like to flip the seed paper while it dries, anyway, whether it is curling or not.

6. To create seed cards, simply use a dot or two of white school glue to attach the fully-dried seed paper to the card of your choosing (perhaps use construction paper or card stock). To create ornaments, use a hole punch or the tip of scissors to carefully puncture a hole in the seed paper for an ornament hanger.seedpaperstepsM05-12-13

7. Finally, include planting instructions with your seed gift. Of course, you will want to adapt your note to match the type of seeds you used with your seed paper. Don’t forget to mention the type of seeds in the paper if you can, as well as the recommended season for planting!

By the way, this project is easy to do with small or large groups of kids. It’s fun for an outdoor event, too. Enjoy!

To learn more about other wildlife/nature projects for kids, as well as ways to connect kids with nature, just click here!

Wildlife Project: Building an Insect Hotel

One of our spring projects was to give a gift to pollinators and a boost to the ecosystem by building an insect hotel. This type of project is becoming increasingly popular, and it was our turn to make one, by gosh.MEOinsecthotel06-04-13

An insect hotel is a structure that offers native bees a place to build nests, a place for fireflies to lay their eggs, a place for lady beetles and butterflies and lacewings to seek shelter, and so on.

MEOinsecthotel06-04-13withtext

Part of the fun is building it with natural and re-used (untreated) materials, so making one can be super cheap. Ours cost us the price of one 2′ x 4′ piece of plywood, just a few bucks (we could have brought that price down to zero if we had called friends for a spare scrap, but rain was coming and we had to speed up a couple of steps).

Insect hotels can be done very simply, just by stacking materials such as old boards, pallets, or bricks. This makes it possible for even young kids to help create a hotel (check out this link for a huge variety of other people’s insect hotels). An adult should make sure the structure is safe and secure, but kids can help fill the open spaces.

insecthotelA05-14-13

But older kids and adults can really go to town to build the insect hotel of their dreams, so to speak. It can become a real-life math problem, a science project, and an engineering or art or architecture project all in one. Ours is somewhere in between simple and fancy. It LOOKS fancy, but it was remarkably simple — best of both worlds! So while there are lots of ways to build insect hotels, I’m just going to show you how we did ours.

insecthotelC05-14-13

You start with what you have at home or can get for free — this makes every insect hotel unique (what a wonderful concept!). We had five things at home that made this project straightforward and easy to do. The first is that we had 12 vintage screen blocks our neighbor passed along to us a few years ago — we kept them until we could figure out a perfect project for them. We also had an assortment of bricks, decaying wood from one of our raised vegetable beds that was in need of repair, scrap pieces of 2×4 in the garage (for the roof), and lots of natural materials from our garden and yard (sticks, leaves, etc.).

The vintage blocks set the stage for the design, as they also set the height of the shelves. We spaced them just far enough to allow for potential partitions (we would use more decaying wood and some bricks to create these). To add just a bit of additional height, we used two layers of bricks as the base, then cut the veggie-bed wood to size to create the shelves. The reason for the height from the bricks was to be able to add leaf litter underneath the insect hotel to give toads a place to find shelter, caterpillars a place to overwinter, and lizards a place to lay eggs. I should probably mention that we also removed grass and laid down cardboard as a barrier to weeds (the cardboard will break down quickly but will block out light nicely for a while to keep weeds at bay).

insecthotelB05-14-13
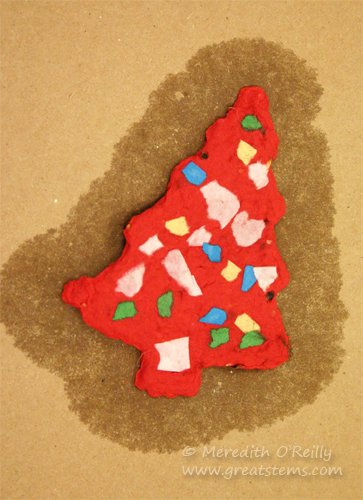
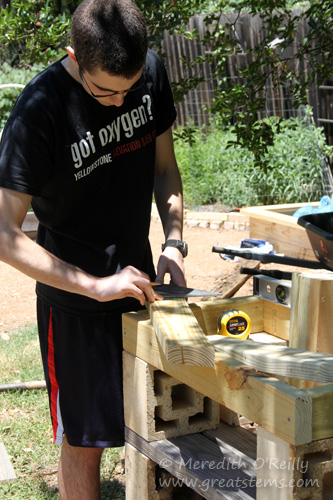
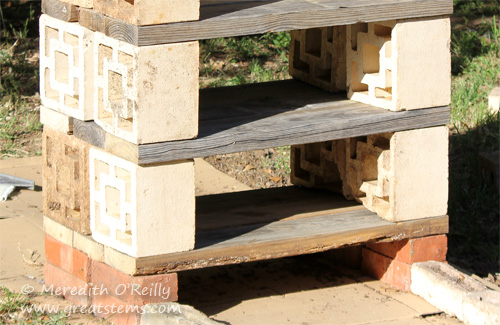
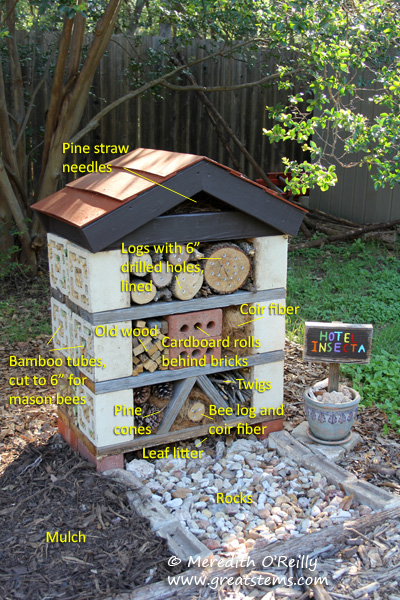
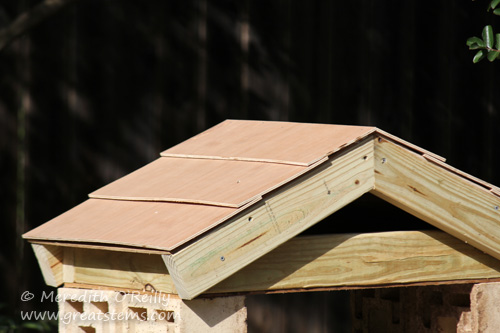
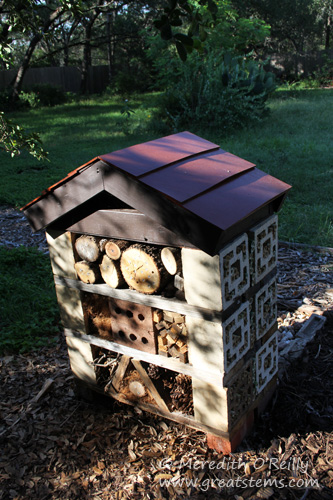
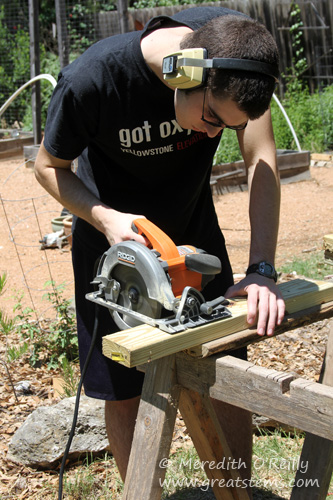
The roof was the only part where we used new wood, that 2×4 plywood I mentioned, plus some scrap wood lengths we had in the garage.

insecthotelD05-14-13

You can see the basic roof design my kids and husband created to fit the hotel. This is the only piece that involved nails of any sort — everything else is stacked only.insecthotelE05-14-13

insecthotelFG05-14-13

The plywood was used to make shingles of a sort. A bit of caulk at the top filled the seam.

insecthotelFH05-14-13

Already at this point, a harvestman and a tiny orbweaver spider had moved in. Clearly they were eager for bug feasts to come.

insecthotelJ05-14-13
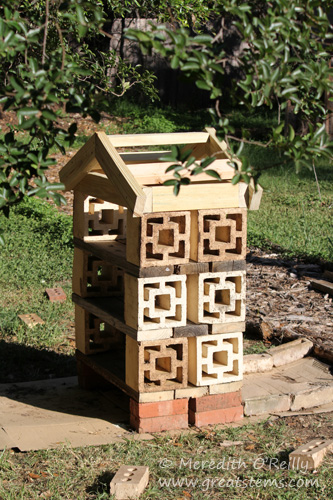
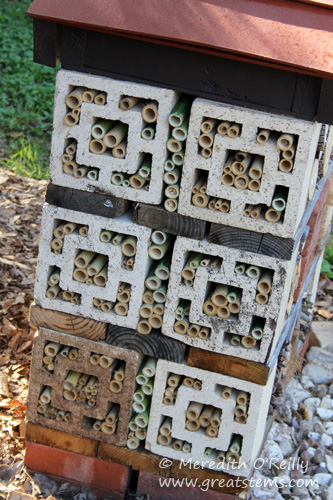
I painted the top section using leftover paint from our house’s exterior — this makes the insect hotel fit the setting nicely, as it matches our house and the color scheme of our garden’s decorations. Of course, it rained that very night, so in the picture it looks dirty. Rain came again for a few days after that — I was so glad the roof was done.

insecthotelI05-14-13

For filling the spaces, our priority was to create places for native bees to build their nests. We collected logs from the yard for this, using a chainsaw to cut them to an appropriate length. Following mason bee nest box instructions, we drilled holes 6″ deep into the wood (the deeper holes allow for female bee eggs — shallower ones produce male bees). So that we could add homemade paper liners to better protect the bees (again, following the advice of experienced mason bee keepers), we used a 3/8″ drill bit rather than the traditional 5/16.”insecthotelN06-04-13

insecthotelM06-04-13

To make liners for the tubes, we cut parchment paper to about 3″ x 6″. These we rolled tightly with a pencil, then inserted them into the holes (they unrolled nicely inside to make a good liner). The liners bring the hole diameter to about the 5/16″ preferred by mason bees.

insecthotelG05-14-13

The screen block was a perfect place to add additional places for nesting bees and other critters. A neighbor on our street is always happy for us to cut down the running bamboo that is invading her yard from her nearby neighbor’s property, so we gathered bamboo, trimmed off the branches, and sliced the bamboo into 6″ lengths of all diameters to fill the holes.
insecthotelK06-04-13

Here we were casual about it — there are lots of different sizes for many species of insects interested in using the bamboo. Some were cut with the bamboo joint at one end, so they are open only from the opposite end (nice for shelter or nesting), while others are open at both ends, allowing an insect to pass into the main hotel structure if it desires.insecthotelH05-14-13

On the middle shelf of the insect hotel, we created partitions with bricks, then inserted rolled corrugated cardboard as lacewing shelters. insecthotelO06-04-13
Additional bricks, with the holes open from the front, protect the cardboard and insects while allowing easy passage for the critters to enter and exit. We also made “A”-shaped partitions simply by cutting more veggie-bed wood to size and sliding it in — no nails required.

Other materials used were decaying wood slices for firefly larvae, loosely placed coir fiber as a general shelter place for small insects, and twigs and pine cones and other wood bits for additional shelter. We filled the roof section with pine straw needles. Though we intended it for insects, it wouldn’t surprise me if Carolina Wrens or other birds will nest in the roof’s pine straw one day. They might think an insect hotel is a perfect place to build their home — convenient food on the spot!

insecthoteIJ05-14-13

Of course, there was one more finishing touch needed. A grand-opening sign! We made use of some more rotting wood from the old veggie bed and some more outdoor paint, including outdoor acrylic, that we had on hand. We attached a supporting piece of wood to the back, then stuck the sign into a plant pot with some rocks (see top photos above).

insecthotelL06-04-13

View from the back

The back of the insect hotel duplicates the front half, mainly because we liked the front so much.

We’re already seeing evidence of bees building nests, and other critters (including more little spiders) have moved in. What a simple but rewarding project! Though we could have finished this in just a day or two, we spread it out over time due to occasional rainstorms. The most time-consuming part, honestly, was drilling the holes in the logs. You have to take a lot of breaks to let the drill and drill bit cool down — they get hot!

To see a couple of other nifty Austin insect hotels, visit Sheryl’s tall, well-planned structure at Yard Fanatic and Vicki’s clever use of an antique bottle rack to make her uniquely awesome Bee B&B at Playin’ Outside. Another gorgeous insect hotel is Gail’s pollinator condo at Clay and Limestone in Tennessee. Remember to also check out the link at the top to get even more ideas!

Wildlife Projects for Kids: Milk Jug Bird Feeders

milkjugfeedersm05-30-13

Here’s a fun bird feeder project that you can do with kids of all ages. Depending on the age of the children, adults might have to help with cutting or working with wires, but decorating can be all kid!
milkjugfeedersn05-30-13

What I love about this project is that it gives a plastic milk jug a new purpose, while simultaneously helping wildlife, giving kids a fun activity to do, and connecting kids with nature.

milkjugfeedersA05-30-13
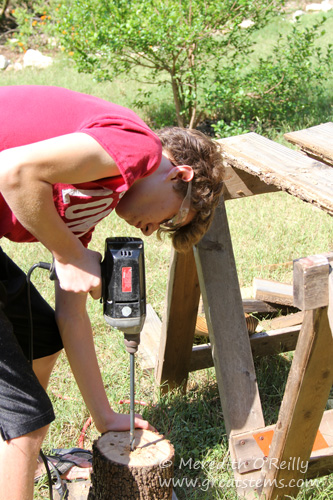
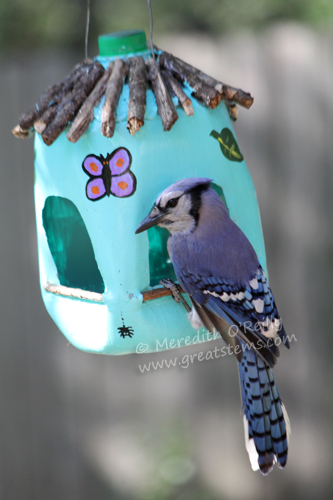
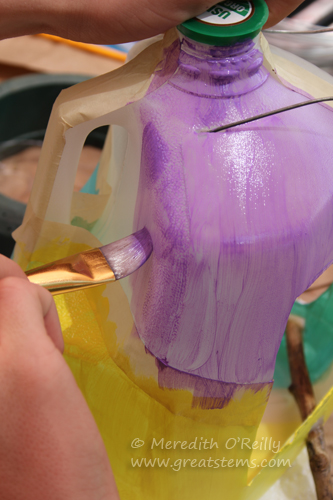
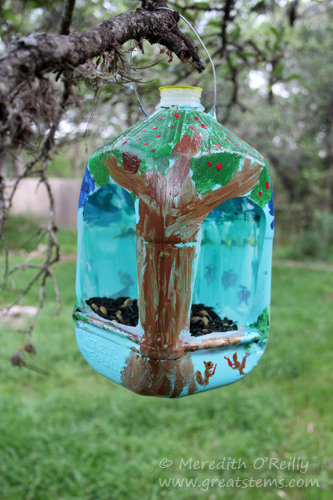
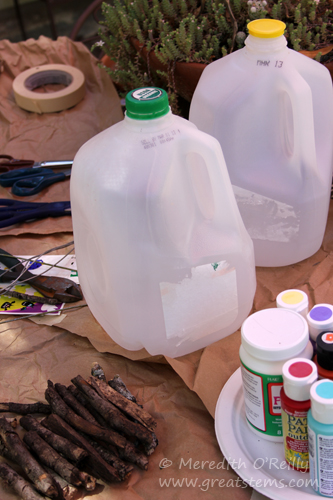
Materials can vary, depending on what you have on hand and how you want to decorate your feeder. The one thing you’ll need for sure is a milk jug. Oh, and birdseed!

Materials:

  • Milk jug with cap
  • Possible decorations: stickers, bottle caps, milk jug caps, Sharpies or other permanent markers, outdoor acrylic paint, tape for making sharp edges
  • Possible tools: scissors, wire cutters, pliers, paintbrushes, garden pruners
  • Perch or roof materials: sticks cut to desired length
  • Possible adhesives or sealant: non-toxic outdoor white glue, Thermoweb Zots, Outdoor ModPodge
  • Possible hanging materials: bendable thick wire, wire clothes hanger, twine, thin rope
  • Birdseed, such as black oil sunflower seed

Steps:

1. Wash the inside of the milk jug and cap with soapy water. Rinse well. Try to remove the label — some will peel off easily, but others might be difficult (you can always choose to paint over the stubborn ones, or cut them out).

milkjugfeedersab05-30-13milkjugfeedersb05-30-13

2. Use scissors to cut “windows” into your milk jug. We liked using the larger sides opposite the handle. Don’t go too low or you will lose seed storage space. If you want to put in a perch, make sure you don’t go too wide with the window, either. Adults will need to help with this step for younger children.

milkjugfeedersc05-30-13

3. Using the pointier end of the scissors, carefully puncture two holes near the top of the jug for the hanger. Try to place the holes in the thicker plastic near the cap. Older kids can probably safely do this, but younger kids will need adult assistance.

milkjugfeedersd05-30-13

milkjugfeederse05-30-13

4. Cut your hanging material to your desired length and insert it into the holes. If using wire or a wire clothes hanger, use wire cutters to cut the length and pliers to twist the wire inside the milk jug to secure it. Adults will likely need to do this step, including twisting the wire. If using rope or twine, tie a secure knot inside the milk jug.

5. You don’t need to add a perch, but if you want one, there are different styles you can do. Again, parents might need to help younger children with this step.

milkjugfeedersfa05-30-13

A resting perch along the lower edge of each window is a very attractive addition to the feeder. To do this, carefully cut slits to each side of the window — the slits should be a little wider than the thickness of the stick. Use garden pruners to trim your sticks to a length just beyond the slits (and trim off any little branches, too). Then maneuver the stick into each opening. Glue into place, including on the inside for extra stability.

milkjugfeedersfh05-30-13
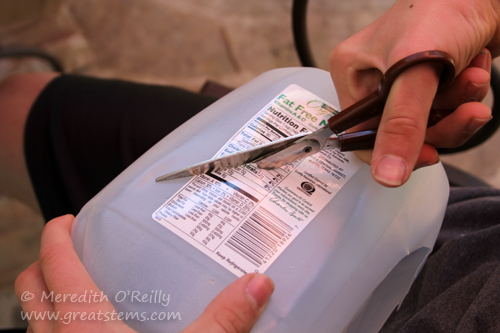
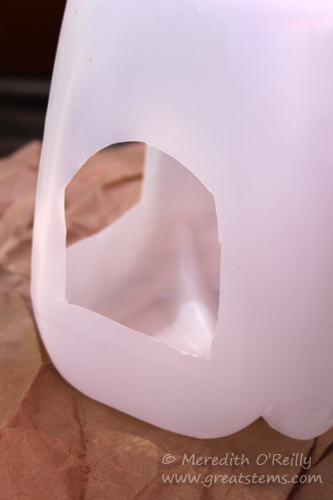
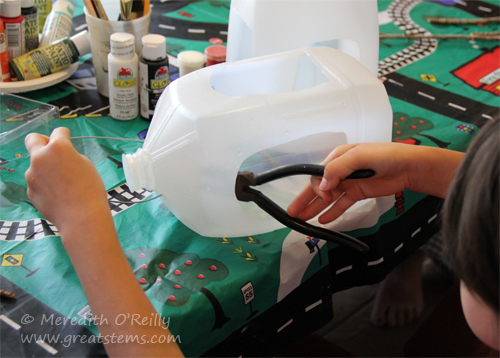
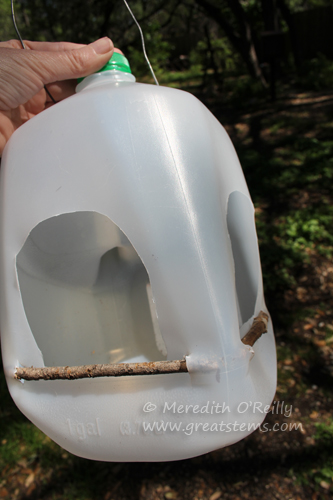
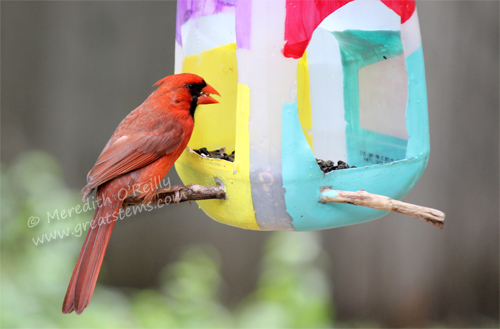
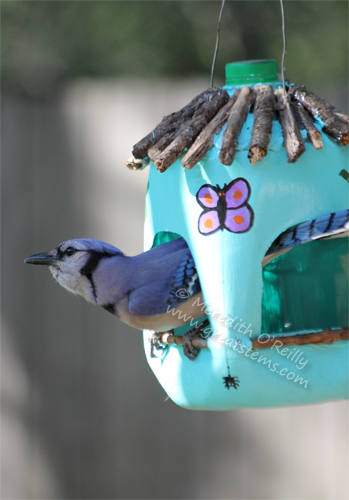
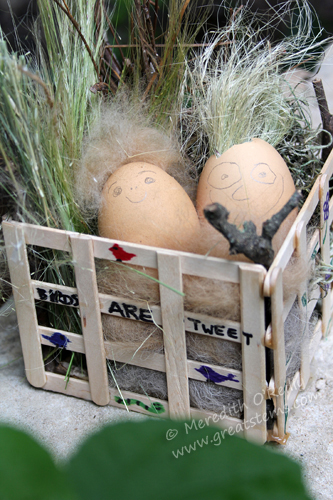
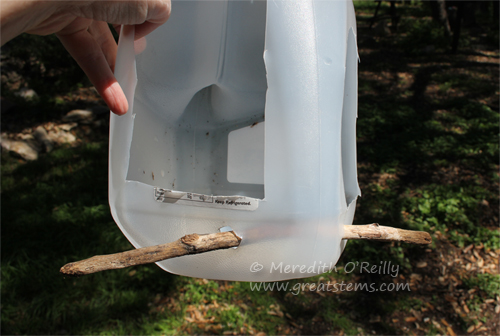
Another option is to create a long perch that goes through the corner. Cardinals especially appreciate this perch style (as seen in one of the first photos above). Again, glue it into place.

milkjugfeedersfg05-30-13
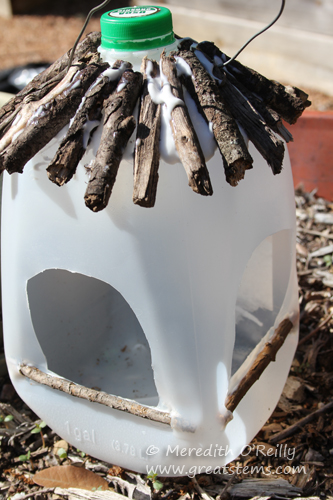
6. Before adding paint or other colors to your feeder, glue on any materials you desire. You can add a roof with small sticks, as shown, but be warned that it’s a challenge to adhere the sticks to the milk jug. You have to use a lot of glue, which can substantially add to your activity time because you have to wait for the glue to dry, possibly overnight. If you have the time, then go for it. We used Outdoor ModPodge to glue these sticks on.

milkjugfeederss05-30-13
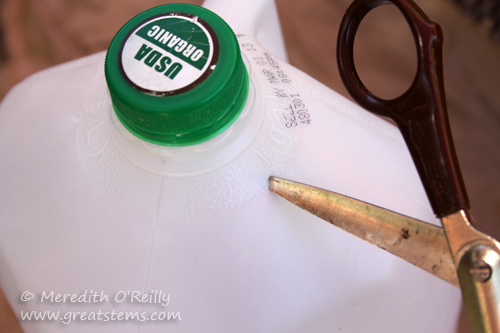
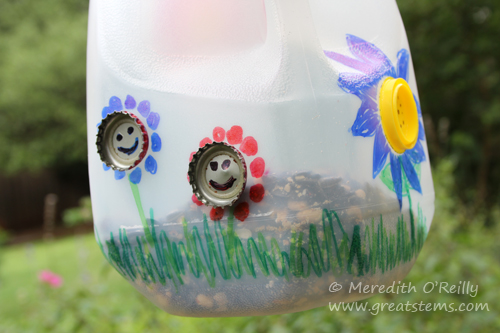
To adhere caps to the milk jug, consider using adhesive dots (such as Thermoweb Zots). To apply, press the cap first onto several dots (don’t touch the dots with your fingers); the dots will naturally lift off the paper. Then press the cap into place on the jug.

milkjugfeedersr05-30-13
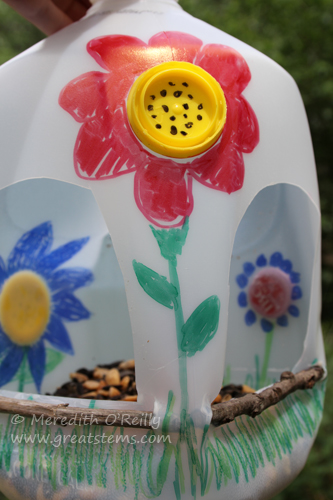
7. Decorate your jug with stickers, permanent markers, or paint, letting everything dry in between stages (note: Sharpies and other permanent markers will eventually fade in the sun — if using these, keep your bird feeder in the shade).milkjugfeedersi05-30-13

milkjugfeedersg05-30-13

To create straight edges, use masking tape.milkjugfeedersh05-30-13
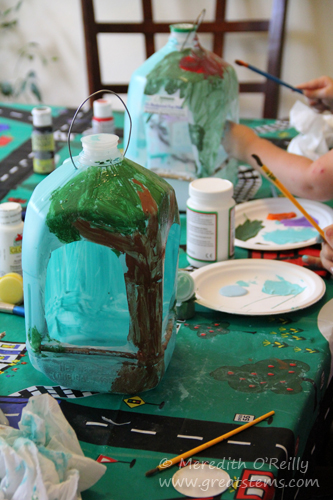
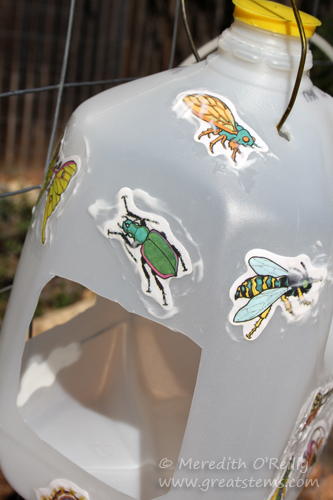
If using stickers, place a thin layer of outdoor white glue over them to help secure them — the glue will dry clear.

milkjugfeedersj05-30-13

Because of the plastic used in milk jugs, adhesion is ever the challenge. For painting, we used outdoor acrylic paint with an Outdoor ModPodge layer over it to “seal” it — however, be forewarned that the result will feel mildly tacky to the touch. If you choose a different glue or sealant, be sure to check toxicity before using it with kids or letting wildlife near it. Also, younger kids might tend to go a little thick as they apply paint — this is fine but expect some of the paint to peel off when the feeder has been put to use by birds and squirrels.

milkjugfeedersp05-30-13
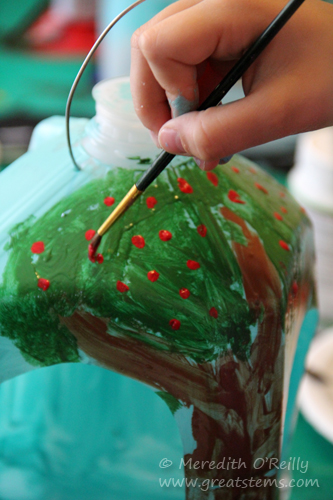
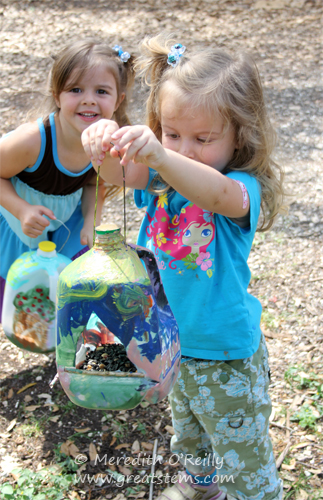
8. Finally, fill with birdseed and hang outdoors. It might take a couple of days for the birds to find your feeders, but squirrels might be happy to show them where it is!

milkjugfeedersl05-30-13 milkjugfeedersk05-30-13 milkjugfeederso05-30-13

Prefer a birdhouse instead of a feeder? To convert this project to an easy birdhouse, simply cut one circle window out of one side of the milk jug, rather than two windows. To make the inside floor less slick (for baby bird leg growth safety), adhere a few tiny twigs or a few pine needles to the bottom.

Interested in other nature/wildlife activities for kids? Visit this page

Wildlife Projects for Kids: Making a Nature Journal

Oh, how I love making nature journals! A nature journal is simply a place to record one’s observations of nature. It might include sketches or drawings, written descriptions or notes, poems, photographs, natural objects such as leaves or flowers, or scientific data such as lists or wildlife tallies. There are no rules when it comes to nature journals! This activity is great whether you are a kid or an adult. We should all keep one. Trust me on this.

naturejournalL05-06-13

Nature journals help us see, understand, and appreciate the natural world around us. They help us tap into our senses, develop our observation skills, and discover our creative side. Very importantly, they help us slow down and relax, and that can be hard to do in this busy world, no matter your age. Kids might be kids, but they experience stress, too. Often their schedules are so packed with school, homework, studying, dance classes, music classes, sports, and other activities that they don’t have much downtime — many parents put a lot of pressure on their kids to always achieve. Some kids stay indoors because of their parents’ worries, and they eventually develop these same fears. Of course, many kids are inside glued to their televisions and video games. Point being, kids today often don’t get much time to be outside to just explore.

naturejournalE05-06-13

Time spent outdoors helps kids develop an appreciation for nature that will last a lifetime. We want them to love and respect the Earth so that they will protect it as adults. But time spent in nature also helps kids relax and enjoy themselves and just be kids!

naturejournalJ05-06-13

Journals are a way to encourage this deeper love and understanding of nature. For kids, they can be a place to draw pictures of or write about what exciting things they have seen, such as an insect with unusual markings, tadpoles swimming in a shallow creek, a woodpecker tap-tap-tapping, or a fragrant bloom that they caught a whiff of.

naturejournalK05-06-13

Grown-ups see nature journals as having multiple benefits for children — sparking imagination and creativity; giving a “secret” boost to academic progress and scientific thinking; helping children make connections between their lives and the natural world around them; helping them study interactions between wildlife and flora or between animals of the same or different species; and giving opportunities for reflection on what was observed in the past to what is being observed now. Plus, it gives children a chance to slow down or even sit still. Parents might have a different reason for wanting that, of course, but when children slow down, they can engage their senses and awareness (and keep from startling nearby wildlife away!).naturejournalI05-06-13

But frankly, nature journals just plain make you feel good. You observe and record, and you accomplish, while at the same the experiencing the fascinating, exciting, and simultaneously soothing natural world around you.

Nature journals are super easy to make with a just a few materials you likely have around the house. All you need is some paper, thin cardboard or a thick paper such as cardstock, a rubber band, a stick (appropriate for the size you make your journal), scissors, a hole punch, and possibly a ruler or pencil if you need it.

naturejournalinstruxB05-06-13
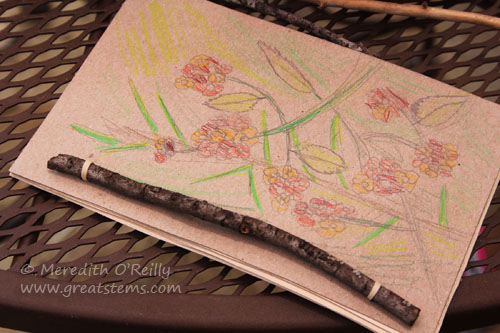
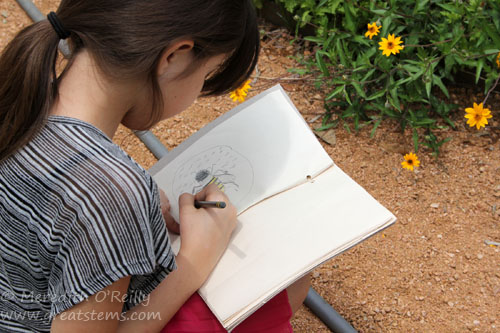
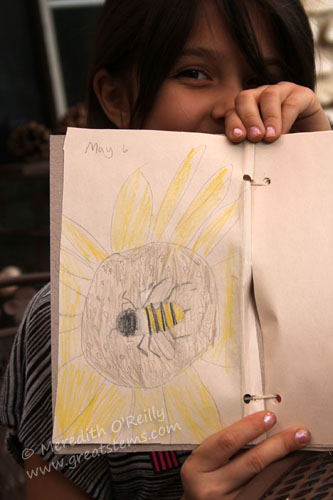
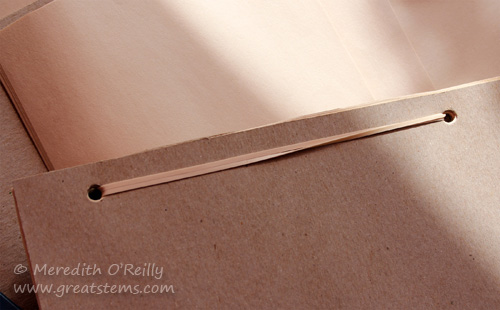
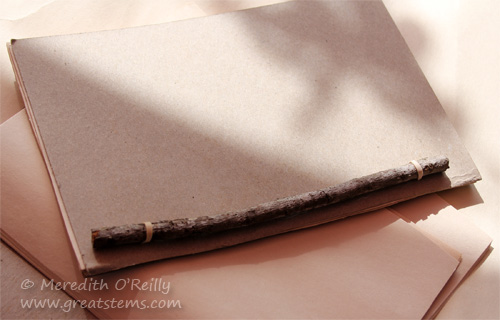
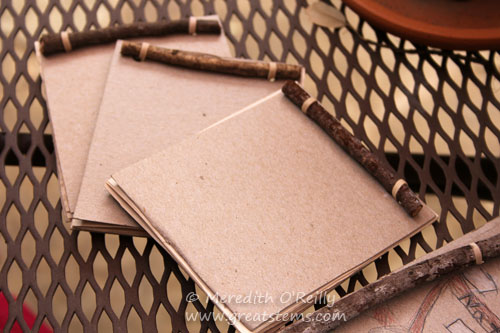
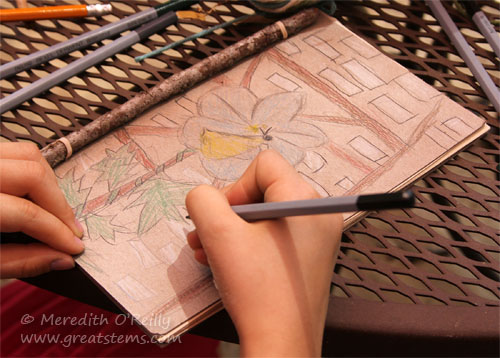
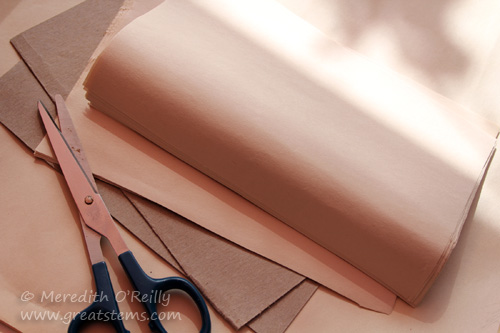
Start by cutting the cardboard and paper to the size you’d like the journal to be. If you need to, use a ruler and pencil to keep things straight.
naturejournalinstruxA05-06-13

Next, punch two holes on one side of one piece of cardboard, where you’d like the hinges to be. Don’t get too close to the edge, but don’t go too far away from it, either, else you have trouble opening and writing in the journal. Then align the cardboard with sections of paper and/or the other piece of cardboard to punch matching holes on the rest of the journal pieces. You want everything to be lined up as perfectly as possible, especially the holes (you can always trim edges later if you need to). When you are done, stack everything up with the cardboard on the outside as the cover.
naturejournalinstruxC05-06-13

Take the rubber band and loop one end over the stick, then through a hole. Stretch the rubber band along the back and through the other hole, looping it on the other end of the stick.

naturejournalinstruxD05-06-13

And that’s it! Time to gather pencils and other drawing tools!

naturejournalH05-06-13

By the way, journals don’t have to be large. Perhaps it would be handy to have one that fits in a pocket. Younger children might find it rather fun to have a mini-journal.

cloudedsulphur05-06-13

Let kids decorate their nature journals how they’d like, and give them the freedom and encouragement to spend time outside, letting them put whatever they want inside their journal. It might be easier for some kids to get started if you point out things they might not see at first, such as a tiny spider on the tip of a flower or the heavy pollen sacs on a busy bee. Note details, such as lobes or veins on a leaf or long antenna on an insect. Once you get them started, they’re likely to see things you didn’t notice!

naturejournalDD05-06-13

Be encouraging as kids explore art — some might feel frustrated at first. It’s all about fun and not perfection, but not all kids see it that way. Give them positive comments about about their work, pointing out details you especially like. To advance their skills (and possibly yours!) teach them how to create simple sketches that they can color in or add detail to later if they like. Kids might need your help with vocabulary, too — whenever you can, teach kids the names of plants and animals they see (it’s okay to tell them when you don’t know the names yourself — perhaps you can find out together!).

naturejournalABB05-06-13

If you go hiking or camping, be sure to take your journals with you! Sometimes it’s easier and quicker to just take a single pencil with the journal, do simple sketches and notes, then finish coloring or adding details at home (or inside the classroom, if you are doing this activity with students) — whatever works for all of you.

naturejournalF05-06-13

Remember, there is no set way to use a nature journal. Kids can take notes or draw, write a poem or song, make a list, tape or glue in an object they found — whatever moves them. How does that moment in nature make you feel? Write it down! Kids also might have fun using their nature journal to make a field guide. It’s a great way for kids to memorize and share the names of plants and animals, simply by writing them down as they learn them and including a drawing for the ID. They can even include a map, if appropriate.

naturejournalC05-06-13

Some kids might want to do tree or leaf rubbings in their journal, or press and glue down a flower or leaf. Kids with access to a camera might want to include some of their photographs in their journal. In fact, kids often surprise adults with their keen eye and photography skills — if you haven’t done this, give kids a chance to use a camera. Some people feel using photos takes away from the purpose of a nature journal, but I think that a nature journal should be anything you want it to be. Yes, I do love the inspiration and creativity that comes with pencil and paper, but a nature journal is personal. Let kids decide how they want to use the journal, and rejoice in what they do, learn, see, and share.

MEOnaturejournal05-16-13

I keep a nature journal, too, as do my teens. Mine is a spiral-bound one, a straightforward sketch pad. There are prettier ones out there, but it’s all a matter of personal preference. If kids want a sturdier journal, take them shopping to let them pick out their own. Some might prefer lined paper or blank paper or a particular journal size. Even a 3-ring binder works.MEOnaturejournalB05-16-13

Finally, encourage kids to add something to their journal regularly. They are creating something memorable, a valuable keepsake that lets them experience again and again joyful or remarkable moments in nature. I know naturalists who still look back to journals from their childhood. Hang onto those journals long after they are all filled up!

Interested in other nature/wildlife activities for kids? Visit this page


Wildlife Projects for Kids: Nesting Materials

In the springtime, mama and papa birds busily collect materials to build their nests. Different bird species will use all sorts of materials to construct a well-supported and often cushioned place for their eggs and future young. Kids and grown-ups can easily gather materials to help out parent birds, setting them out in homemade or purchased containers. What a fun project!

nestingmaterialsB05-06-13

eggnestingmatsB05-06-13

Dog fur is one of my favorite materials to use, perhaps because at my house it’s so readily available (and the dogs are content to share, as they enjoy getting brushed). But I love the fact that Titmice and other birds will sometimes steal clumps of fur directly off sleeping dogs outside — it certainly makes a nice soft lining for nests. Be sure you haven’t used flea treatments on your pets if using this material for nesting options.

nestingmaterialsD05-06-13

When gathering materials, remember that natural is best, of course. Consider the following:

  • Dog fur (free of flea treatments; cat or rabbit fur works, too)
  • Dry grasses (free of pesticides or herbicides)
  • Hay or straw
  • Real cotton fiber
  • Feathers
  • Tiny twigs
  • Leaves
  • Pine needles
  • Sheep’s wool
  • Plant fluff and seeds
  • Snake skin (if you have pet snakes, for example)
  • Coconut fiber

Note: Some people provide thin strips of cloth or pieces of yarn. Natural materials really are best. If you choose to provide cloth or yarn, do so responsibly. Stick with yarns made of natural fibers, such as wool or cotton — these will break down naturally in the environment. Keep the pieces short — 3 or 4 inches — longer pieces can wrap around a bird’s foot or wing or neck, causing death or serious injury. Please do not use acrylic, nylon, or other man-made materials. If using strips of cloth, again stick with natural materials. Keep the cloth less than 5 inches long, cut into 1″ strips.

Never use dryer lint, which can contain harmful residues or retain moisture. Also, avoid any other synthetic materials.

nestingmaterialsA05-06-13

Snake skins? you might ask. Believe it or not, some birds decorate, so to speak, their nests with snake skins. It is believed that they do this to keep would-be predators away, especially mammalian predators. Birds that have been seen using snake skin include Titmice, Blue Grosbeak, and especially Great Crested Flycatcher. I imagine others do it, too, if not for predator avoidance then just because it makes a handy material.

craftstick nestingB05-06-13

craftstick nesting05-06-13

It’s easy to be creative with holders — the important thing is to have fun! Here are some ideas:

  • Suet container
  • Homemade box of twigs or craft sticks (use outdoor, non-toxic glue)
  • Grapevine ball or wreath
  • Small or medium-sized basket
  • A bowl or saucer or small bucket
  • Twine to make a loose ball
  • Cardboard egg carton, with holes cut out
  • Eggshells to make little people
  • Strawberry basket
  • Hollowed-out coconut shell

Whatever you choose, think about bird safety. Can birds land and fly away without getting trapped? For this reason, never use mesh bags — they can trap feet and legs or be a strangulation hazard.

eggnestingmatsD05-06-13We had fun making eggshell “people.” Eggshell people are multi-purpose. Obviously they can serve as holders for different nesting materials, but the eggshells themselves can be beneficial as a calcium source for female birds, who need the mineral in order to lay eggs with strong shells, boosting the survival rate for their young. In the wild, birds might consume snail shells for calcium or even the discarded eggshells from their own nest.

eggnestingmatsC05-06-13To make eggshell people, simply carefully crack eggs as you make breakfast one morning — create a small hole toward one end of each egg. Be sure to save the small broken pieces. Rinse the egg shells and broken pieces, then sterilize them by boiling them for 10 minutes, baking them at 250 degrees F for 20-30 minutes, or microwaving them for 2 or more minutes (with more eggs, lengthen the time). When the eggshells are cool and dry, fill them with dog fur, grass clippings, or other materials. To make a face, paint on fruit or beet juice, or just use a pencil to make a light drawing (FYI: today’s pencil “lead” doesn’t actually contain lead, but large quantities of the carbon-based graphite could irritate birds’ GI tracts (think parrots chewing on pencils); however, a minute amount isn’t a concern).

eggnestingmatsA05-06-13

Crush the smaller broken pieces until they are seed size. Set them out in a small bowl or egg carton, or just sprinkle on the ground — possibly near a bird feeder if you have one. As birds remove materials from the eggshell people or if the shells get broken, just crush those up, too. Then compost the container. Voila!

nestingmaterialsE05-06-13

One extra tip — make sure a bird can easily pull the materials out of the holders. Sometimes suet feeders, for example, can clamp items in too tightly, especially if you overstuff them. Give materials a test pull!

craftstick nestingC05-06-13
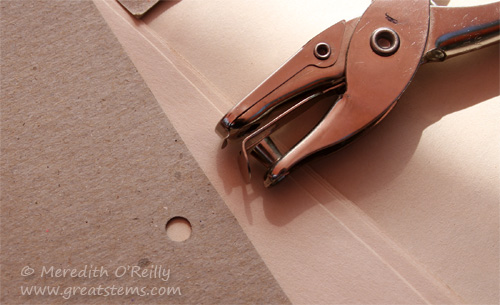
One final note — have fun!

Interested in other nature/wildlife activities for kids? Visit this page

Wildlife Projects for Kids: Log and Pine Cone Feeders

Brrrrr! It’s cold outside! Even here in Texas, major cold fronts can bring sudden freezing temperatures and snow. When temperatures drop, insects and reptiles will hide under protective leaves and twigs and logs, but birds have to expend a lot of energy to stay warm. Their efforts are complicated by the fact that fat-and protein-rich insects, prime energy food sources, can be hard to find when it’s cold outside.

logfeederwoodpeckerB01-09-12

An easy way to provide an energy source in the cold is to put a peanut butter and seed mixture outside for the birds. You can use pine cones, log feeders, orange rinds, or pieces of bark to hold the food mixture. This is a fun project, and it’s a great way to let kids get involved in helping nature. Note: At the end of this post, I talk about alternatives to peanut butter if allergies are a concern, and I also talk about foods you should NEVER feed to wild birds.

Let’s start with a basic pine cone feeder, and then we’ll look at alternative feeders if you don’t have access to pine cones in your area.

Pine Cone Feeder

  • Pine cone (completely natural — don’t use ones treated with scented oils)
  • Wire, twine, or yarn
  • Organic, natural peanut butter (I like to get crunchy, but creamy is fine)*
  • Organic yellow cornmeal
  • Black oil sunflower seed
  • Optional: Peanuts, dried fruit (chopped), or other seed (such as safflower)

pineconefeedersAA03-04-13

1. Start by twisting the wire or tying your twine or yarn around the fat end of the pine cone to create a loop for hanging the feeder.

pineconefeedersDD03-04-13

2. Next, scoop peanut butter into a bowl and add the corn meal in small quantities.

pineconefeedersCC03-04-13

As the corn meal gets mixed in, the peanut butter gets less sticky and becomes more the consistency of fresh play-dough — this is what you want.

pineconefeedersEE03-04-13

3. When the mixture becomes difficult to mix with a spoon, just stick your hands right in and knead the peanut butter-cornmeal to a well-blended consistency. I’ve seen some parents and kids hesitate to get their hands dirty on this step, but this is a really fun part for the rest of us! In fact, once hesitant kids dive in and get going, they usually discover that they are enjoying themselves, too. Plus, getting your hands in there lets you know when you have the right amount of cornmeal — if the peanut butter is still too sticky, add a little more cornmeal. If nothing is staying together, you’ve probably got too much cornmeal, so add more peanut butter.

4. When the consistency seems just right, add in the seed, as well as the peanuts or chopped dried fruit if you have them.

pineconefeedersGG03-04-13

5. Then it’s time to spread the mixture onto your pine cone!pineconefeedersHH03-04-13

You can press peanut butter down between the cone scales, too — the birds will have no trouble getting it out.

pineconefeedersBB03-04-13
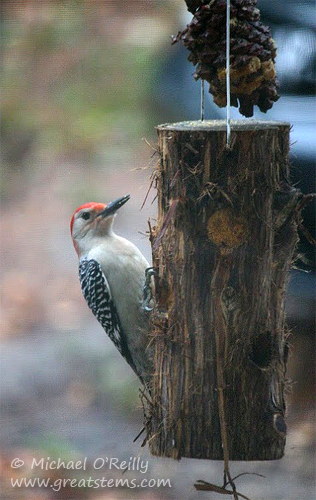
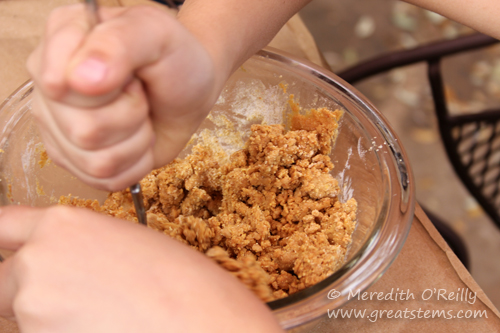
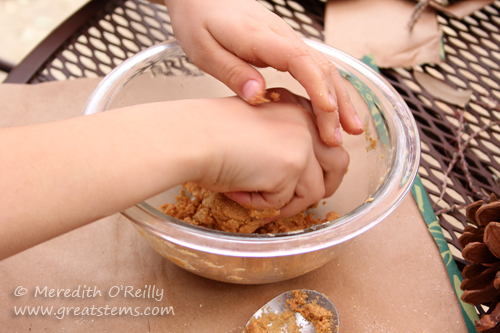
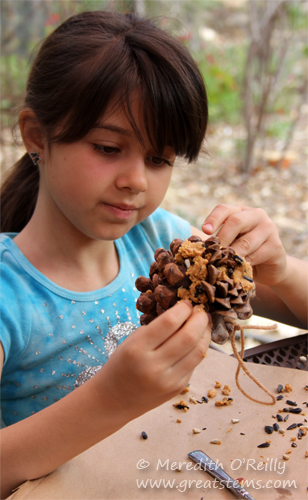
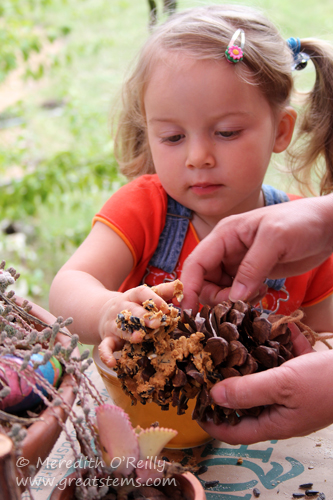
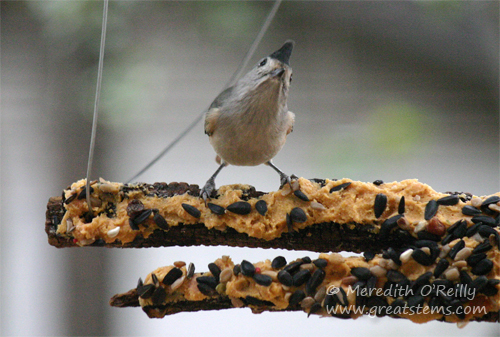
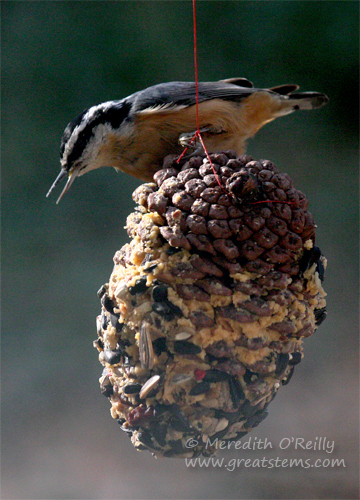
And that’s it! Hang your feeders outside a window so that you can watch the birds as they feast. It might take them a day or two to find the feeders. Don’t be surprised if a squirrel gets interested, too — but the squirrel might just show the birds where to find the pine cone!

If you don’t have pine cones but you have some power tools, you can make a log feeder. Older kids can help with this! Here are the basic instructions — I might do a how-to post in more detail later. Use a saw to cut a log to about 12 inches long (it’s helpful for the log to be 2-5 inches in diameter). With a power drill and a small bit, drill a pilot hole for a screw eye, then insert the screw eye and turn it the rest of the way into place. Finally, with a spade bit (about 1 or 1 1/4-inch), bore holes partially into the wood, about 1-inch deep. Then just add the food, and hang up your feeder!logfeederB03-04-13 
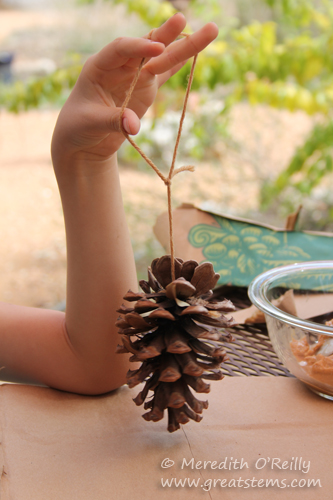
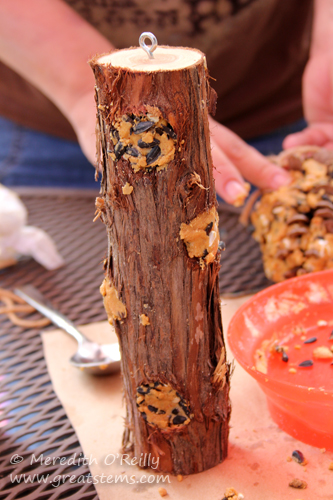
You can also cut one end off a large orange and remove the pulp (give it to the birds!), then create a bowl from the remaining rind by adding a hanging method and filling the rind bowl with the peanut butter mixture.

perchB12-17-10

Another idea is to find a piece of bark that you can hang up and fill or spread with the peanut butter mixture. We created a perch one year that was very, very popular with the birds.

* What if your child is allergic to nuts? Some people use suet, or animal fat, instead of the peanut butter, but it’s harder to buy it organic. Others use vegetable shortening, but I can’t recommend it, unless you can find organic, healthier versions — I take the approach of “if I won’t feed it to my family, I won’t feed it to the birds.” Keep in mind, too, that seeds are often packaged in places that have peanuts and other nuts — you should never assume that a bag of black oil sunflower seeds won’t have traces of peanuts. However, the good news is that there are many other ways to feed wildlife that might be safer for folks with allergies — for example, oranges and other fruits are great choices for birds and butterflies, and there are lots of fun ways to present those to wildlife. Mealworms can be purchased at many pet stores, too — perhaps make a bowl out of an orange rind and fill it wiggling mealworms! Many parent songbirds will love to feed them to their babies.

pineconeRBnuthatchB12-09-10

While I’m at it, let’s talk about foods you should never feed wild birds. Foods that are bad for wild birds are bread or other wheat products (including loaf breads, bagels, cereals, and crackers), microwave popcorn, spoiled seed, chips and other junk food, raw meat, honey, and any foods that have been treated with pesticides or other chemicals. Unfortunately, well-meaning people unintentionally cause harm to wildlife when they provide these non-nutritious or potentially deadly foods to animals. Stick with organic foods, and always research before you feed something you are uncertain about to birds or other critters.

A final note — be sure not to use peanut butter or suet when it’s too warm outside — you don’t want the food to go rancid. But if it’s cold, help the birdies stay warm with these energy-rich treats — and then sit inside with some hot chocolate and enjoy watching the grateful birds!

Interested in other nature/wildlife activities for kids? Visit this page