Giving Broken Garden Tools a Colorful New Life

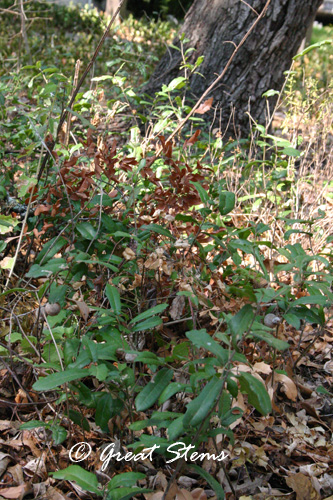
I went outside to take a picture of a lovely blooming and ever so drought-tolerant little shrub in the garden, only to discover that its blooms had come and gone. I’ll have to catch it on the next bloom cycle, because I love it so (it’s called a Pyramid Bush). But what did catch my eye were some of the objects decorating our fence, and I realized that I’d never actually posted about them.
gardentoolsf08-28-13

From time to time, tools break beyond repair, and I hate to see them go to waste. It’s amazing what a bit of paint can do.gardentoolsb08-28-13

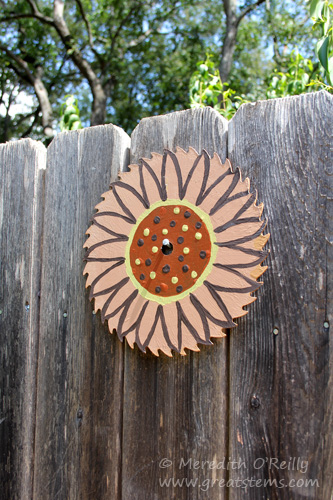
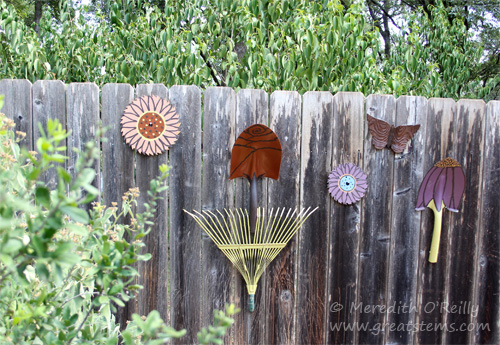
This saw blade isn’t technically a garden tool, but it certainly has helped build things for the garden. It makes a perfect flower.gardentoolsa08-28-13 How about a shovel that becomes a rose, with a rake as the foliage? The rake is actually painted a light green, but in the sun it looks more yellow than lime, I admit. Someday, if I happen to have a different color of leftover paint, I might paint over it, but part of this endeavor is utilizing what I have at home, not going out and buying something. gardentoolsc08-28-13

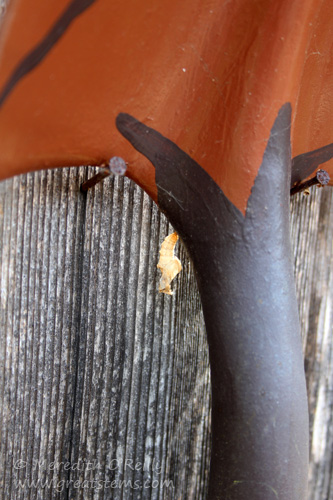
Look what I found behind the rose shovel — a spent Gulf Fritillary chrysalis. That little caterpillar crawled a long way across the garden to become a butterfly!gardentoolsd08-28-13 
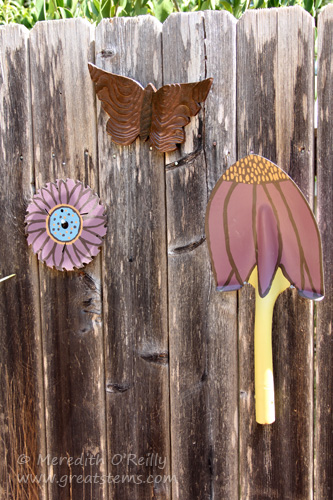
A smaller sawblade gave an opportunity for another bloom, and a second shovel blade became a Purple Coneflower. The coneflower might be my favorite of the tool bouquet, honestly. The butterfly isn’t a leftover tool, obviously, but a gift from sweet friends.

Some day I might paint some stems on the fence to complete all the flowers. I had saved a broken garden hose to be the stems, but the pieces are more complicated to hang and I just haven’t been inspired yet to do so.gardentoolse08-28-13

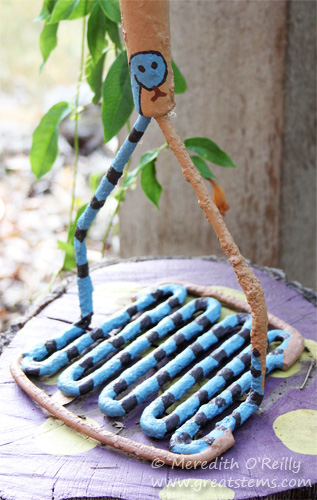
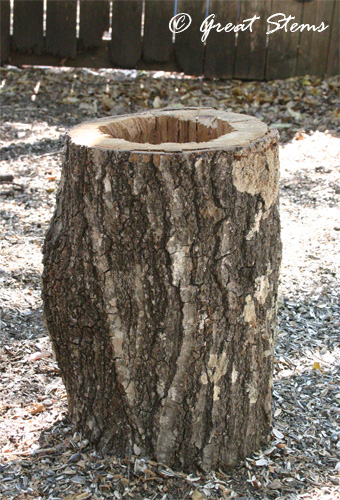
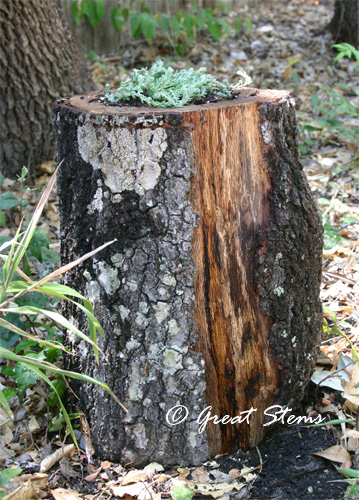
A little too awkward to hang on the fence, this tool gets its own stand. The broken mud masher, formerly used to mix cement, inspired a serpentine theme. By the way, it’s sitting on a painted log — we have a few such logs in different colors around the backyard woodlands, and they add a nice touch of color here and there.
gardentoolsg08-28-13

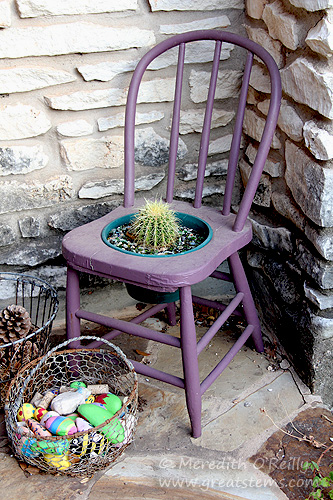
Though this painted old chair (I’ve always called it a potty chair, but I don’t know if that’s really what it once was) isn’t exactly a former tool and nor is it broken, I thought I should include it with the group of colorful, re-purposed objects around the garden. I painted it a few years ago and added a Golden Barrel Cactus for mischievous fun. Just don’t sit on it!

Got any fun ways you give broken tools a new life?

Homemade Cedar Trellises

I’m big into using natural materials to make functional features in the garden. Here in Texas, cedar is easy to come by. We’ve used it to make cedar-slice pathways and mulched woodland pathways. We’ve also used it to make log feeders for birds. The latest projects are our cedar trellises.cedar trellis

What people here call cedar is actually Ashe Juniper, which is native to Texas. Ashe Juniper is a great wildlife tree (very important for many birds and a host plant for Juniper Hairstreaks), but its habits don’t appeal to some people. Because it readily establishes in overgrazed or disturbed lands, many ranchers don’t like it, and because its pollen triggers winter allergies for some folks, they don’t care for it, either. But as a wildlife lover, I love Ashe Juniper. As a bonus to others not caring for it, however, the wood is available for many a project because so many folks try to clear the trees off their land. And then they do it again when the trees grow back.cedar trellis

I wanted a self-standing trellis to give my dewberry a place to grow. For a long time, I let the dewberry create a bramble patch, but it felt too limiting — I wanted to be able to plant other plants in the same area. You can see here that I’ve cleared the surrounding area of bramble — now I just need to add new shade-loving natives.

cedar trellis

This trellis lets the dewberry grow up instead of out, and now I can control where I want the dewberry to grow.

Made of local cedar, the trellis fits well into the natural settings I’m trying to create. That’s a Rock Rose, or Pavonia, in bloom in back.

cedar trellis

To make the tripod, we simply cut 1″- to 2″-diameter cedar posts to the size we wanted, and then used wire of a flexible enough gauge to tie the pieces together. A tight twist using pliers keeps everything secure. It’s so easy a project that one person can build it in an hour or two.cedar trellis tripod

In the backyard, we added another tripod trellis.Passiflora lutea

This one will be a support structure for our native Passiflora lutea. The vine is still a wee baby, because the dogs kept breaking it, but ever faithfully it keeps trying to grow. Now it is protected by the trellis, so it should be able to grow safely.cedar trellis

Elsewhere on our property, we have another type of cedar trellis, ladder-style. It looks great against the rock walls of our house.

cedar trellis

We used 2-3″ posts for this one and nails instead of wire. Despite its simplicity, it was harder than it looks to make it. We pre-drilled holes just to get the nails to go through, but it still took a lot of determination. My husband was in a bad mood that day as a result. As an alternative, just use the flexible wire again.

This trellis will be for the Berlandier’s Trumpet, which also suffered a bit from the dogs until we provided the trellis as protection. At least I think that’s Berlandier’s Trumpet — it is still so small! But that’s what I recall planting there.

Cedar Trellis

We made another one for the front yard. I’m still trying to get a vine established there. This time, I’ll go for Crossvine, me thinks. Nothing else has been happy, but Crossvine can handle the shade.

To show you a full vine on a trellis of this type, check out this lovely one at the Wildflower Center. Theirs is a little fancier.

Coral honeysuckle on cedar trellis

Natural trellises — love, love, love!

Clay Family

This winter, the family decided to have fun with clay.

claybatpullsa01-15-12.jpgHere are my bat fan pulls. They are Mexican Free-tailed bats, of course, in honor of Austin’s giant colony at the Congress bridge.

claybirdsa12-11.jpg

I also tried my hand at making a Carolina chickadee. I kept looking out the window at the real birds for models.

claybirdsb12-11.jpg

It’s hard not to adore Nolan’s bluebirds. They are kind of like blue ducks, but we’re all okay with that.

claybirdsd12-11.jpg

He also made a great and most vibrant Painted Bunting.

claybirdsc12-11.jpg

Logan made this Ruby-Throated Hummingbird for his great-grandmother. He also made other birds and even little itty bitty bats.

 
claybirdse12-11.jpgMichael played with brown clay for a long time, and we made all sorts of jokes about chocolate poo. And then all of a sudden out of his hand appeared a hawk!

We’re not clay experts, but we had a great time. Many of our clay items became holiday gifts for family, and we also made homemade wooden block puzzles this year. We’re just big fans of making gifts from the heart. I’m already thinking about next year’s homemade gifts. What shall they be, what shall they be?

New Cedar Log Path Creates Woodland Zen

cedarpathb08-29-11.jpg

Meet the wood path that cost us nothing but time and the purchase
of a $50 electric chainsaw.

Our side yard has long been a wild mix of large trees, understory trees and shrubs, brambles, and a set of plants I’ll just refer to as “miscellaneous.” I consider it woodland despite the fact that it sits between two houses, and in fact it serves as a small habitat corridor that is very popular with the wildlife. I’m quite fond of this area, and I intend to fill it in with many more wildlife-friendly native plants to serve as a habitat, visual screen, and sound barrier (we live near a highway).

sideyard08-29-11.jpg

We’ve attempted planting a bit here and there. However, the Oak sprouts mixed with the prickly vines of Dewberry and Greenbrier have been, if you’ll pardon the pun, a thorn in my side. I don’t actually want to get rid of them, but I do want to control them so that I can increase other plant diversity. It was clear that I needed a better plan of attack so that I could successfully manage the area. A pathway was in order. But I wanted it to be natural, cheap, and nature-friendly.

I thought about just using cedar mulch. But I wanted something that would be clearly defined and easy to maintain — mulch can spread beyond its original boundaries and will sometimes still let weeds through. Decomposed granite has its own issues. But thanks to a few cedar logs I had around from a previous project, I became inspired to slice them up to create mock flagstones. Of course, I needed a lot more logs, so I looked for free wood of various diameters on Craigslist. I think we used about three mini-van loads worth for this project (I’m so technical).

cedarpathc08-29-11.jpg

We realized pretty quick that it takes time to slice up a lot of logs. To make it easier, my husband built a little stand to hold the logs — what a difference that made. While he cut the logs into roughly 1.25″ slices, the rest of us cleared brambles and miscellaneous plants to create a pathway through the trees.

cedarpathg08-29-11.jpg
I had fun laying the path — it was like working on a giant jigsaw puzzle. Of course, it was pretty easy to fit the pieces together on this one. You can see the red color of the freshly cut logs mixed with older slices that had already turned brown.

cedarpathd08-29-11.jpg

And rather than lay them in sand, which I never like mixing with clay soil if I can help it, I just laid them directly on the dirt.

cedarpathj08-29-11.jpgThe log slices follow the natural ups and downs of the soil — I made no attempt to level the ground anywhere.  

cedarpathf08-29-11.jpgAfter laying the path, I spread leftover sawdust to fill the gaps between the slices, like mortar — except not like mortar.

cedarpathh08-29-11.jpg

A view of a longer portion of the path, still covered in a cushion of sawdust

I also added a few small limestone rocks gathered from around the yard to give a casual border to the path. The path defines the future planting areas for the tree-covered area. I envision an assortment of understory trees, shrubs, and perennials adding pleasant greenery to the already scenic wood path. 

To show off the cedar, I swept the wood path with a broom. The sawdust between the slices created a finished look. Here’s where I’ll admit that I actually like the path still fully covered in sawdust equally as well — the sawdust gives an extra cushion that lets you bounce a little along the path. But then you miss getting to see the log slices underneath, and they are just plain cool.

cedarpathi08-29-11.jpg


Cedar log slices with saw dust used to fill the gaps

I am obsessed with our new path. Everytime I look at it, I just sigh a peaceful sigh. Of course, it’s still too hot and dry to plant anything around the path right now, but the path is so pleasant in appearance that while inside I repeatedly walk over to the kitchen window to see it again. 

The advantages to this wood path are many, as I have discovered:

  • It’s natural and organic
  • It’s free (except the electric chainsaw, a small one that we spent $50 on)
  • The wood is locally obtained and grows readily in Central Texas
  • The space between the slices easily lets moisture penetrate the soil below
  • Ashe Juniper is naturally rot resistant
  • It’s comfortable to walk on
  • You can walk barefoot on it, too
  • Log slices can be easily moved around or replaced, not that we’ve had to
  • The path stays in place without shifting
  • The path can be swept with a broom or raked
  • It’s easy to create
  • I can use leftover wood bits in my closet to keep moths out. And the cedar smells great.


cedarpath08-29-11.jpg
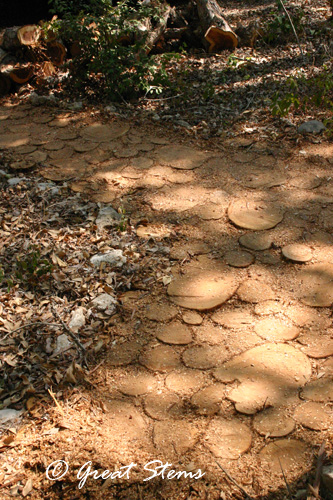
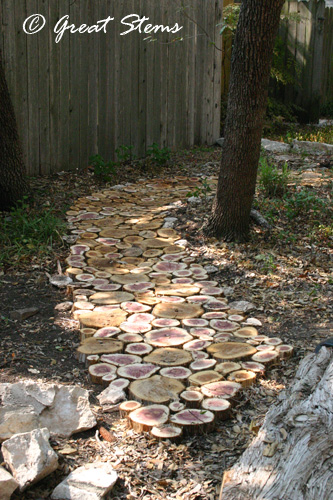
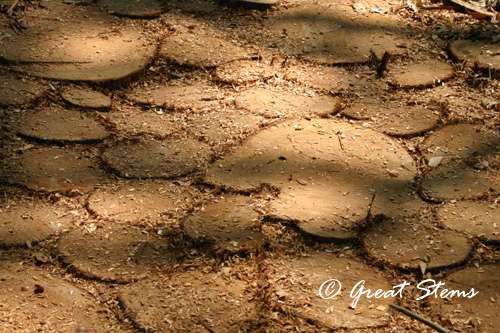
The logs are staying nicely in place, human- and wildlife-tested. Were this path in our backyard, I’m certain that our big, rambunctious dogs might test it to its limits, though.

Is this a weekend project? Yes. Did it take us months because we are lazy slowpokes? Yes. But do we love it? YES!

Stump Planters Incoming

Goodness, I’m behind on my blog — I’ve been swamped, but in a good way (I can say that because I’m not excessively stressed at this very moment, but give me a few minutes and it will come back, I’m sure).

I just walked through the full-sun backyard, trying not to immediately turn around and seek cool shelter back indoors. The natives are hanging in there as best they can. The lawn is fried from the heat and drought. Note that once again I’m not taking pictures. (A) It depresses me, and (B) I don’t want my camera to melt in my hands. But patches of dirt where once there was Bermuda gives me hope that maybe, just maybe, the Bermuda will die out and I’ll have an easier time replacing the lawn. Must find the positive in an extended drought! Here’s another — guess what’s happening in the neighborhood invasive forest?

My gardening is practically nil, but even so we’ve managed to tackle a few related projects. I’ll start with the simplest — a new stump planter made from an old tree my brother-in-law wanted off his property.

 
stumpplanter08-26-11.jpgI put old trees to good use — left whole and intact, they are excellent for wildlife, providing nesting and cover sites, as well as insect sources for birds and other wildlife. But stumps and sections like these make excellent natural pedestals for birdbaths, birdfeeders, and other nifty garden stuff, as well. Having one as a planter has been on my to-do list for a long time.

And so my husband drilled and chiseled one out for me. It sounds easier than it was, but since I wasn’t the one doing it, it was easy — for me. In any case, he’s the best, and I love it.

stumpplanterb08-26-11.jpgFor this planter, I wanted a sedum, so we kept the depth of the planter fairly shallow. There’s not much room for more than one plant, either, but I’m not complaining. With a little deeper hole in the next planter, perhaps I could add a native grass, vine, or blooming perennial — I’ll work on that! Wouldn’t Blackfoot Daisy look great? Ooh, or Chocolate Daisy — then I wouldn’t have to bend so far to take a sniff of the delicious hot-chocolate aroma!

stumpplanterd08-26-11.jpg

So when I can convince my husband that he should make another stump planter, I’ll report back with new pictures. In the meantime, the picture above gives a little glimpse of another outdoor project — it’s a favorite!