Saving the world from organized aphid crime
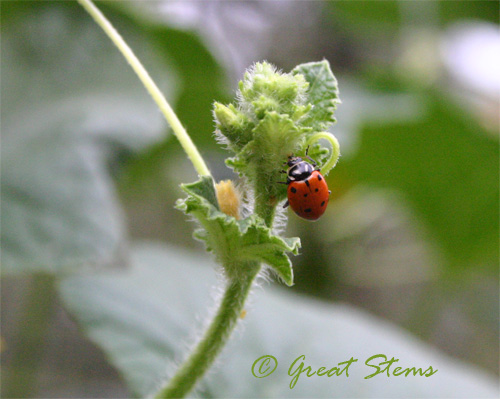
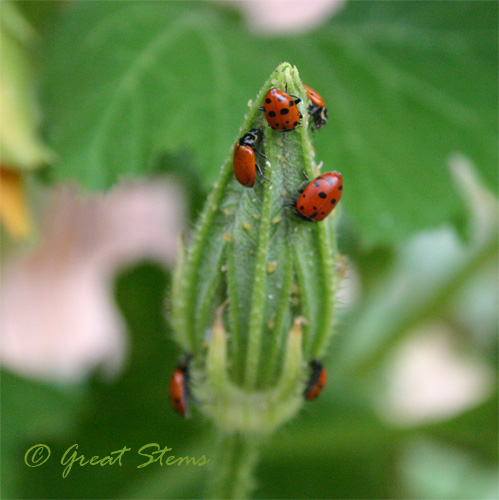
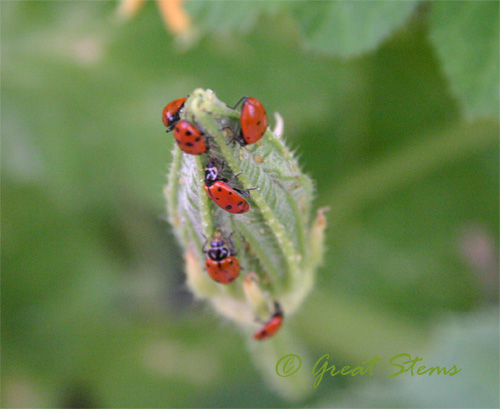
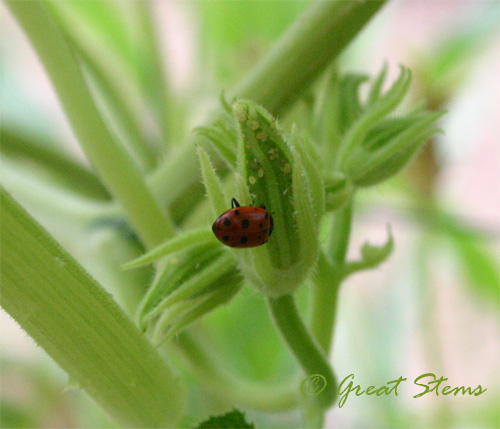
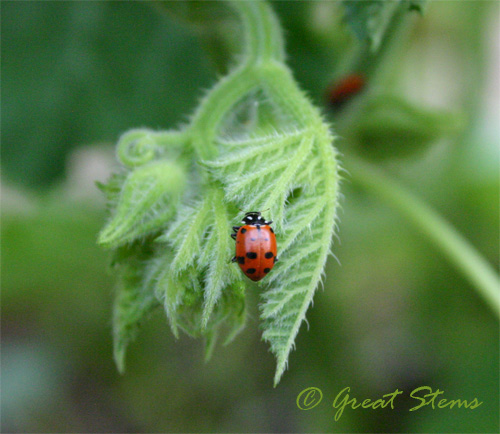
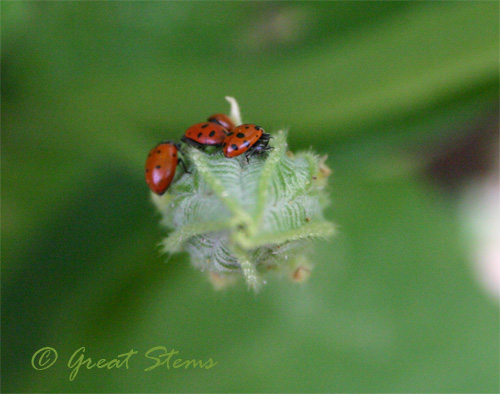
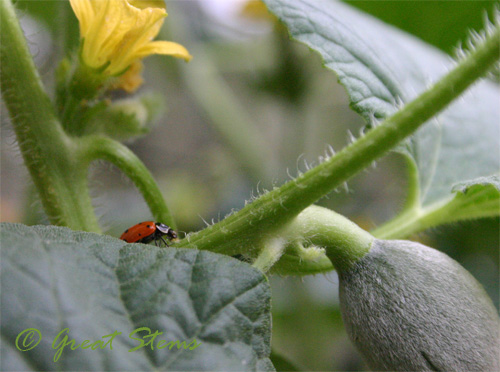
Our heroes!
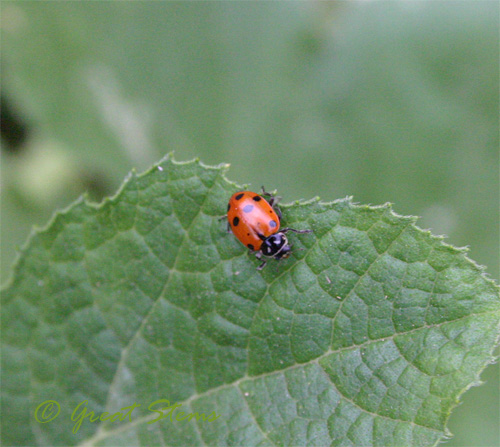
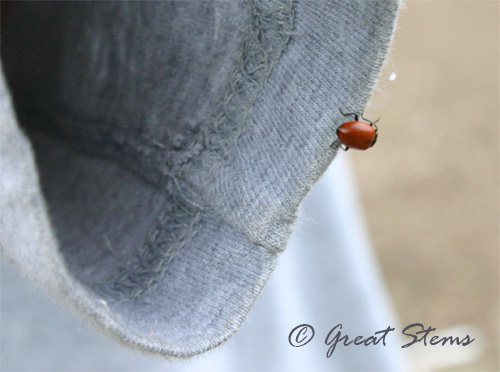
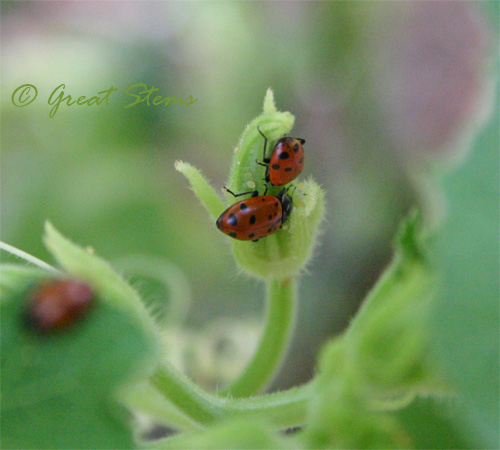
Saving the world from organized aphid crime
Our heroes!
When I started my garden last year, I focused primarily on choosing native butterfly/caterpillar and hummingbird plants, and I kept telling my husband about how different our yard would look next year (which is now this year). But I knew that he wouldn’t really get into it until he saw his first hummingbird. For my husband, hummingbirds remind him of visiting his grandparents in Uvalde, and so the little birds are quite special to him. Now that our garden is growing and we get hummingbirds regularly, it’s fun to watch my husband get such enjoyment out of our garden.
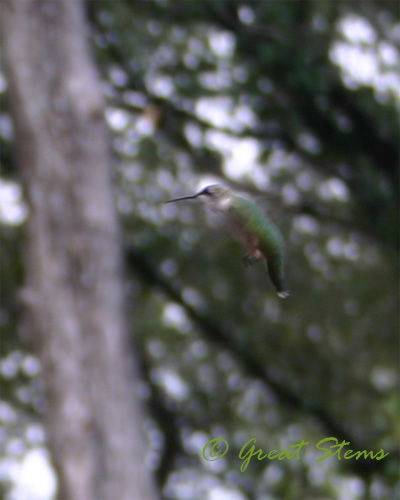
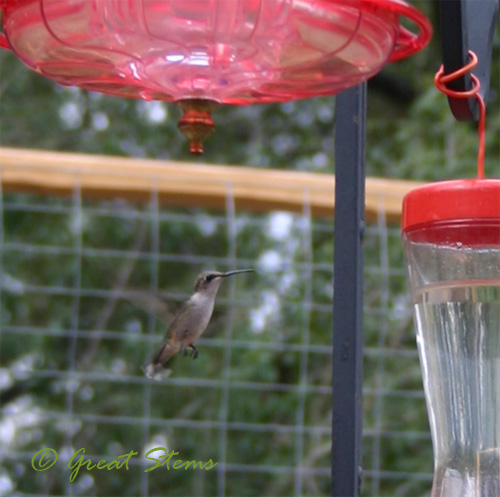
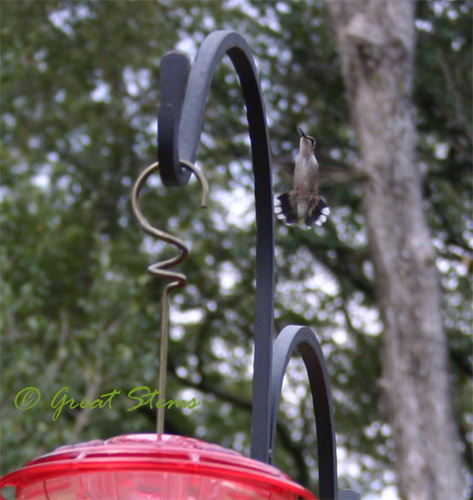
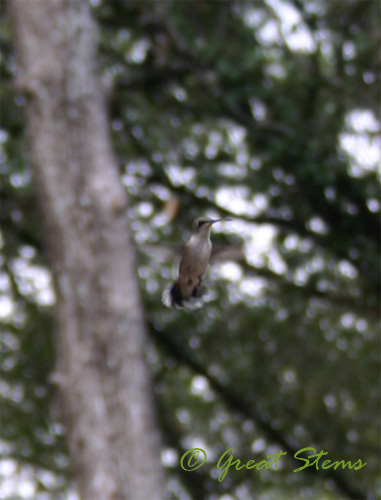 We have many varieties of hummingbird plants now, but the plants are still more or less small, so the main visits are to the feeders, though I’ve seen visits to the Salvia and Flame Acanthus. We had just one feeder up for many months, and then a few days ago, I found a second hummingbird feeder in the back of our garage, and we set it out. I don’t know whether it was the combination of two feeders or the fact that migration is underway, but that very day we had five hummingbirds zooming around. We sat out on chairs and enjoyed trying to identify them. I couldn’t get pictures of them all at once — they were all flitting about trying to push the others away from feeders while trying to sneak in some sugar themselves.
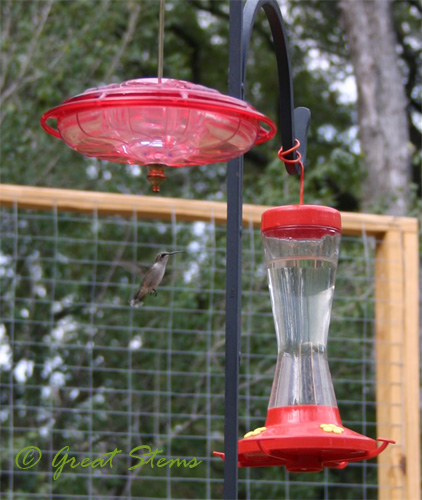 Of the two feeders, I much prefer the UFO-shaped HummZinger feeder over the taller, more traditional feeder. There are a few reasons for this, but primarily the Hummzinger is much, much, much easier to clean, and it has a built in “moat” to keep the ants out. It’s all plastic, which is a bummer, but the design is sound and it feeds da birdies, so I forgive it. It helps keep the wasps out, too. It’s also more affordable than the blown-glass feeders, which my dogs would break anyway. It’s very noticeable how quickly the liquid goes down in the tall one, so I’m not sure if it means the tall one is the first choice for the hummingbirds. This is worth investigating!
 We had to visit one of the big building stores yesterday for house repair stuff, and as I wandered through the garden center just to see what was there, I passed by a couple buying hummingbird feeders and food. I decided to offer them some friendly advice, that making your own sugar water is better than buying commercial syrup because red food coloring is reported to be dangerous for hummingbirds, plus making your own saves money. But this couple just looked at me quite annoyed, and the husband stated that hummingbirds won’t come to the feeders unless it has the red liquid, and I could tell by his tone that he considered me to be foolish and ignorant and that I needed to mind my own business. So I said very pleasantly that yes they do come to the feeders without red liquid, and I moved on, hoping that because the wife also said that they would, that maybe she’d actually someday stop buying the red liquid. But I’m not so sure the husband will. Tried to help. Denied. Move on. Clearly this guy is not a friendly garden blogger or garden blog reader!
But I thank him for the inspiration behind today’s post — tips for attracting hummingbirds to your yard, with details on feeders and making the syrup.

Other than that, be patient. This time of year, many hummingbirds are in migration. Next month, my family is going to the Gulf of Mexico to hopefully see migrating hummingbirds en masse, so I hope I’ll get a few good pictures to share.
 FYI, I looked into making my own hummingbird feeders with recycled bottles. But upon investigation, I learned that the long tubes used for the typical upside-down feeders, homemade or store-bought, tend to leak, causing all sorts of problems. I decided to save the money and avoided purchasing the tubes. I still hope to make my own someday, but I won’t be using an upside-down version.
Now that the kids are back in school, I’m trying to take a few days to get the house back together. It’s been a mess with all the gardening, dogs, painting, and constant activity, so I’m a green cleaning machine (my family’s working their elbow grease, too). At the same time, I’ve been adding some new pages to my blog’s sidebar with some tips for going green. I’m always looking for ways to be eco-wise in my home, but I’m still learning and incorporating, too, trying to make it all routine. Being eco-wise is obviously important to our planet, but sometimes it’s hard to get started or hard to think beyond what you have done all your life. So if you find a useful tip or two, I’m happy! Part of the reason I decided to work on these pages was to remind myself to continue helping my family take positive strides toward reducing our negative impact on the planet.
To launch the new pages, I’d like to pay homage to the Indispensable Vinegar. It might not be fragrant like that rose in your garden, but it’s oh so very useful. Take a look at all it can do for you!
Inside the home, vinegar can be used to:
Clean kitchen counters and sinks
Clean mirrors
Clean bathroom counters, sinks, and bath tub – either use diluted spray or making a scouring cleanser with baking soda, liquid detergent, and vinegar
Get soap scum off of glasses
Break down bodily fluids, such as vomit or feces, in the carpet or on your floor (dilute 1:1 with water)
Clean and soothe irritated skin after working in the garden (or touching poison ivy)
Deoderize a garbage disposal
Clean the inside of a refrigerator
Keep ants out of the kitchen
Soak pot stains to get them clean
Soothe itches from bug bites and poison ivy
Clean toothbrushes (and dentures!)
Laundry – add to your wash cycle for stubborn smells in your clothes or in your machine. Use dilute vinegar to loosen stains on your clothes before washing
Clean windows
Absorb smells – just put a bowl out overnight!
Clean litter boxes
Clean toilets, inside the bowl and on the exterior
Remove stains and smells from counters, pots, dishes, and hands
Mop the floor (particular useful on ceramic tile with grout; however, don’t use on marble)
Clean stains from carpetOutside the home, use vinegar to:
Clean your barbeque grill
Clean upholstery stains
Clean birdfeeders (always rinse well, regardless of how you clean)
Keep pests away from your garden bed, including rabbits and cats (be careful where you place, and don’t spill – it’s a natural plant killer)
Clean your trash bin
Clean stains off concrete
Clean clay pots
Remove ice or bugs from car windows
Kill weeds — no need for Round-Up! Spray directly on weeds (careful of your other plants), on stubborn tap roots, and even on poison ivy! Some people use a combination of vinegar, dishwashing liquid, and salt on their poison ivy, too. Others heat the vinegar first to strength the acidity.
Clean windows
PRACTICE CANCELLED DUE TO RAIN
Rock-a-bye, baby
In pantyhose
You won’t fall down
When the wind blows
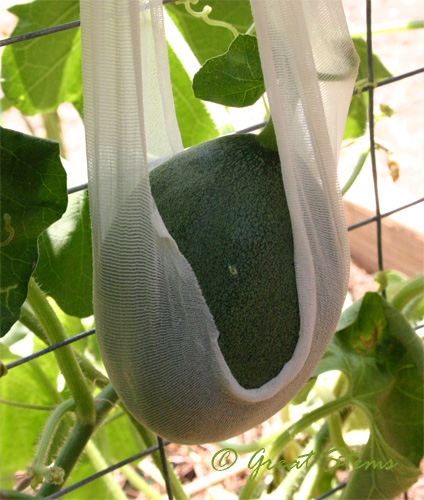 Snug in your bed
Some melons might laugh
Till they drop right off
And go-o-o CRACK.
Look what I discovered was visiting the cantaloupe today.
 I feel like I’ve reached a major gardening milestone — I’ve officially attracted a (major) bee to pollinate my flowers. He was quite a busy bee, too. My pictures aren’t great — the sun was high, and I was hot, but I snapped a few and got myself out of there.
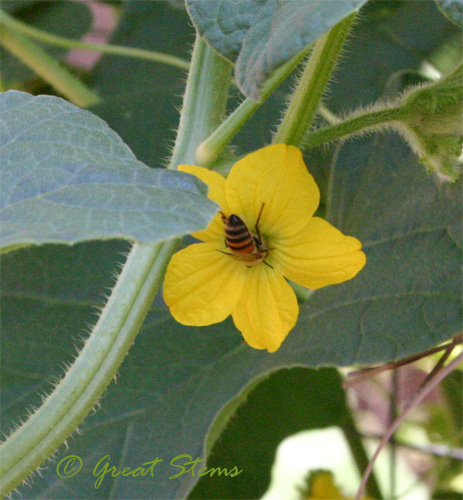 Is he actually a honeybee? That would make me extra happy.
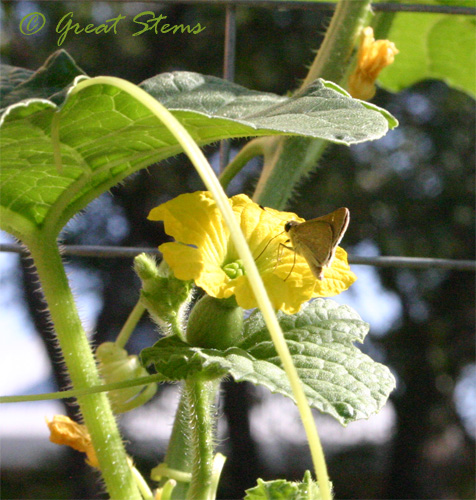
There was also this little butterfly around, with a nice long proboscis. I believe it’s a skipper, but I don’t know which kind yet.
So it’s a happy day. Plus my kids are back in school as of today. Brain power!
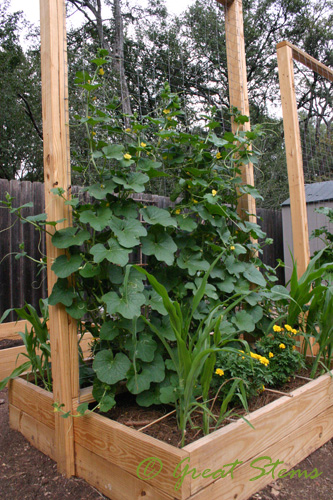
Two of our three raised beds are green and busy, and our third bed patiently waits for temperatures to cool. Fall planting is not too far away! I’ve selected seeds for a variety of fall plants, and the desire to go straight to having four beds is pretty strong at this point. I’ve expanded to the fence line, as well, a work in progress. Part of me keeps looking at the rest of the yard, wondering whether I have the nerve to turn it into a much bigger garden, but four beds will keep me busy enough for this year. I’m already planning to at least move the shed to get more space for raised beds.
 The challenge now is that I’m educating myself on crop rotation and multi-year planning. I realize now that it might have been wiser for me not to put cucurbits (melons and squashes) into two of my three beds, because it will be difficult to start a good crop rotation plan with what I have (you want to move crop families with each season/year). I’m not too worried about it, as these are brand new beds, and so far the pests/diseases have not been too bad. But I want to do this as right as I can from the get-go. Inside I’m chuckling, as I have sooooo much to learn, and (more) mistakes will most certainly be made.
But I’m doing research – taking classes and visiting my trusty friend Google. I’ve started a 3-ring binder notebook, storing planting guides and tips, and in it I will also place anything I print out related to my garden. Nice and portable. This blog will serve as the main journal, though.
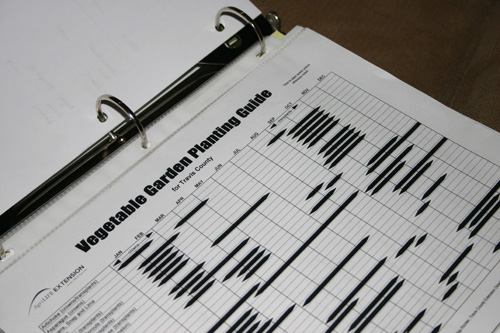
Planning so far ahead is scary, but it’s the best way to maximize harvests in the planting seasons. I’ll post my diagram once it’s complete. Of course, it’s all subject to change! After all, as I’m learning, there’s always something obvious to others that I’ll not figure out until after I’ve moved forward and gotten myself into a big mess (like not using seeds from store-bought cantaloupes). Little things like how corn can help get rid of root nematodes, which could affect carrots and other root plants, and how certain plants can release toxins that inhibit small seed germination – it can be overwhelming knowing how much I have to learn. Companion planting, too – plant this plant near this plant, but this other plant will inhibit growth of said plant, so plant it near this other plant… ACK.
Part of me wants to be the kind of gardener who just plants stuff and sees what grows. But it’s clear that there’s a lot more to a successful farm garden than just sticking seeds in the ground and adding water. If something fails, then months to a year might go by before you get to try again. Ouch to wasting that time and money. So, education.
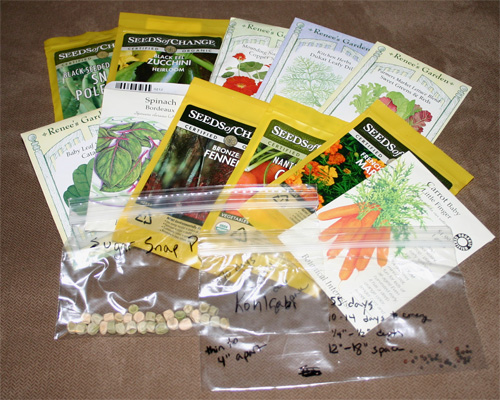
Fall plants I’m looking at include kale, kohlrabi, spinach, carrots, lettuce, strawberries, garlic, and peas. I’m planting zucchini and beans now, catching their late summer planting window. That fourth bed is likely to be dedicated just to strawberries for this upcoming season. Yum.
Edit: My husband just tentatively asked me, “What’s kale?” Muahahaha.
“A Watched Cantaloupe Never Fruits”
Yesterday I joined many Austinites for another veggie class, this time taught by Master Gardener Patty Leander. During her excellent presentation, Patty covered a lot of information regarding specific fall crops recommended for central Texas. I particularly appreciated the various resources available as printouts, such as lists of recommended seed varieties and good seed resources (you can find these pages at the Central Texas Horticulture website, under Gardens & OrchardsàVegetables; also adding to my sidebar, even though it’s by Aggies). Caroline from the Shovel-Ready Garden was there, as well as Master Gardeners and Austin Garden Bloggers Bonnie from Kiss of Sun and Vicki from Playin’ Outside. I heard rumors of there being other local garden bloggers there, too, but I didn’t get to meet up with them.
After the presentation, we chatted for a bit, even talking about my cantaloupe worries and laughing about the plant sex thing. None of us knew what to expect for pollen from male cantaloupe flowers, nor whether I should be concerned about the potential hybrid-ness of my cantaloupe and the sterility of my plants’ male flowers. So basically I went home still on the same path of “wait and see.”
 Not really wanting to feel sad that my female cantaloupe flowers were pining for potentially potent pollen, I put off visiting my garden until late in the day, then decided to go out and squish a few bugs. I’d had the kids watering the veggie garden for the past few days, so I was out of touch, and the bugs seemed to figure it out. The aphids are spreading, I might have some red dots that could be spider mites on my big pumpkin plants, and the little as-yet-unidentified red bugs on my cantaloupes are getting more numerous, along with their larger black versions. So I did a little veggie “debugging.” Sweat bees are still my tiny little pollinating buddies – I check the inside of a flower before I do any additional hand pollinating.
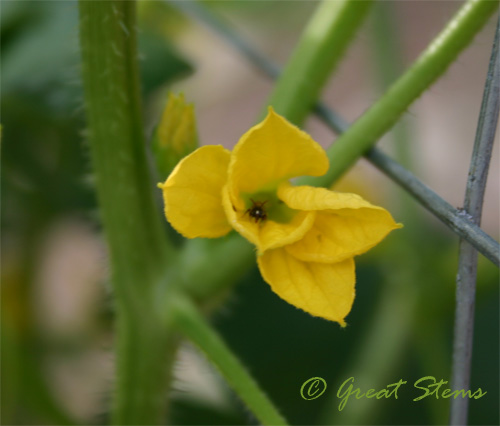
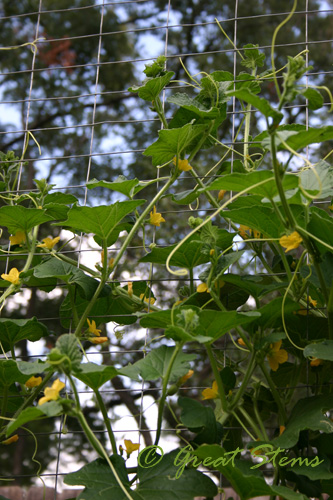
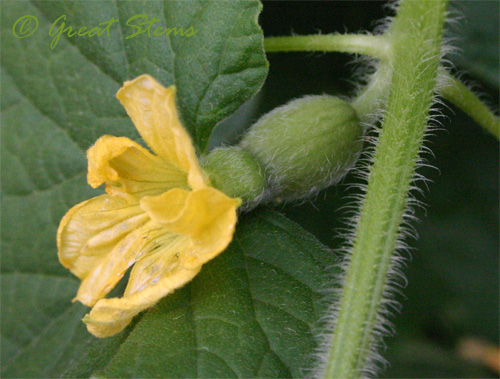
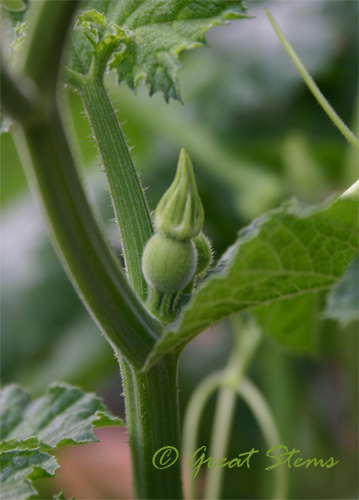
My cantaloupes are very prolific bloomers.
 And then I saw it. This cute hairy little bulb on the female flower. It was a little bigger and noticeably more fuzzy than ones in previous days.
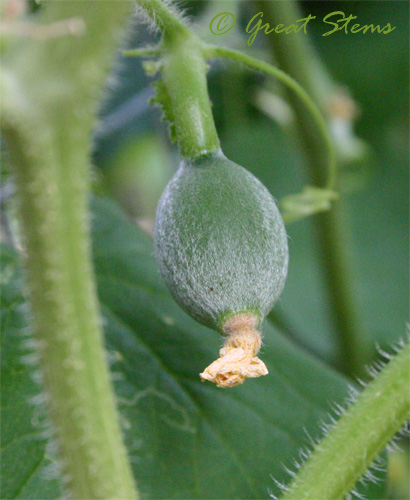
 And as I inspected a little more, I found an even larger one!
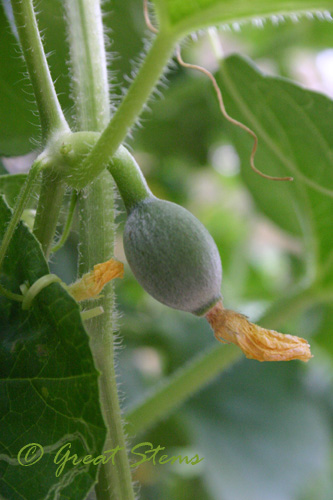
 And another one!
 Could they be… pollinated?!!! Or are they just teasing me? Will non-pollinated ovaries grow in size for awhile?
But then I about screamed when my eyes fell upon this one. I almost tackled my 12-year-old as I ran for the camera.
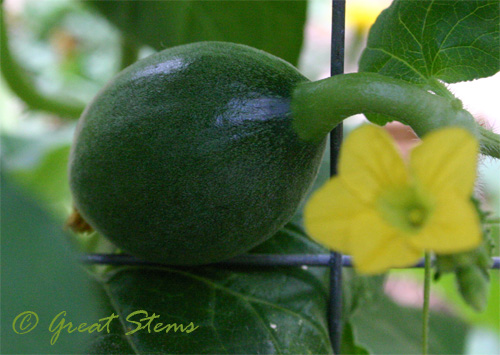 It’s bigger than a golf ball!
Does this mean I might have normal cantaloupe after all? Or could they become goofy-shaped strange-tasting hybrid freaky fruits? I know, I know — wait and see. No matter what happens, I’m having fun, and that’s worth the price of all that soil I put in those raised beds.
In other veggie-odd news, my sugar pumpkins have bigger leaves than my jack-o-lantern pumpkins. They have many buds, both male and female, but only the first males are just now blooming, to my knowledge. Weird. Of course, they could have been blooming while my back was turned.
And I found the first female buds on the jack-o-lantern pumpkins. I bet those male flowers are excited. J
Pole beans are growing. Corn’s growing. One is sending up something through the center of its stalk – hopefully a good something and not a worm.
 And I’m canta-loopy. Time to read up on when to reduce watering and how many fruit I should remove from the plant to maximize the sweetness of those that remain. Is it one cantaloupe per vine or one per plant for max sweetness? I hope one per vine.
Assuming I’m not actually growing Audrey 2, that is.
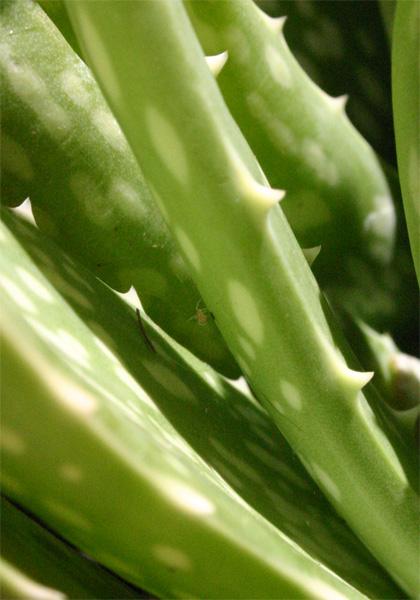
Here’s my entry for Gardening Gone Wild’s August Photo Contest, for the theme “Down on Your Knees.” I’m amazed at the beauty of nature shown in all the photographs. Great job, everyone!
This photo is of the tiniest little spider making a web in my aloe vera plant. I never realized I had such a wee resident making its home in there. And I actually had to lay down for this shot!
Because of all this house painting I’ve been doing, I’ve had to rely on the kids to help water, and I was starting to experience garden and blog withdrawal symptoms. So today I got out the camera and trekked around the yard getting my scheduled watering done and snapping a few pictures along the way. I also took another veggie class this morning (more on that in a separate post). So I got my infusion of “green” this morning. And as soon as I finish blogging, I get to go back to… you guessed it… painting. Houses are big! Even small houses!
Today I honor and recognize my yard’s truly amazing Survivors. In our Texas heat wave, really every plant that still has chlorophyll is a survivor, but some of my plants have overcome some of the worst situations to keep on growing despite the odds against them. I give you… the Survivors.
The Challenge: Being gnawed to the ground, dug out, dragged across the yard, trampled, peed on, or otherwised abused by THE DOGS
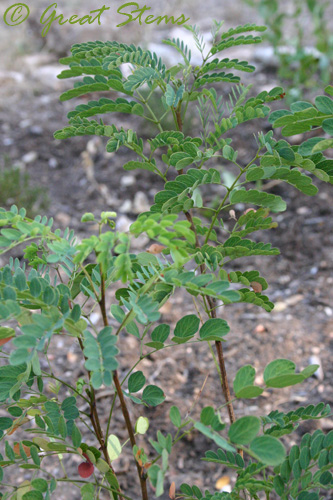
There are numerous survivors here, including our sweet remaining Mexican Redbud and Hop Trees, and others. The Goldenball Leadtree shown here survived not only the dogs chewing it in half, but the fire ants that made a colony in the original planter (I had to survive those fire ants, too, because I found out about them the hard way). I can’t wait to see blooms on this little guy, by the way. Little golden puffballs!
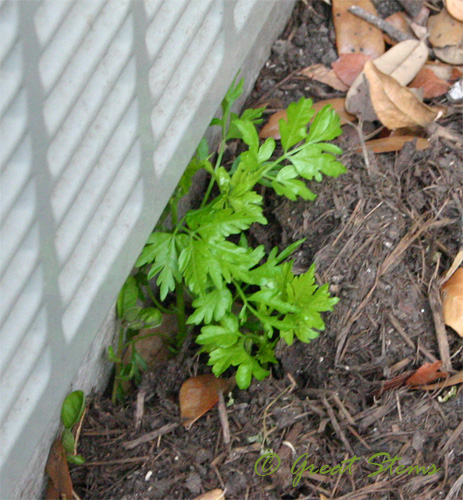
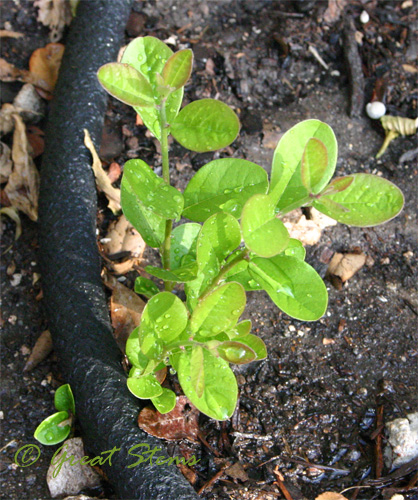
 The Challenge: Growing in the side yard, which means being in a place that is so low priority on the watering scale that they often get forgotten.
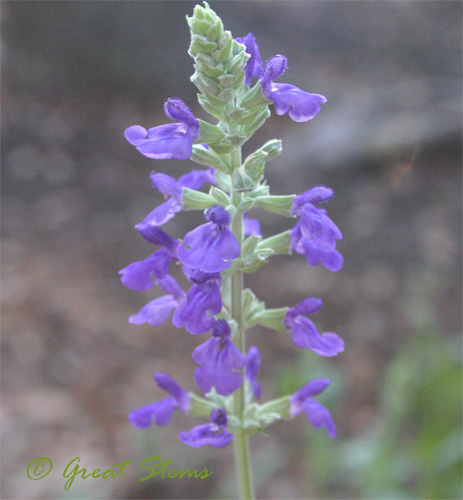
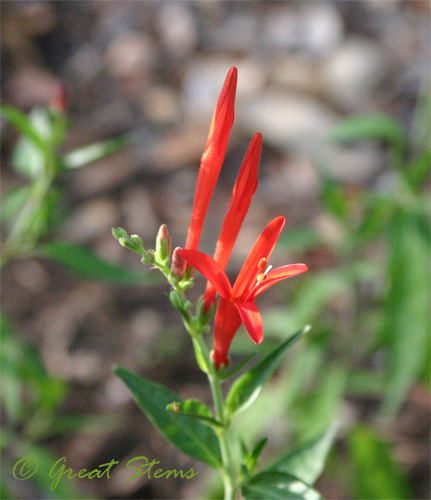
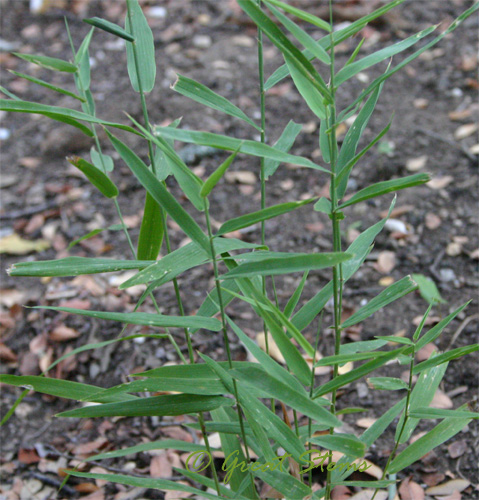
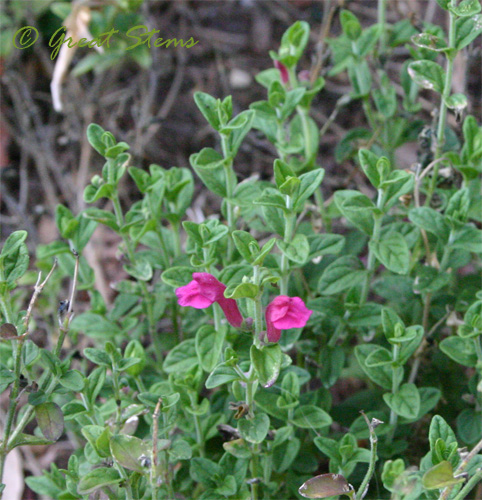
Lucky for the sideyard plants, I’ve been rinsing my paintbrushes out there (fyi, we’re using eco-friendly paint), so they are getting more water than they are used to, and they are using the opportunity to grow, recover, and even bloom. I have several survivors of this challenge, but here are pictures of Salvia “Indigo Spires,” Flame Acanthus, Turk’s Cap, and Inland Sea Oats. The Inland Sea Oats also have been mowed over several times when we thought they were long gone or something else.
 The Challenge: Surviving where others have failed
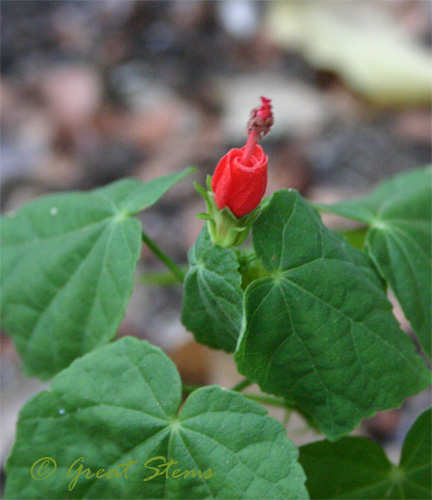
My first Chile Pequin simply struggled to grow, and I assumed it was because it needed more water than I could regularly provide. But after it died, I bought another and planted it in similar shade a few feet away, in the neglected side yard. Though it gets even less water than the first, the new one has grown to about a foot tall already.
The Challenge: Thriving despite being told, “You’re too old”
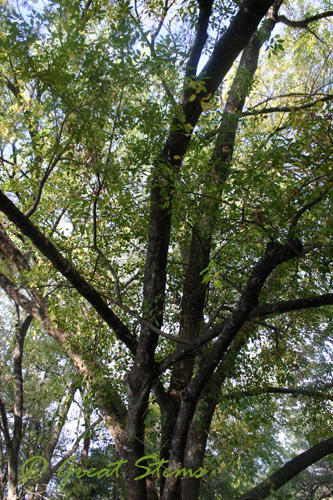
Our house was built in 1971, and we’ve lived here 14 years. We have two huge Arizona Ash Trees in the front yard, and we were told five years ago that the trees were at full maturity and would die at any time. Well, they continue to do fine, so well that they once again have blanketed our sidewalks and yard in golden leaf-like seeds. We never water the two trees, which a neighbor suggested might be why ours do well where others have died off. Regardless, we thank them for their shade.
 The Challenge: Being a tree planted in late February as opposed to fall/winter, and then surviving what we think was overwatering
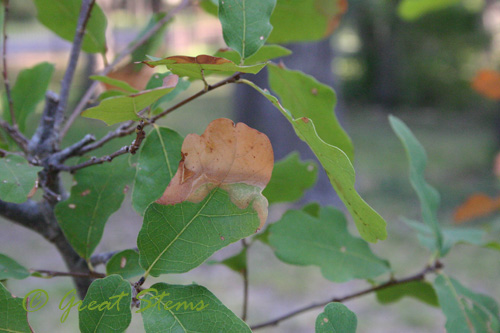
Lacey Oak is one of our favorite trees, and our tiny one just recently caved to the heat and abuse by dogs. But this other beauty of a tree was planted a little late in the season in the front yard, and we were determined that it would not die to transplant shock or heat. But after a few months, we became concerned at the number of leaves turning brown or partially brown. At first we thought it needed more water, but now I think it was overwatering that might be cause. We backed off on the watering, and it’s hanging on. Grow, baby, grow!
 The Challenge: Surviving despite our best efforts to (purposely) kill it
We’re NOT cheering for these, by the way. There are some plants that keep growing back despite how hard you try to kill them off — weeds, of course, Bermuda grass, and so on, but in this case I’m referring to Chinaberry and Gum Bumelia.
Chinaberry is an exotic invasive, and it grows from any little bit of root you accidentally leave in the soil, and of course from the numerous berries. The neighbor’s mother tree has been removed, but we are still trying to dig out shoots from a root so deep we can’t get to it, and others growing out from under the air conditioner. This next time, I’m pouring on the vinegar.
 The Gum Bumelia is a Texas native, and it made me a little sad to remove the ones growing directly behind the house, but their spines are exceptionally long and hazardous, and they blocked us from having any other use for that area right by our patio. Even cutting them down led to numerous spines in the dirt, and we had to pull many out of our shoes and sometimes (ouch) feet. I can’t get to all the culprit roots, so I’ll try vinegar on these, too.
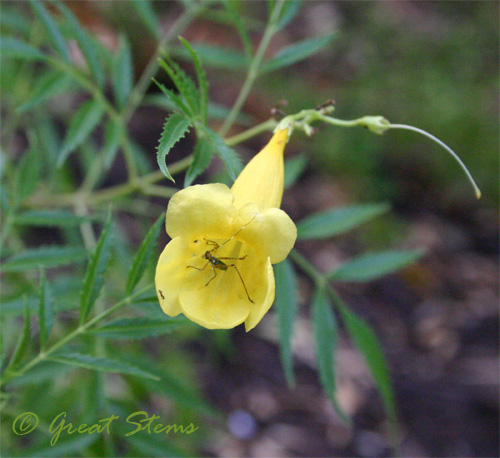
The Challenge: Being the tiniest plant to survive several TX freezes in a season, with some winter-wise TLC
This Yellowbells, or Texas Esperanza, plant was a tiny little 4-inch guy that was planted just before a series of freezes in central Texas. My efforts (watering and covering) to keep it and its neighbors apparently did the trick, because they all survived. Is that an assassin bug in there? I hope so. Be good bug, not bad bug.
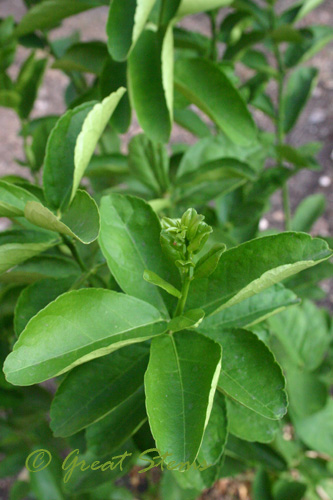
The Challenge: Surviving being a tree planted in full sun in the heat of the summer
We couldn’t resist buying this big Mexican lime for such a cheap price, and then we realized how perfect it was for a bright spot by our patio. We decided to take the chance and plant it and not to get too mad at ourselves if it didn’t make it. It’s actually doing pretty well, and its leaves let us know when it needs water. I even got to pull a lime off it, though it was probably already growing when we bought the tree.
 The Challenge: Making a comeback despite being near death when finally getting put in the ground
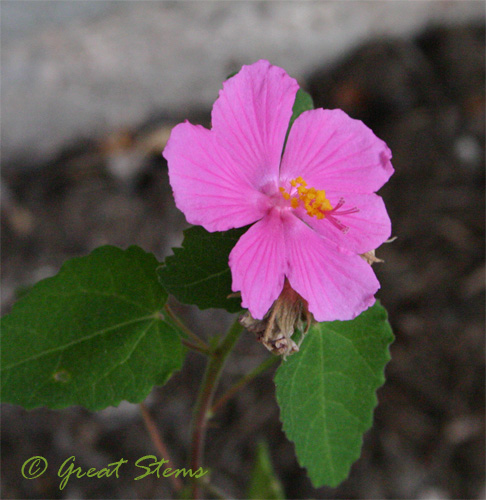
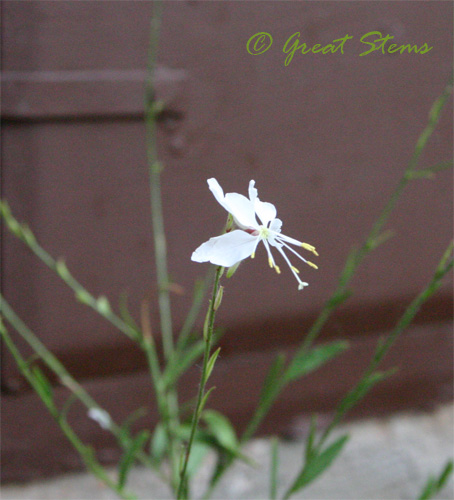
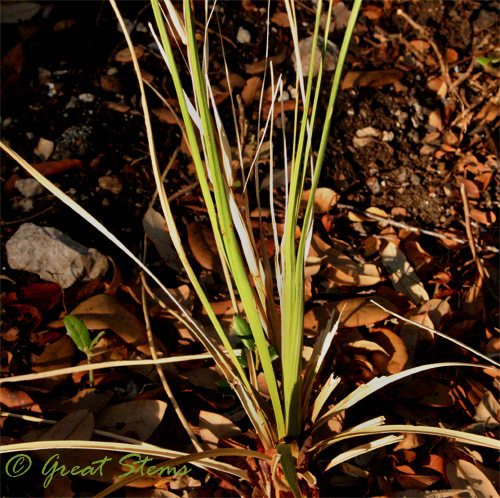
Again, numerous survivors here, but one of my Rose Pavonias (Texas Rock Rose), a Gaura, and a Basketgrass (Nolina) got photos taken. The Nolina doesn’t look like much, but trust me, we’re happy to see some green.
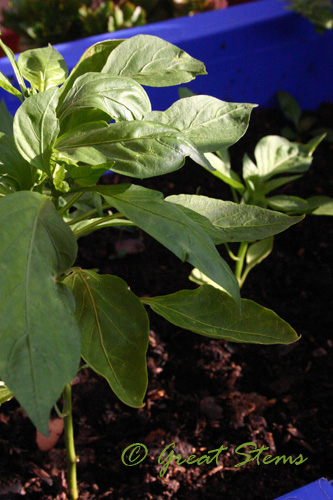
The Challenge: Staying alive in full sun as tiny seedlings until another growing season began, and then finally starting to grow
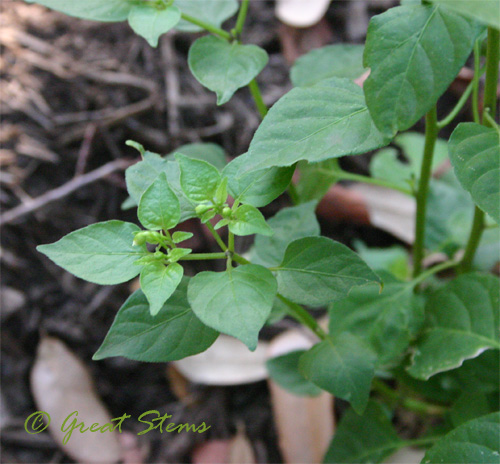
My son’s mixed bell pepper seedlings, planted in a recycled recycling bin.
 The Challenge: Being overshadowed by towering plants, but blooming once those died off (the Na-na-na-na-na Challenge)
That would be one of our Pink Skullcaps, accidentally sandwiched between the tall kind of Zinnias since spring.
 The Challenge: Surviving the worst we can throw at a plant, short of acid
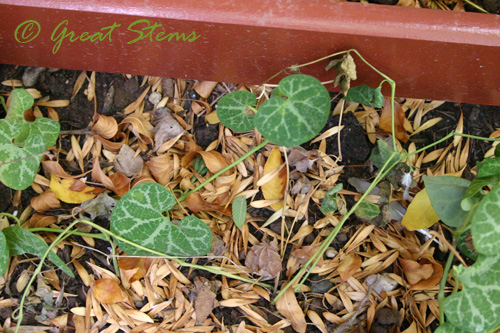
Perhaps the winner of all winners should be my very first Dutchman’s Pipevine, which has survived being dragged across the yard by the dogs, having its leaves completely stripped by dogs and roofers (in cleaning up their mess), being drowned, being underwatered, being smothered by a foot of leaves, being transplanted multiple times, and more. It is now hopefully in a permanent spot, alongside more of its kind, with something to challenge it to grow taller.
 There are plenty of other survivors in my yard that also deserved their tales told, but it’s time to paint. 🙂
I end with a picture of Loki, doing what he needs to survive…
