
 For some time, we’d been wanting a little fountain in one of our front entryway beds, a sort of zen moment of trickling water as one approaches our front door. But getting a classic planter-style container with reservoir would have cost us more than $500, and it wasn’t really my style anyway. So I wanted to see how cheaply we could make a disappearing fountain using as many materials from home as we could. We could have probably made it for $21, but we decided to be “practical” and buy a couple of other items. It actually cost us less than $40 — I rounded up for the sake of the title. I’m not counting the cost of the electrical outlet, as we were going to be putting one out there anyway, not just for a fountain, and we already had a bunch of those parts anyway.
 Money spent: We bought a large tub normally used for mixing cement ($11), as well as a small 130 gph pump (about $21). We also ran out of window screen, so I bought some more aluminum screen material ($7), but the rest will be used for plant containers, so I’m not really sure whether to add the cost in — regardless, that’s still less than $40. We seriously considered not using the basin and using other items we had at home, but in the end, we decided this might be best.
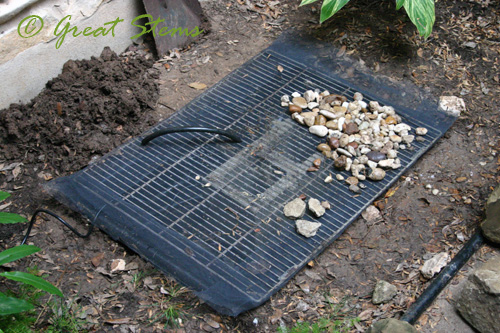
Materials gathered: An old grill from our neighbor’s uncle’s junk he was having hauled off, leftover block-style rocks from our other neighbor that we had used to circle a tree in the backyard, a concrete block, and little colorful rocks we found in the backyard.
At this point, I have to give out kudos to my 12-year-old son. This was more or less his pet project, and while I gave some guidance in regard to the plan (he had some rather far-fetched ideas and I had to bring him back to Earth a bit), he did the bulk of the work.
The first step was to dig out the plants from the area and give them new homes in the front yard (that really did a lot to make our front yard better, too). And then the hole for the basin was dug. The basin we chose turned out to be ideal for the job — the rock under the soil would have prevented the use of a deeper reservoir. (Please ignore the plastic edging in these photos — it came with the house, and at some point it will go away, because I can’t stand it.)
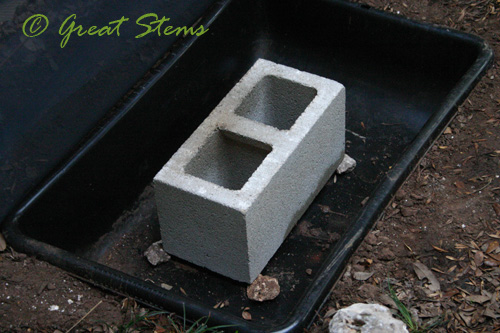
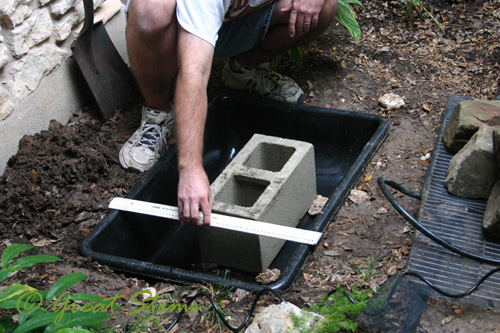
The concrete block is there to support the weight of the rocks on top of the grill, and we stuck some rocks underneath to let water flow. The ones we settled on are in the leveling picture below.
Dad helped with the leveling (and he also got to play electrician to put in the outdoor outlet).
 We wrapped the window screen around the grill and cut a little hole for the pump tube.
 Then we poured in some water collected from the recent rains (the change in rocks in the images had to do with some adjustments we made regarding the pump placement).
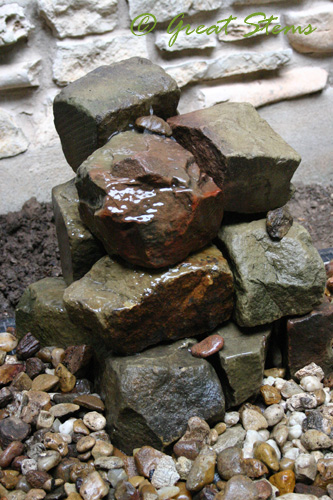
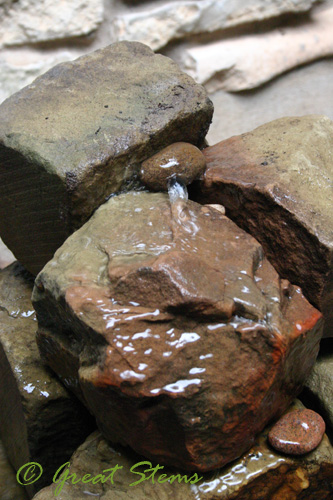
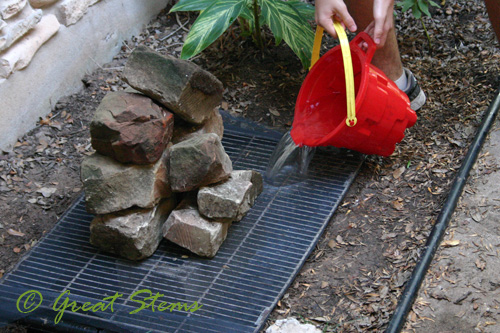 And the rest was just building the rock feature and collecting the little rocks for the base. Simple as that! Here’s a picture of the rock work in progress…
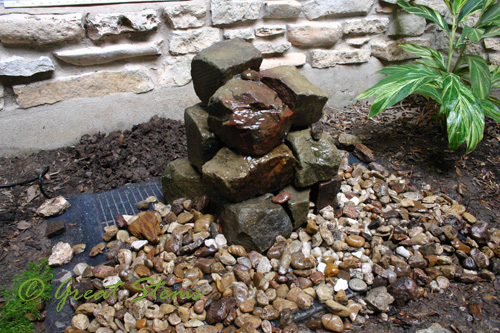
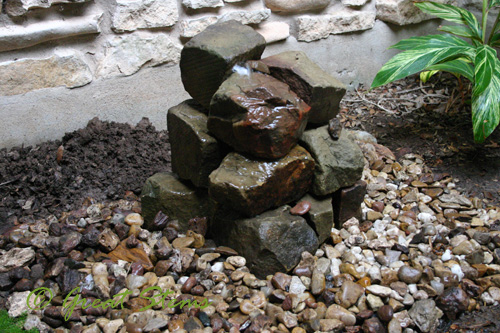
I love that it’s a little rock statue, and while I envisioned something like it, it came out even better than I imagined. Now I just need to choose some plants to go around it! I’ll probably end up spending more on those than I did on the fountain itself…
 Thank you to my son for all his hard work and dedication to getting the job done, and thank you to my husband for the electrical work that I’m sure he’ll get finished soon (hint, hint).
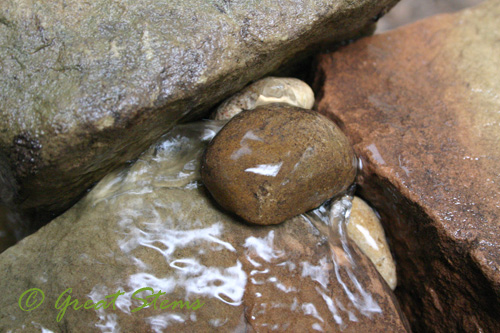
Now, I should point out that disappearing fountains are technically a no-no during our city’s Stage 2 water restrictions. We’ll turn it back off when water is an issue again, but right now we have so much rainwater gathered that we actually have to find a place to put it all — the grounds are saturated and the bins are overflowing. This fountain is only going to be filled with rainwater from the roof or gray water, NOT hose water. And I think it looks wonderful whether water is flowing or not, so when it has to be turned off, it’s still going to make me happy. The water just gives that nice trickling sound, and I’m hoping we’ll see some wildlife visit on occasion, too.
WOW! That is fantastic and so very clever! I’m gonna make one just like that. Thanks so much for the idea! It looks really, really great.
Very Cool and Thrifty too! It is nice looking and those are great instructions.
I really like your fountain! I like it better than a lot of the ones I have seen because it looks natural.
I like this, Meredith, and your step-by-step tutorial is great. Eventually I hope to make a disappearing fountain out of drilled stone or concrete blocks. Ideas are percolating.
That looks terrific and your play by play was great! And now because of you I am now trying to talk myself out of another water feature. LOL
This will be so great for you to come home to the soothing sounds of water.
I’m curious about why you can’t have it running even during the water restrictions if it is a closed system as it appears to be?
It probably has to do with evaporation — it doesn’t take much heat and water levels drop quickly, even in a nice big pond. But in Stage 2, ponds that support fish and other wildlife are ok to refill, while luxury displays like disappearing fountains, are considered unnecessary water use. That’s why before I ever built it, I knew I wouldn’t use city water to run it, even if we weren’t in a drought.
Well done Meredith! The frugal fountain. I love it. 🙂
Doh! That would have been a much better title.
Dear Habitat Steward (in training!),
I am wondering about wildlife and grey water. When I water the roses, a lizard nips out, and I do hope he isn’t drinking the grey water. But I guess if he does, it is OK?
Well, I’m hazarding a guess here, but I would think the gray water could be potentially harmful, depending on what is in the gray water (I’d worry about even natural soap if it was going straight to wild animals). But it’s a chance you take if you are trying to be water conscious. If it were me, I’d probably try to keep the water low to the soil, and perhaps put out a small saucer of clean water for the lizard.
Super job and it doesn’t look budget at all. We made a similar one out of a native rock that had a hole in the center. I used a deep planter for the water tank. It has been running for about 8 years although we turn it off when we go away. It requires cleaning from time to time because algae grow in the water and over the top of the stone. We sometimes add a little algaecide especially at this time of the year. We do have to keep an eye on the water level as there is modest evaporation. I like you idea of the screen cloth over the grill. That would stop the occasional frog that finds its way into the tank.
Meredith, this is great. I love it that it is completely natural looking. I may try to recreate this one …
Wow! What a fabulous site! I’ll add you to the CTG blogroll. I sure hope we can tape your garden sometime, huh? Email me at llehmusvirta@klru.org.
And for baby barbados & dogs, what I’ve done in the past with frisky pooches is to put a tomato cage or something around them. “We”, as in “I” managed to whack a baby live oak playing frisbee with dog. It recovered and is now huge, but after that, we put a tomato cage around it.
Love it!! The sound of water adds so much to a garden, we initially just added the pond, then we wanted a stream… now we’re thinking we may add a bog garden to the front beds, have you had an experience with those? hugz,
Your blog is amazing and I am SO IMPRESSED! So glad I got to see it all, especially the birdbath, fountain, and pumpkins! Your photography is extraordinary. I am looking forward to keeping up with you through your garden endeavors! xo, H.
Lovely! How creative and practical you are. It looks absolutely beautiful…better than many others I’ve seen. Good job!
Wonderful! This is closer to what I’ve wanted to do than many tutorials show. Thanks for the ideas. But how did you build the rock part? Particularly, how do they stay together? Do tell! :3
We simply stacked those rocks — no mortar was used. But we ultimately changed it to a small pond with a waterfall and like it so much better. We have toads there most of the year! http://www.greatstems.com/pond-entryway/
Also, did it last long? How was/is maintenance? Thanks!
Hi, Cal. We ultimately modified the pond to allow better support for wildlife and to help us notice when the water was running low. Here’s how we changed it: http://www.greatstems.com/pond-entryway/ As far as maintenance, we just do a quick clean-up of any fallen leaves once a year and periodically add water (only about 2-3 times per year). Easy as that!