Wrapping Up the Year

Well, it’s the end of 2010, and since my garden is in a rather dreary state of dormancy, and the dogs are doing their annual running amok in the cooler temperatures and wreaking havoc on the entire backyard, I thought I’d end the year with some fun with my new close-up filters and a spider species new to my yard. The close-up filters are an inexpensive way to get a bit of a macro effect without breaking the bank on a new lens.

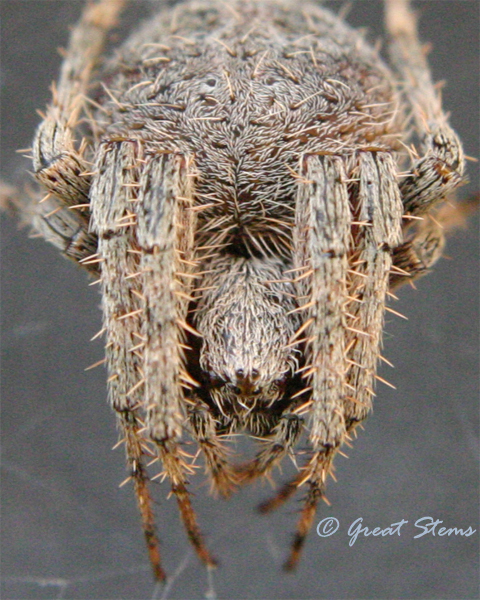
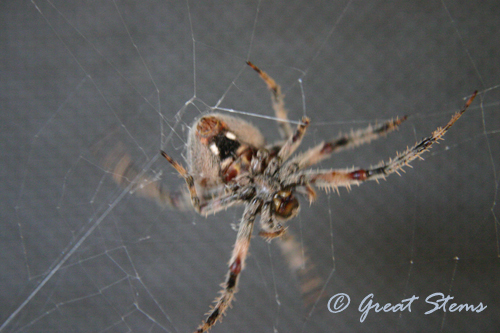
I found this little lady on a web outside my bedroom window.

 
neosconacruciferaa12-30-10.jpg
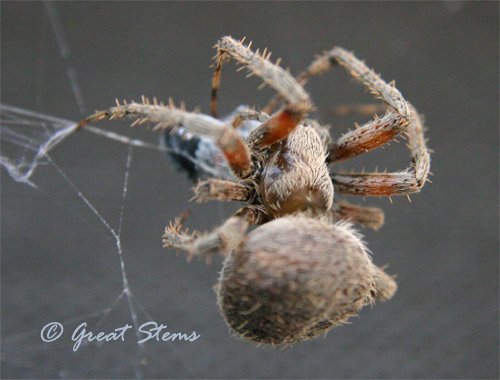
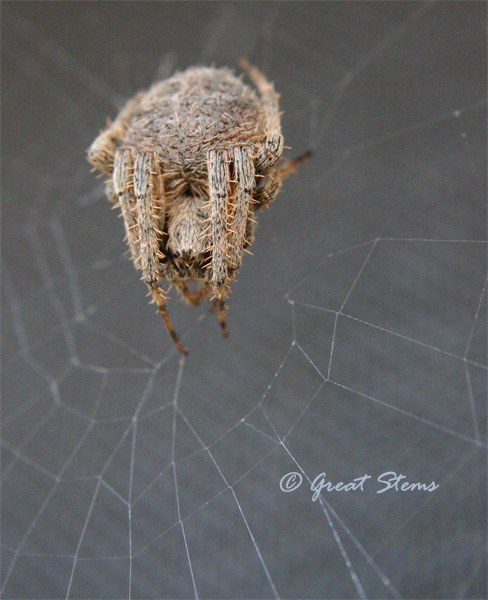
I believe she is a Neoscona crucifera, also known as a Hentz Orbweaver. They seem to be fairly common in central Texas — a lot of the online photos I found came from this region. I can’t help but stare at her hairiness. She might not win the hairiest spider award, but she’s right up there in my book.

 
neosconacruciferad12-30-10.jpgIt was utterly fascinating watching her go after one of my pest bugs. How on earth did that bug just happen to end up in the web while I stood nearby with my camera? Remarkable timing, right? I know!

neosconacruciferac12-30-10.jpg

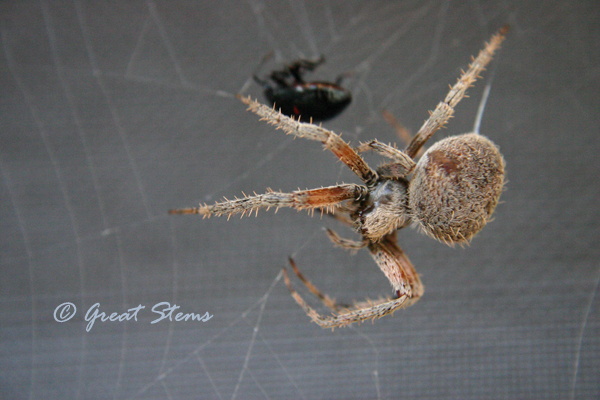
So here’s what I observed. First, Mrs. Spider ran over fast and paralyzed the bug — she was so fast I didn’t witness the bite, but in a fraction of a second, the bug went from squirming to still.

neosconacruciferag12-30-10.jpg
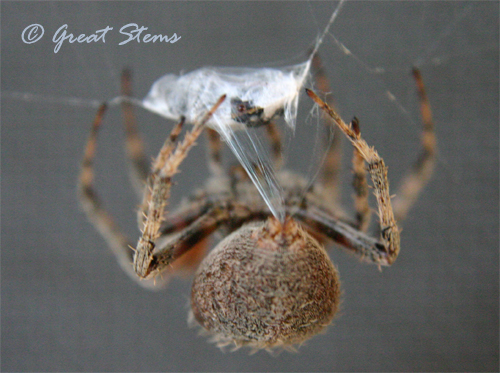
Then Mrs. Spider made a hole in her web. I’m not sure the purpose of this — did she use the web strands on her prey? Did she remove them in preparation for easy spinning of the bug? If I were to guess, she moved the sticky threads out of her way. Notice that while she was doing this, her spinnerets began producing more silk.

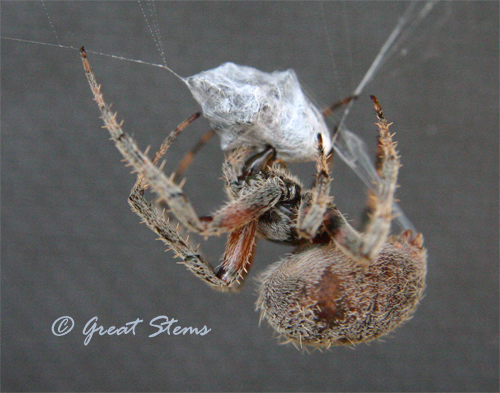
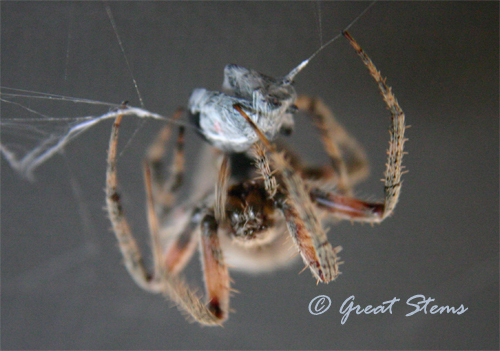
And then the spider simultaneously began maneuvering the paralyzed bug and wrapping it in a widened sheath of silk. 

neosconacruciferae12-30-10.jpg
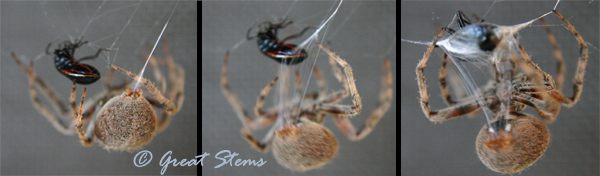
I watched in astonishment as the spider expertly swayed her abdomen side to side to thoroughly guide the silk over all parts of the bug. A true weaver at work! Look closely:

neosconacruciferaf12-30-10.jpg

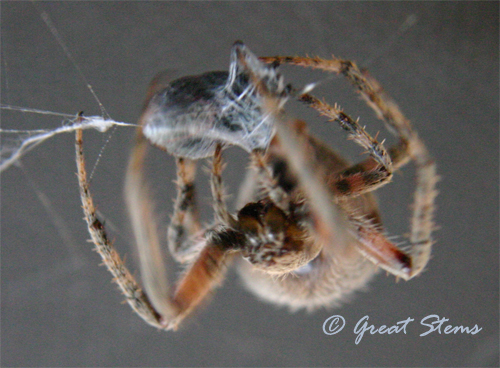
During the process, the spider paused and extended her fang into the body. I assume that at this point she is injecting the prey with digestive enzymes to liquify the bug’s insides. Perhaps she was already feasting. Anyone want to ask her?

neosconacruciferah12-30-10.jpgThen she went back to wrapping up the bug some more.

neosconacruciferai12-30-10.jpg

Once the spider was content with her packaging job, she slid the wrapped bug over to a new spot and secured it. The move was amazingly smooth.

I was curious whether the spider would be interested in a second bug or just ignore it. She was interested, that’s for sure! She zoomed across the web to start the process anew.

neosconacruciferaj12-30-10.jpg

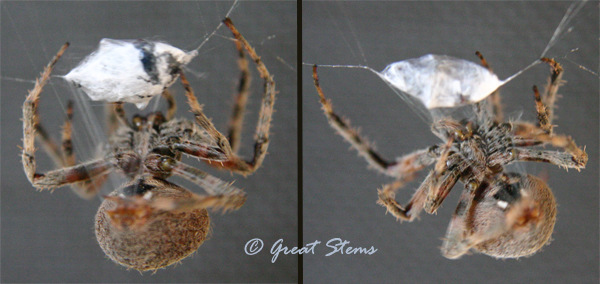
Here’s a sequence of shots from her second kill — she was kind enough to give me the view from the front this time.

neosconacruciferak12-30-10.jpg
neosconacruciferal12-30-10.jpg
neosconacruciferam12-30-10.jpg
neosconacruciferan12-30-10.jpg
neosconacruciferao12-30-10.jpg

It was really challenging to get shots that were in focus — between the spider’s busy movements and the wind, the web bounced quite a bit. I think this is a downside to the close-up filters — they don’t seem to handle movement well. Still, they are fun to play with!

I assume that this spider will lay her eggs soon — juveniles tend to be nocturnal, and this adult was quite central on her web during the day, mostly likely getting additional nutrients for that final project. I’ll have to keep a lookout for babies!

Happy New Year, everyone! I’m so glad for all my gardening, wildlife, and blog friends. 2010 has been such a great year — I can’t wait to see what 2011 will bring. Apparently it will at least bring spider babies!

All I Want For Christmas Is Peas

Everyone has had such lovely holiday and winter pictures to share on their garden blogs, so I went out to my garden for some pictures and saw mostly dormant perennials looking less than festive. My husband’s work has been stressful and long, too, so we really haven’t had a chance to tour the lights, either. Alas. I did bake cookies last night, though!

peasb12-23-10.jpgBut meanwhile, what is growing in my poor neglected garden are veggies. I’ve been especially looking forward to sugar snap peas this season, and I’ve been waiting… and waiting… and waiting.

peasa12-23-10.jpg
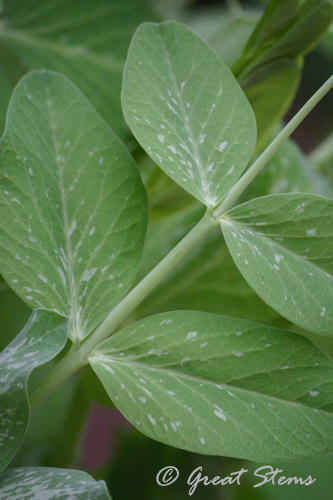
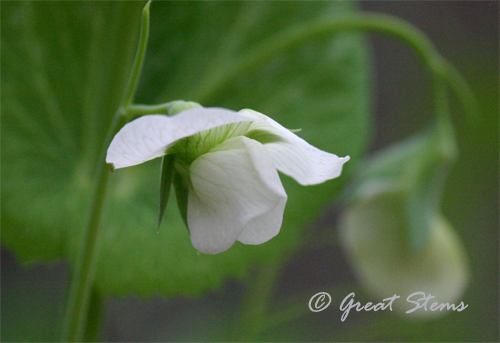
Usually I feast on them right in the garden, having to will myself to save a few for my family. But I’d about given up hope this year — I seemed to be growing lots of green vines with no pea activity in sight.

peasc12-23-10.jpg

But the good news is that finally the pea vines have beautiful white flowers, and I was excited this morning to find four actual peas, as well. I tasted one — not ready yet. But I am filled with hope!

peasd12-23-10.jpg

So this holiday, I wish for peas… AND peace. Whirled or world, may peas be with you.

peace12-23-10.jpg

I wish everyone the happiest of holiday seasons!

Bark and Chirp

I’ve seen a lot of posts recently about homemade treats for birdies, and here’s mine. Great activity to do with kids, by the way, and the sheer joy of seeing the birds feasting upon the feeders just makes me all giddy.

nuthatchonpinecone12-09-10.jpgOf course, there’s the classic pine cone bird feeder, and it’s a hoot to see the birds dangle upside-down to get to the last of the peanut butter mix from between the ridges. We refilled the pine cones this morning, and the birds are happily at it again. That’s a Redbreasted Nuthatch on the pinecone above.

But if you don’t have pinecones easily available in your area, you can be creative and use other materials. My son found a really cool piece of tree bark (it looked like alligator skin), and I was amazed he agreed to my suggestion to use it as a bird feeder. But he did, and it’s our newest favorite feeder of our many favorite feeders (anything that a bird goes to qualifies for favorite status).

Here’s a Black-Crested Titmouse enjoying the tasty perch.

titmouseonbarka12-18-10.jpg
titmouseonbarkb12-18-10.jpg
titmouseonbarkc12-18-10.jpg
titmouseonbarkd12-18-10.jpg
titmouseonbarke12-18-10.jpgbarkfeeder12-18-10.jpg
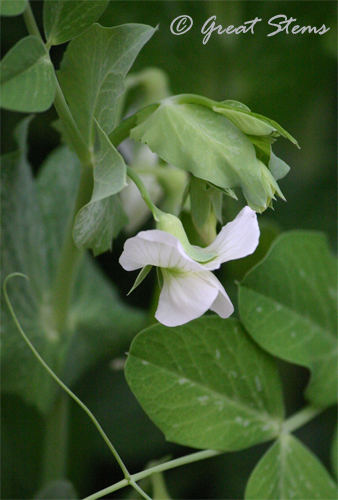
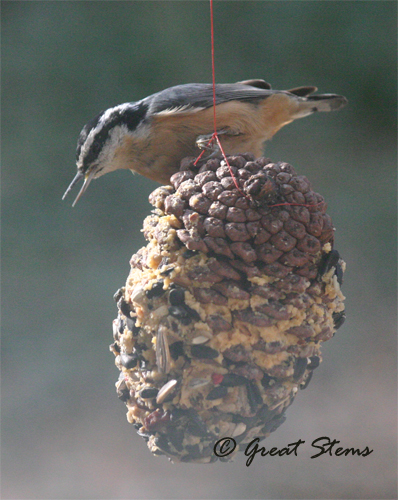
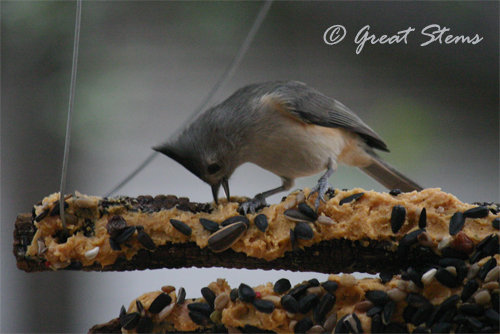
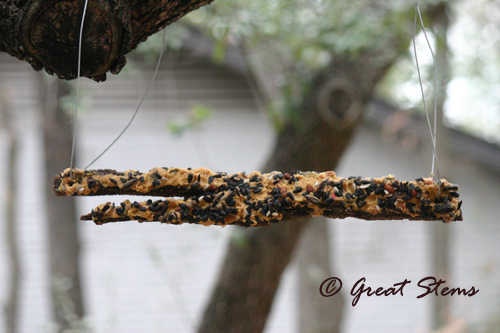
This is the recipe used on our feeders, tried-true-and-bird-approved.

1 cup peanut butter (chunky is great)
1 cup lard or vegetable shortening or just more peanut butter
2 1/2 cups coarse yellow cornmeal
1 box of raisins, cranberries, cherries, or other dried fruit bits
1 bag of birdseed (black oil sunflowers, safflowers, cracked corn, peanuts, sunflower kernels, striped sunflowers)

Make sure you prep your pine cone or bark ahead of time for how you intend to hang it, be it with wires or ribbons. Simply mix the peanut butter, lard, and cornmeal and smear it on the feeder. Press or roll the seeds and fruits onto the peanut butter mix, then hang up the feeder.

In case you are wondering — the peanut butter mixture is for more than just having something that sticks the seeds on. Birds need fat and protein in the winter, and the mix is perfect for it. Happy birdies! 

Don’t They Know It’s Winter?

This is certainly the last thing I expected to see going on in my backyard in the middle of December, but go figure. Gulf Fritillaries, doing their thing.

 
gulffritf12-16-10.jpg

Sometimes the outer wings would open, revealing the brilliant orange of that butterfly’s upperside.

gulffritg12-16-10.jpgI wish the camera could have captured the full beauty of the metallic sheen on their underwings, but some of the lustre was lost in the image. Still, wow.

gulffritd12-16-10.jpg

gulffrita12-16-10.jpg
 The features on this butterfly give it such personality!

gulffritc12-16-10.jpg

I didn’t tell the butterflies that it’s just about winter here. They didn’t seem to care.

One Texas Alligator Lizard, Rescued

txalligatorlizarda12-11-10.jpgIts name implies something much more frightening — something along the lines of a Komodo dragon — but the Texas Alligator Lizard (Gerrhonotus infernalis) only reaches about 2 feet long at its maximum. Even so, it’s the largest native lizard in Texas, and it’s one of the largest alligator lizards period. This one is about 14 inches long.

txalligatorlizardb12-11-10.jpgThe lizard happened to be spotted during a native plant rescue at a construction site near Lake Travis — a lovely habitat that will sadly succumb to development soon, becoming a water treatment plant. Our local Native Plant Society and dedicated habitat volunteers organize plant rescues from such situations whenever possible — some plants are given back to the city for habitat restoration, and the rest go to the volunteers who dig them up. But today, plants weren’t all that were rescued — a City of Austin biologist will be bringing this lizard to a new home, I believe at the Balcones Preserve. It only seemed right — its original habitat is being destroyed.

txalligatorlizardc12-11-10.jpg
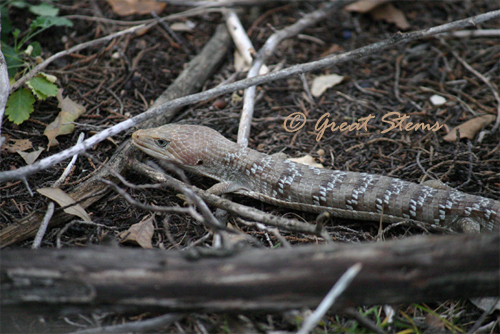
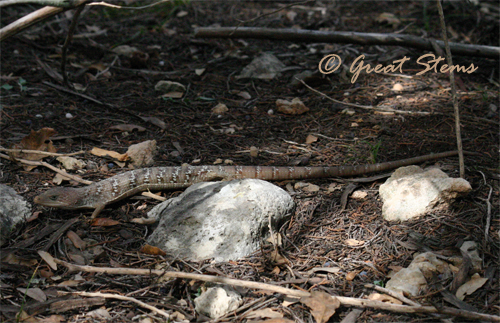
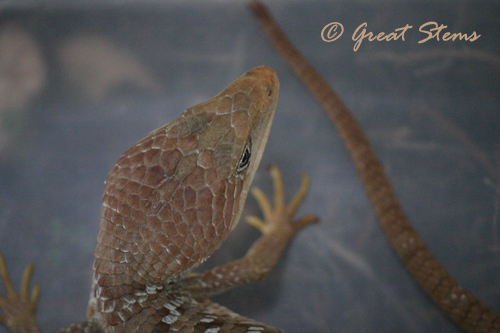
The Texas Alligator Lizard likes rocky hillsides. It moves fairly slowly on its short little legs, making it relatively easy for the biologist to capture the one at the plant rescue. Its slow movement also made it easy for me take some, you know, 100 pictures (I’m not joking). You can see by this next expression that the lizard might possibly have been getting annoyed with my zealous image-snapping.

txalligatorlizardd12-11-10.jpg
Though not the most colorful of lizards, it’s still handsome in its pale-scale armor.

txalligatorlizarde12-11-10.jpgtxalligatorlizardg12-11-10.jpg
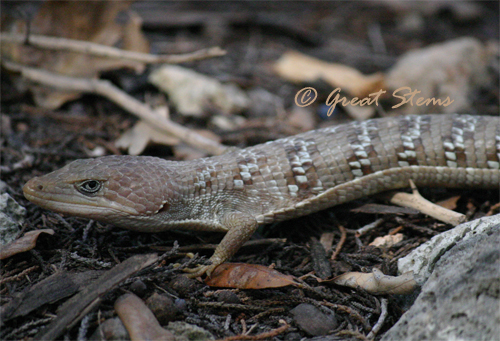
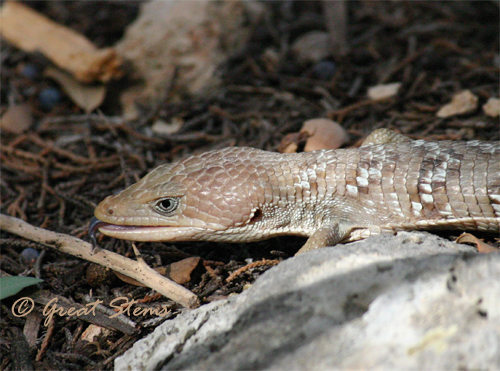
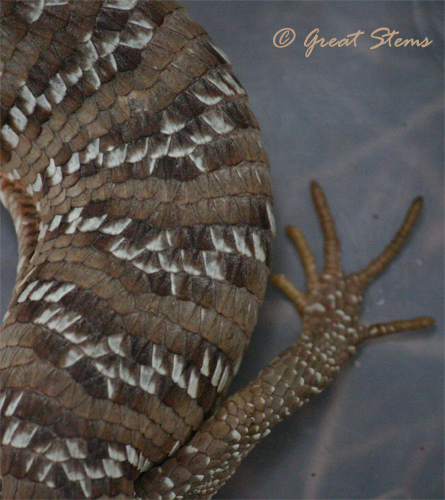
It has a blue, quick-to-flick tongue, and the neatest little digits.
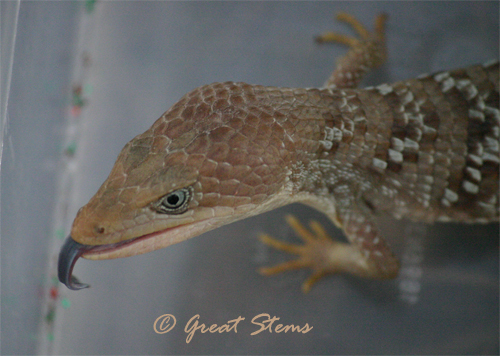
txalligatorlizardf12-11-10.jpg

It breaks my heart to know that so many native plants and animal homes are going to be wiped out, but I’m grateful for all the plant volunteers and rescuers and happy that at least the lizard has a chance to survive.

As for me, I managed to rescue some Rusty Blackhaw Viburnums, Silk Tassel, Yellow Passionflower, and Flameleaf Sumac. The soil was incredibly rocky, making it difficult to get plants out without damage to the roots. We’ll see what survives — at least everything is in the ground, watered, and treated with seaweed! I’m particularly excited about the Flameleaf Sumac — I very much admire its fall colors.

We have a big cold front coming through, so I’ve begun the usual massive watering process. I also planted more than two flats worth of 4-inch plants I still hadn’t planted since I bought them in October (all my gardening has been at the school lately). I figure the little plants have a better chance of surviving in the ground than being stuck in my garage, where they would both freeze and suffer from my neglectful watering. In all I planted close to 60 plants this afternoon and evening, including the ones I rescued. What a day — plants rescued, plants planted, lizard saved. I hope you like your new home, little big lizard.
  

Making Plantable Ornaments or Cards

One of the projects we’ve been working on at home and with kids at school is making plantable ornaments or cards from recycled paper. Here’s a quick and easy way to do this at home. This is a very fun project for both kids and grown-ups!

pulpornamentf12-09-10.jpgMaterials needed:

  • recycled paper in a variety of colors
  • water
  • blender
  • native wildflower or perennial seeds (because we missed the fall planting season for Texas wildflower seeds, we used perennial seeds that could be planted in spring — whatever you use, don’t pick something that will germinate the moment it touches water!)
  • cookie rack or sturdy grid that will allow water to drain through
  • basin in which the cookie rack fits
  • paper-sized piece of window screen
  • cookie cutters
  • piece of damp felt larger than your largest cookie cutter
  • sponge

Tear the paper into bits, separated by color. Add a cup or so of paper bits into the blender and cover with water. Soak for a little bit, then blend. Add more water or paper as appropriate until you have the amount of pulp you want and the pulp is fairly free of chunks. I found it helpful to add a little white paper in with the colors to extend the available colors — we had far more white available than color; plus, the bits of white give a neat effect to the colors when they are visible.

pulpornamenta12-09-10.jpgOur ornaments needed about 1/4 cup pulp, so we scooped the color we wanted and then added 1/4 to 1/3 teaspoon seeds.

We placed the screen onto the cookie rack and set the rack in the basin. Next we spread the pulp/seed mixture into a cookie cutter, making sure that pulp filled all the corners and edges. The goal here is to use just enough pulp to make a thin ornament — the thicker it is, the longer it takes to dry (and then you might sprout flowers seedlings!).

pulpornamentb12-09-10.jpg

If you like, add other colors to embellish the ornament.

pulpornamentc12-09-10.jpg
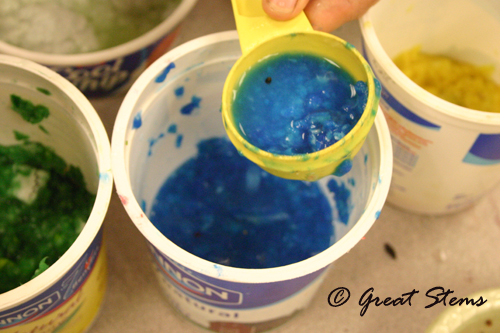
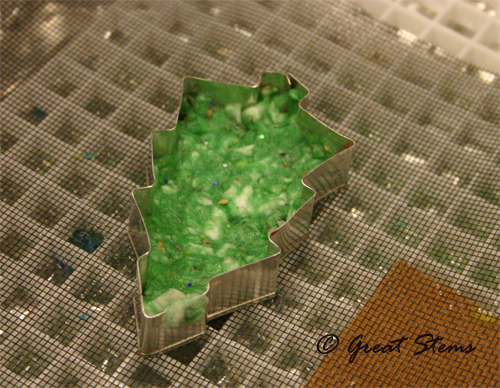
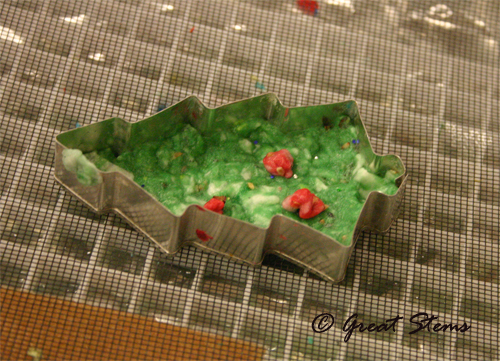
Once you’ve filled the cookie cutter, gently lift the cookie cutter, pressing the pulp down simultaneously to encourage it to remain on the screen.

Next, take a damp piece of felt and lay it over the ornament. Press down on the felt with the sponge to push out the water from the ornament. Periodically squeeze the sponge off to the side to remove excess water.

pulpornamentd12-09-10.jpg
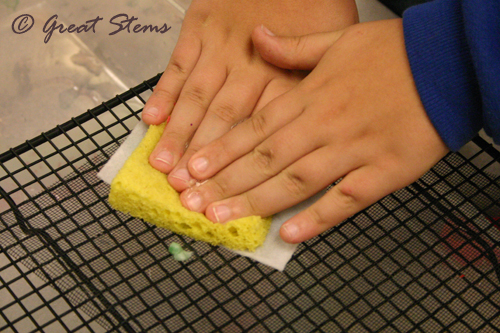
Remove the sponge and felt — the ornament will be easy to transfer to another rack or screen for drying. Voila!

pulpornamente12-09-10.jpg
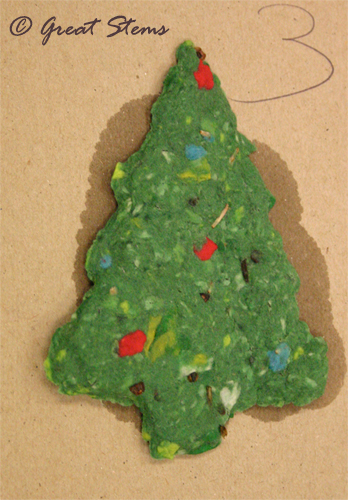
You can use the same process to make a card, with the “ornament” attached to a background piece of paper.

Lizard, Snake, Dragon, Tree

In the previous post, I showed different craft ideas using aluminum cans. I can’t resist showing a few more pictures of items the kids and I made. Aluminum is so very fun to work with, and it is very inspiring — there’s always more we want to try. Here’s a lizard…

aluminumlizard12-08-10.jpg
aluminumlizardb12-08-10.jpgAnd a snake…

aluminumsnakea12-08-10.jpg

aluminumsnakeb12-08-10.jpgA dragon embossed in silver…

aluminumdragon12-08-10.jpgAnd a gummy-bear tree.

aluminumtree12-08-10.jpgAluminum can be used to make neat gift tags, too!

Aluminum Can Flowers and Leaves

Are your flowers all gone until spring? Can’t get flowers to grow at all? Try making some of these colorful recycled creations — and since they are made from aluminum cans, they’re guaranteed to stay pretty for a long, long, long time (just don’t step on them).

We’re doing a craft activity at school tomorrow, helping kids make holiday gifts out of recycled materials. I’ve been testing the process — seeing what kinds of simple things the kids can make with aluminum (we’re doing other crafts, too). These flowers, wreaths, and ornaments are super easy to make, and for the younger kids, we can simplify the steps even more. Though I didn’t take pictures of my methods along the way, I’m including how-to-instructions below.

aluminumflowera12-07-10.jpg

The above flower was made with six heart-shaped cut-outs, a thumbtack pinning them in the middle, a thin strip coiled and glued in the center, an aluminum can background cut with scalloped scissors, and a piece of scrap wood from our garage. Once you’ve pinned the hearts together, spread them like a deck of cards and gently work them upward to get the flower shape (also, slightly bend the petal tips back for added effect). The hanger is braided strips from a grocery shopping bag, hot-glued to the back of the wood. 

Aluminum cans are easy to cut with scissors, believe it or not. Make a small hole with the scissors, then cut the top and bottom of the can off. A single slice down the side reveals a nice rectangle to work with. To take away the curl, just lightly drag the rectangle along a table edge in the opposite way of the curl.

Materials needed for these projects:

Aluminum cans
Scissors

Glue (tacky or hot-glue)
Something to put your artwork on, such as magnets, craft sticks, scrap wood, old CDs
String, twine, strips of shopping bags, raffia, or yarn (or even paper-clips, for hanging purposes)
Old ballpoint pen without ink

Also useful:
Thumbtacks
(depending on the project)
Die-cut punches (I used a 1-inch circle shape and medium-sized heart shape — found at craft stores)
Scalloped-edged scissors or similar
Hole punches
Ruler
(for making quick, straight folds)
Toothpicks, pencils, or other objects to coil foil around

I did have to purchase the thumbtacks, but everything else I had on hand. You don’t have to use die-cut punches but it is soooo fast and works on aluminum very well — it’s nice when you need lots of consistent shapes. Alternatively, create a template on some thin cardboard and trace the outline repeatedly onto the aluminum, then cut the shapes out by hand. I also now have some purchased magnets, so the kids and I will probably have some fun with those.  

aluminumflowerb12-07-10.jpg

This flower was made with five one-inch circles glued to a sixth circle “base.” To get the 3-D effect, simply gently bend the petals upward and give them a slight backward bend at the top of the petal. Coil a strip for the stem and another for the flower center, and make some simple leaves. 

Keep in mind that any of these flowers can easily be used to make a magnet, planter garden (on craft sticks, etc.), or a bouquet. There is also a large variety of can colors out there — you can modify your design to make sunflowers, mums, etc. I intend to experiment with this, too, but I didn’t have any other colors on hand.

Here is a very simple flower, something the younger kids might have an easier time with.

aluminumflowerc12-07-10.jpg

The petals are 1-inch circles, and the stem is made of strips. The petals can be glued flat, and kids can either cut out leaf shapes or make the coiled ones shown in the picture. To make the quilled leaves, cut a thin strip of aluminum and coil it tightly (perhaps around a toothpick), giving a gentle pinch at one end. You can also make entire flowers from quilling strips of foil.  

Ornaments are super easy to make and very satisfying. They look great on a tree with lights and have the bonus of being “double-sided.” 

aluminumornaments12-07-10.jpgTo make the leaf ornaments, simply trace a leaf shape onto the aluminum and cut it out (creating a cardboard template is great for repeated uses). To create a fold, press a ruler over half the leaf shape, along the midline, then gentle fold up the uncovered side. Use a non-working ballpoint pen to create the veins — voila, easy but very effective texture. You can also use scalloped scissors to give additional leaf effects (see wreath below). The star ornament is just a basic star cut-out; the 3-D effect is made with straight folds from every point, with gentle pinching to guide the shape as shown. The holly ornament is made from simple cut-outs of hand-drawn leaves and berries; it’s glued to a paper clip.


The leaves can be used to make a beautiful wreath, glued to an old CD.

aluminumleaveswreath12-07-10.jpgYou can see the scalloped edges on the leaves here — what a difference it makes — very much like leaves found in nature. A hot-glue gun made this a fast craft, but tacky glue should work fine. The CD is used silver-side up.

My boys are doing aluminum can crafts of their own, from ornaments to dragons to snakes. I hope to be able to share photos. And today I’m working on plantable seed ornaments made from recycled paper, working to make the process kid-friendly and easy. Stay tuned for more earth-friendly holiday projects!

Pretty in Red

yauponc12-03-10.jpgI want to ask, “Is it just me or are these the reddest Yaupon berries we’ve ever had?” but I suppose no one reading this post can answer that — not even my husband, and he lives here. But wow — don’t they just pop with vibrant color?

yauponb12-03-10.jpg
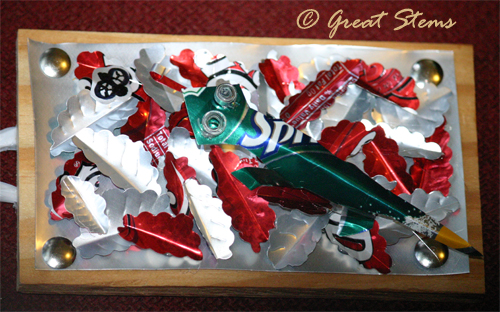
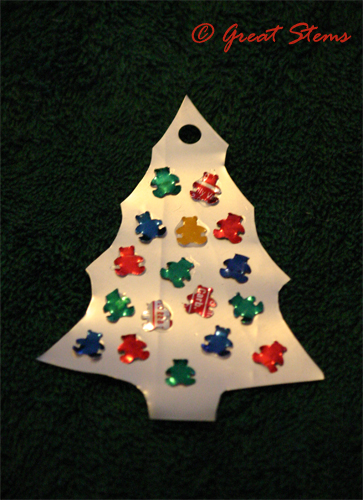
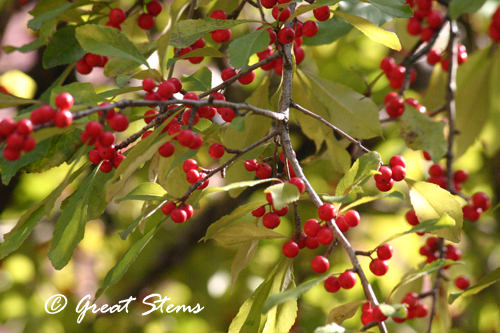
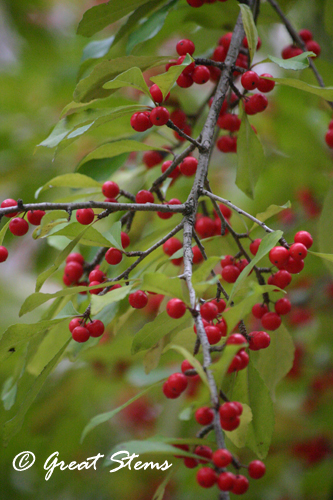
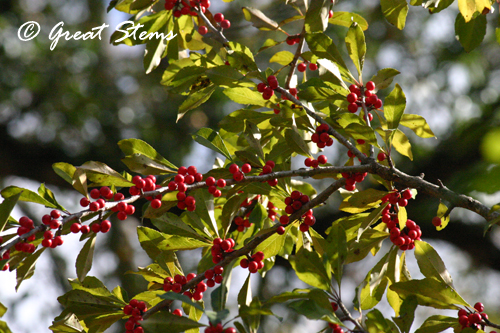
I think this tree must have had as much fun as I did with the Cedar Waxwings last February — it’s clearly ready for them to come again.

yaupona12-03-10.jpg

yaupond12-03-10.jpg
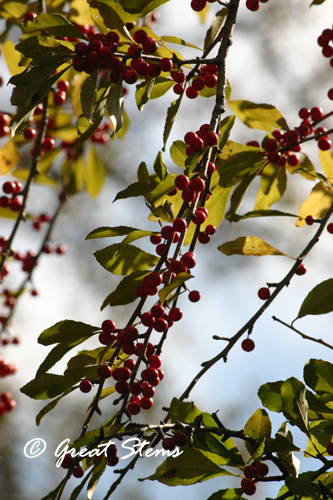
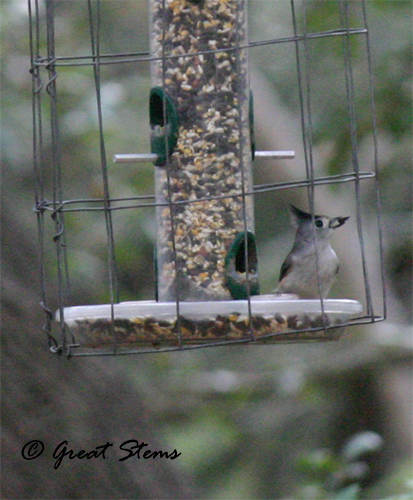
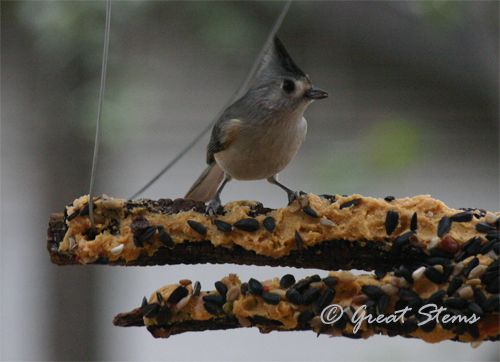
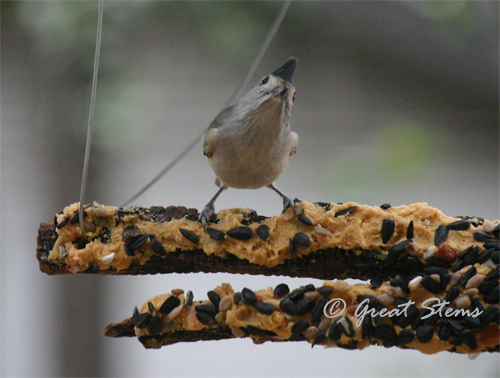
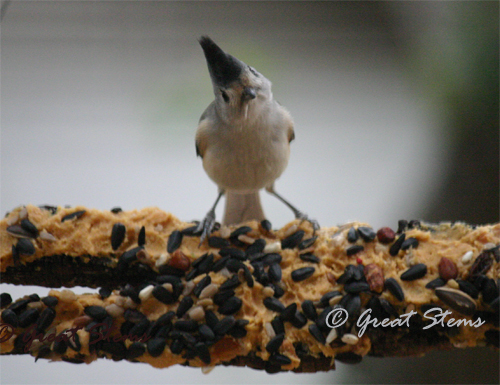
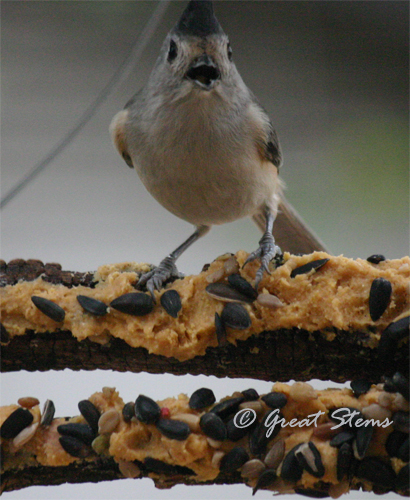
We interrupt this post to show you this adorable Black-Crested Titmouse, seed in beak. These cute little birds don’t like to sit still for pictures, so I’m amazed I got one. Oh my gosh, so cute.

 
titmouse12-03-10.jpg

I’ve been eagerly waiting for the little peppers of the Chile Pequins to turn red, and at long last they have.
The few green peppers combined with the red is a very holiday-festive combination.

chilepequina12-03-10.jpgOne of these days I’m going to pop one of these little peppers in my mouth to see what happens.

chilepequinb12-03-10.jpgWell, maybe I’ll dare my husband to do it instead…

Edit: I told my oldest son that Chile Pequin peppers are 7-8 times hotter than a Jalapeño, and he decided right away that he wants to try one. Guess I won’t have to dare my hubbie after all! I plan to have camera and lots of water on hand…